1. Creating Knowledge Base with WebDAV Documents
Let’s start by implementing the core functionality of your Onboarding application: creating a knowledge base management system.
This system will contain files and documents represented by the WebdavDocumentWrapper entity. The application will store the document description, a reference to the WebdavDocument entity provided by the add-on, and a reference to the department the document belongs to. A user with admin access rights will be able to manage the list of documents, create new documents, edit or delete them using dedicated views. The feature will include the following:
-
The
WebdavDocumentWrapperentity with links toWebdavDocumentandDepartment. -
A database table for the entity.
-
CRUD views for working with the entity.
Creating WebdavDocumentWrapper Entity
Let’s create the WebdavDocumentWrapper entity.
| You can find detailed instructions for creating entities in the Simple CRUD section of the Tutorial. |
In the Jmix tool window, click New ( ) → JPA Entity. Enter
 WebdavDocumentWrapper into the Class field.
The WebdavDocumentWrapper entity has the following attributes:
-
descriptionwithStringtype. -
departmentwithDepartmenttype. -
webdavDocumentwithWebdavDocumenttype: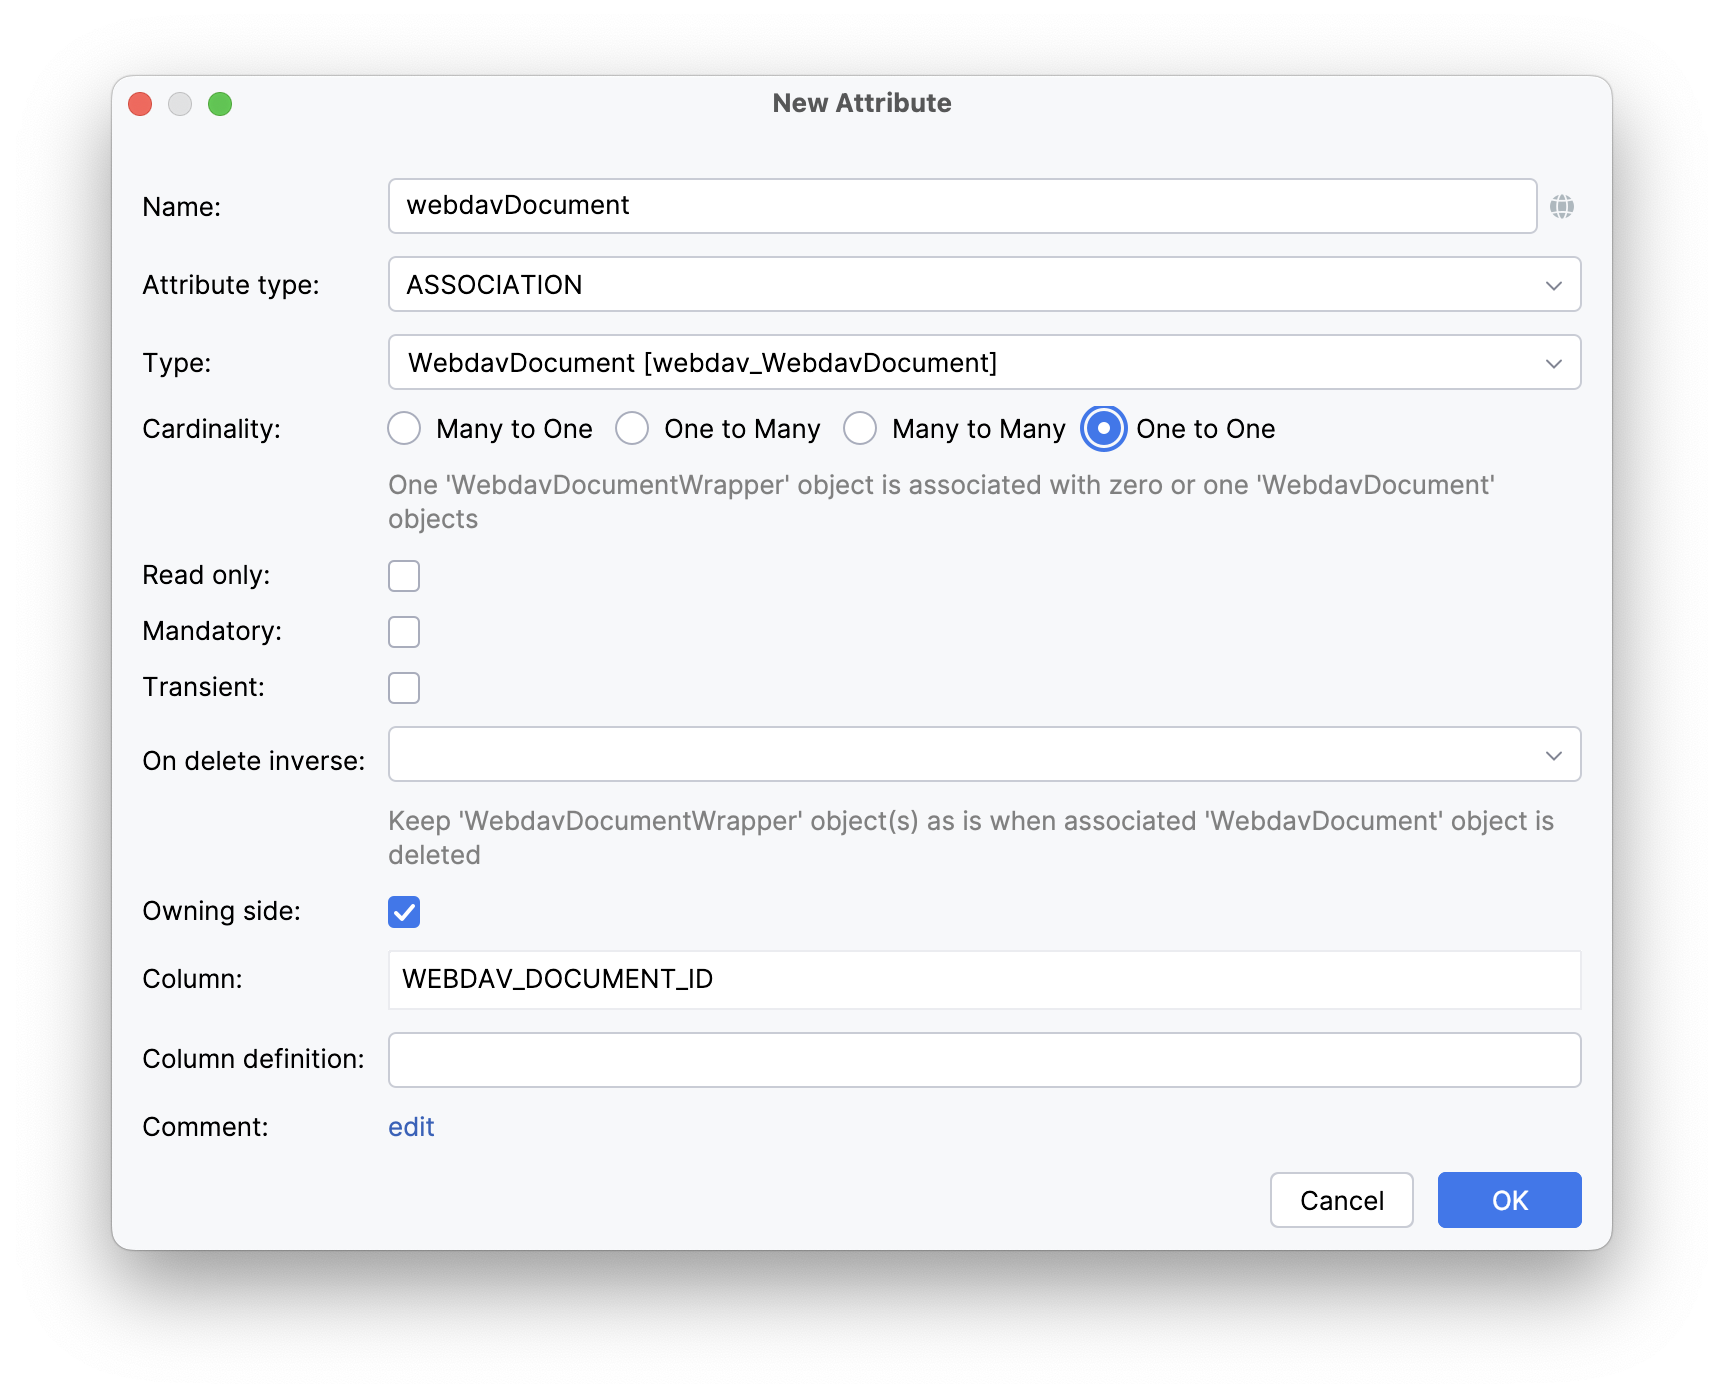
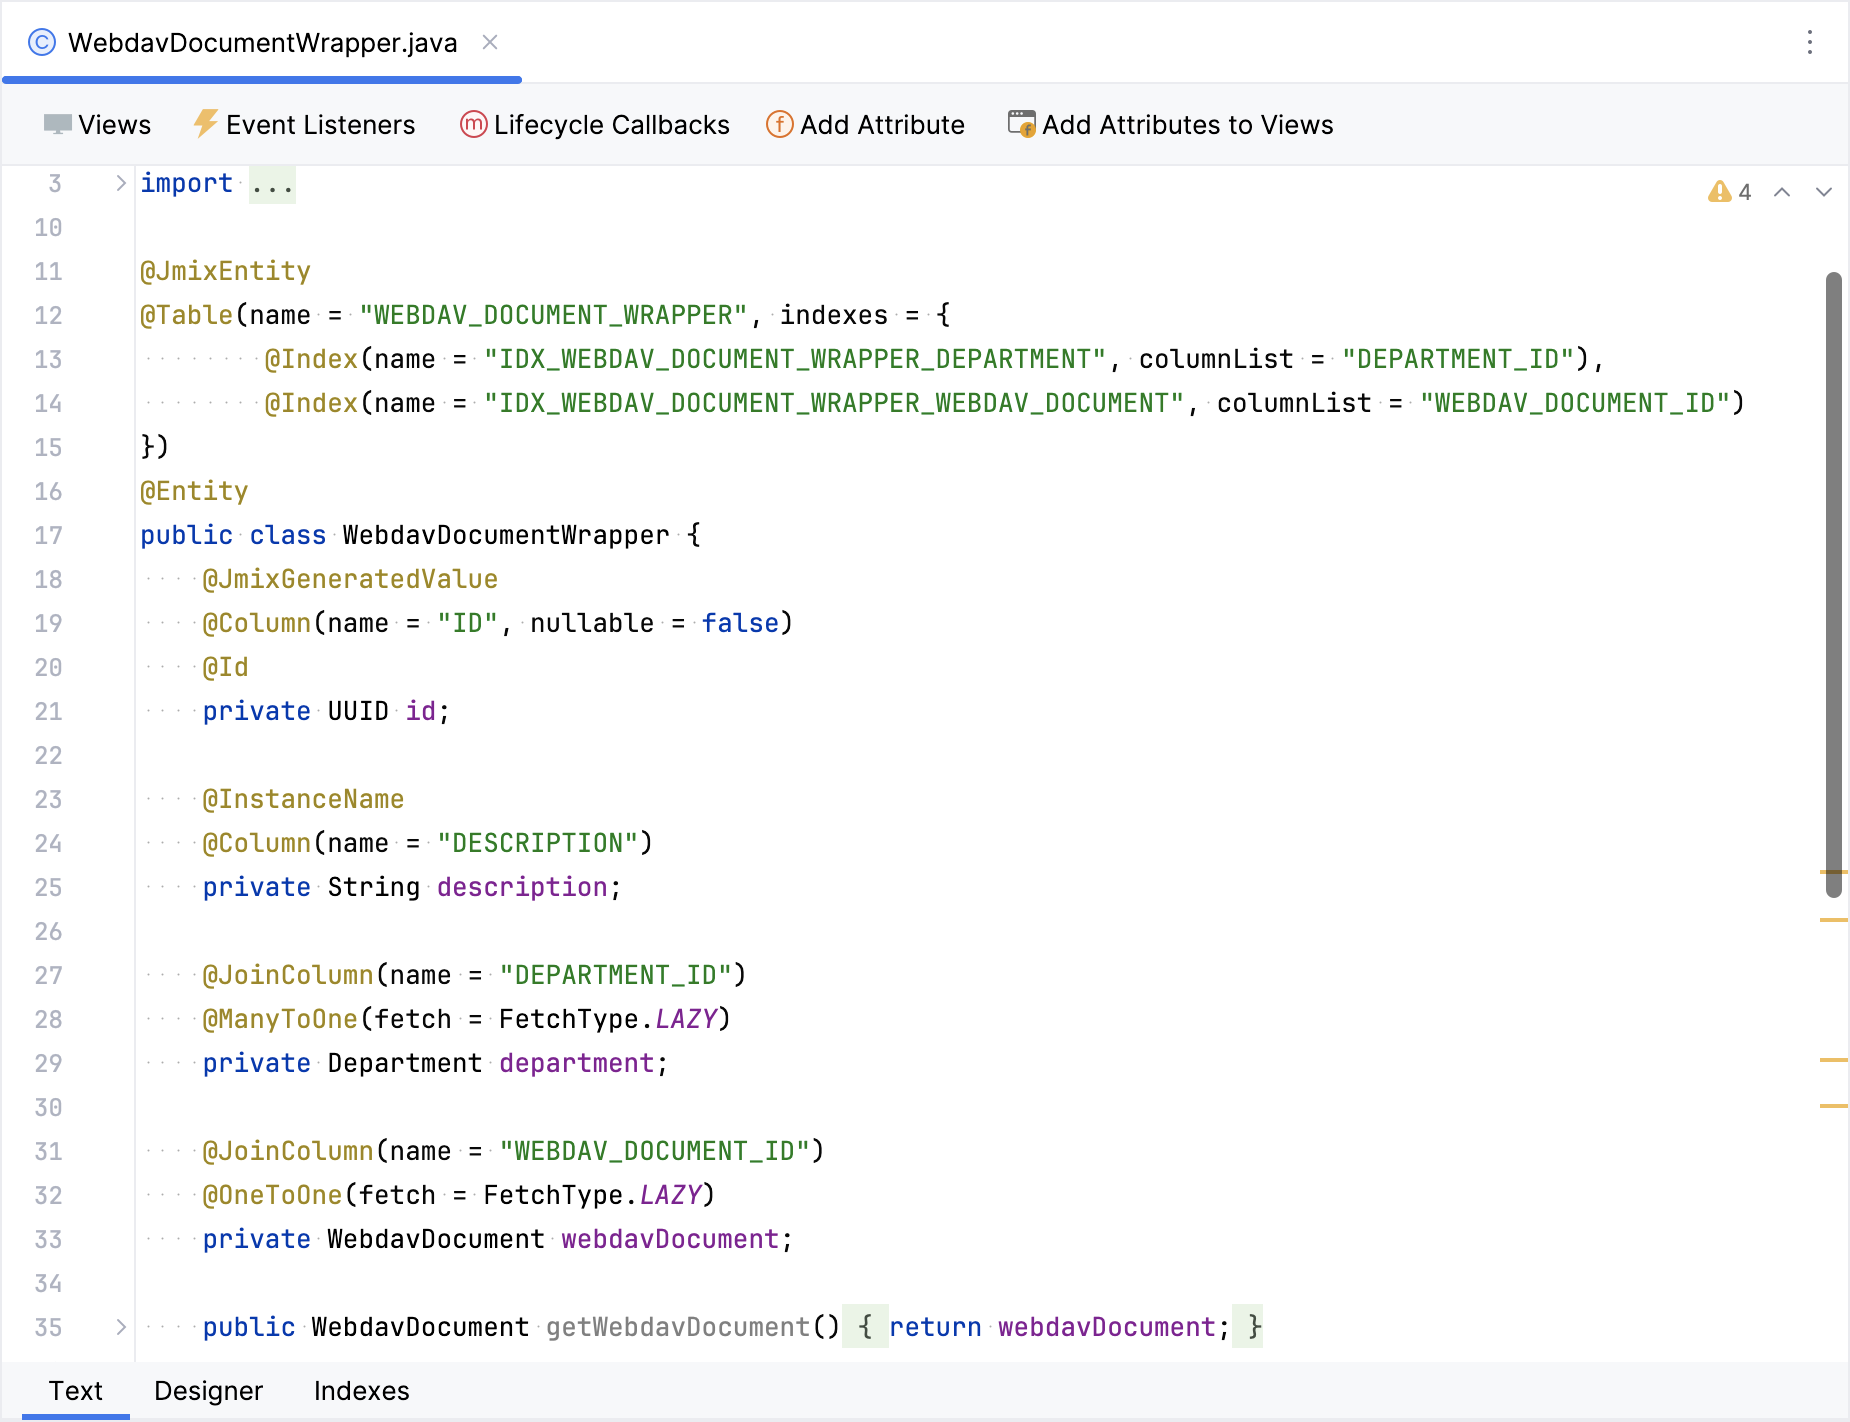
Let’s look at the resulting entity class generated by the designer. Switch to the Text tab at the bottom:
Create CRUD Views
Let’s generate CRUD views for the WebdavDocumentWrapper entity.
Click Views → Create view in the actions panel at the top of the entity designer.
On the first step of the view creation wizard, select the Entity list and detail views template. Click Next.
Accept the suggested values on the first two steps of the wizard.
On the Entity list view fetch plan step, add the webdavDocument and department attributes to the selection:
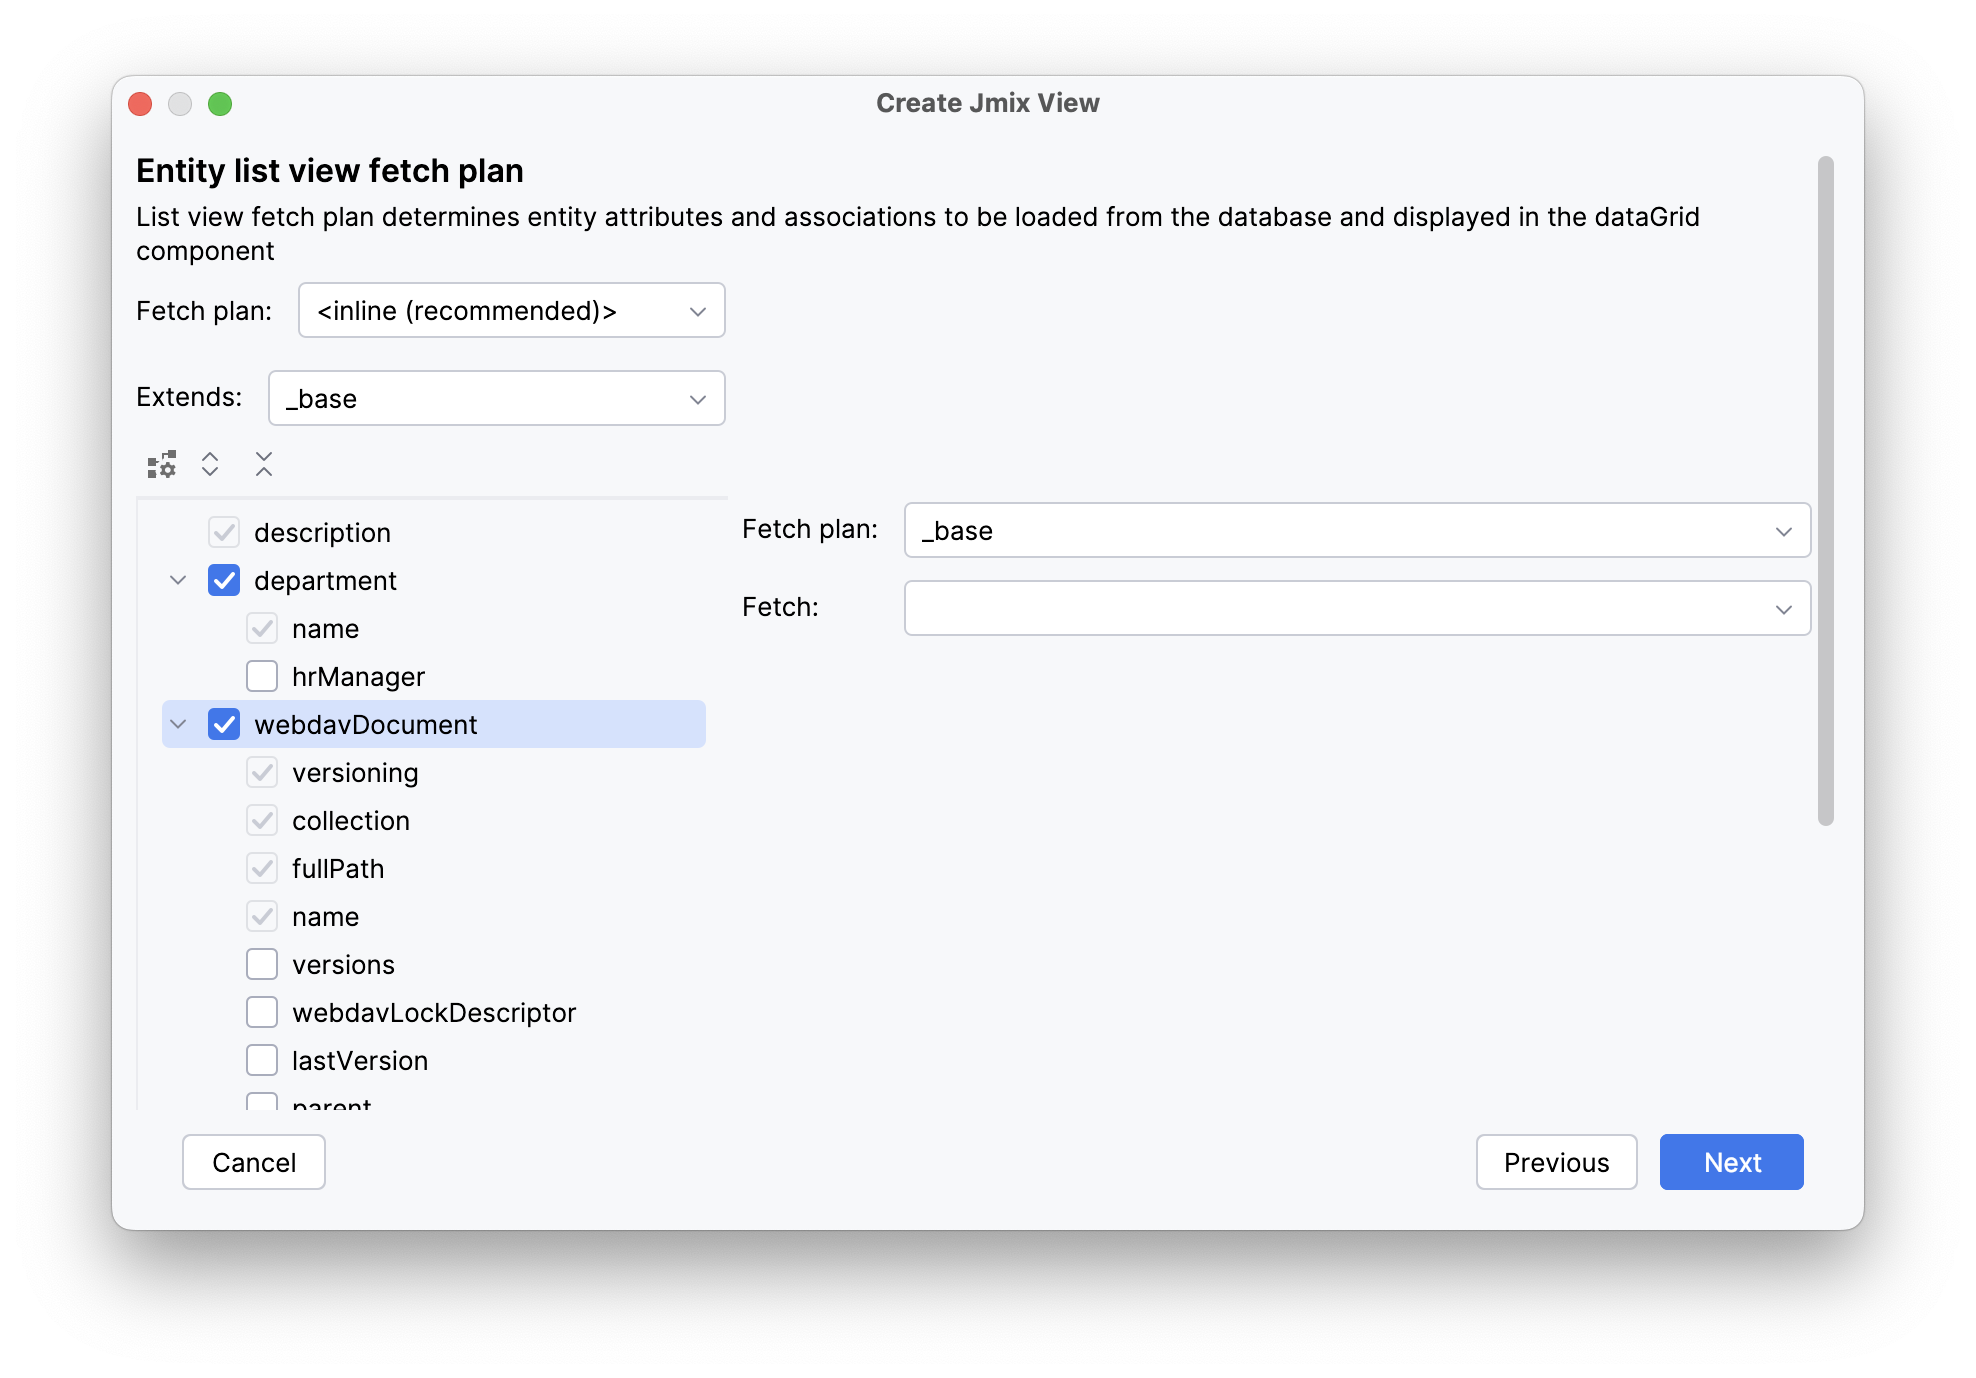
Now you can be sure that the referenced WebdavDocument and Department entities will be loaded together with the root WebdavDocumentWrapper entity and displayed in the list view.
| If an attribute is not present in the fetch plan, Studio doesn’t create a visual component for it in the generated views. |
Click Next.
On the Entity detail view fetch plan step, these attributes will be selected automatically. Click Next.
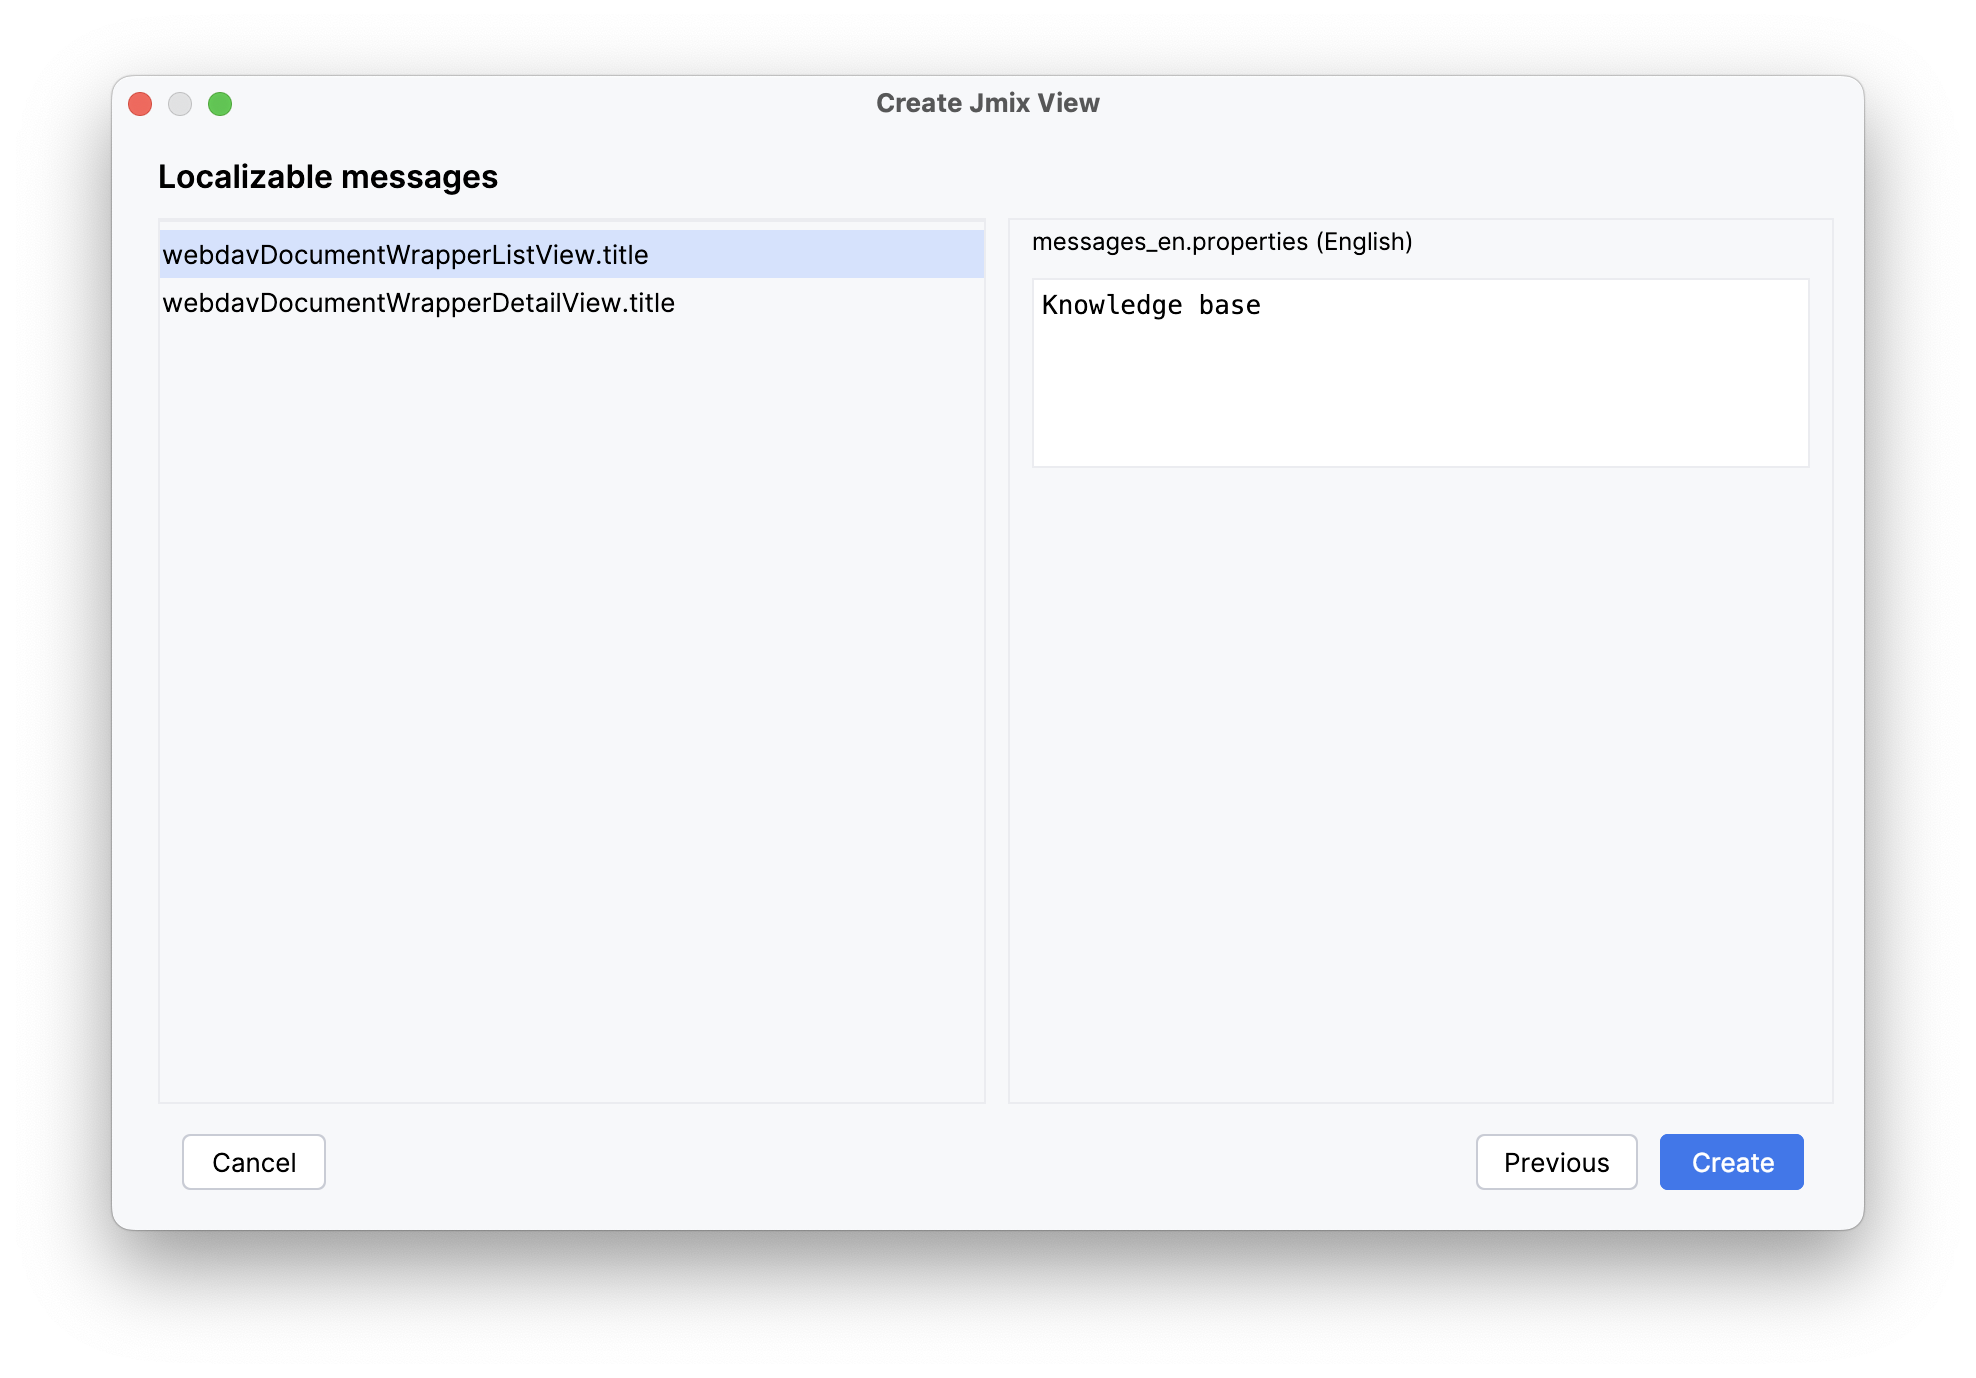
Change the value of the localized message for the list view to Knowledge base on the Localizable messages step and click Create.
Studio will automatically generate two views: WebdavDocumentWrapper.list and WebdavDocumentWrapper.detail, and open their corresponding source code.
Running the Application
After creating the entity and CRUD views for it, you can run the application to see the new feature in action.
Click the Debug button ( ) in the main toolbar.
Prior to launching the application, Studio compares the project data model with the database schema. When you’ve created a new entity, Studio automatically generates a Liquibase changelog to reflect the relevant database modifications (such as creating the WEBDAV_DOCUMENT_WRAPPER table):
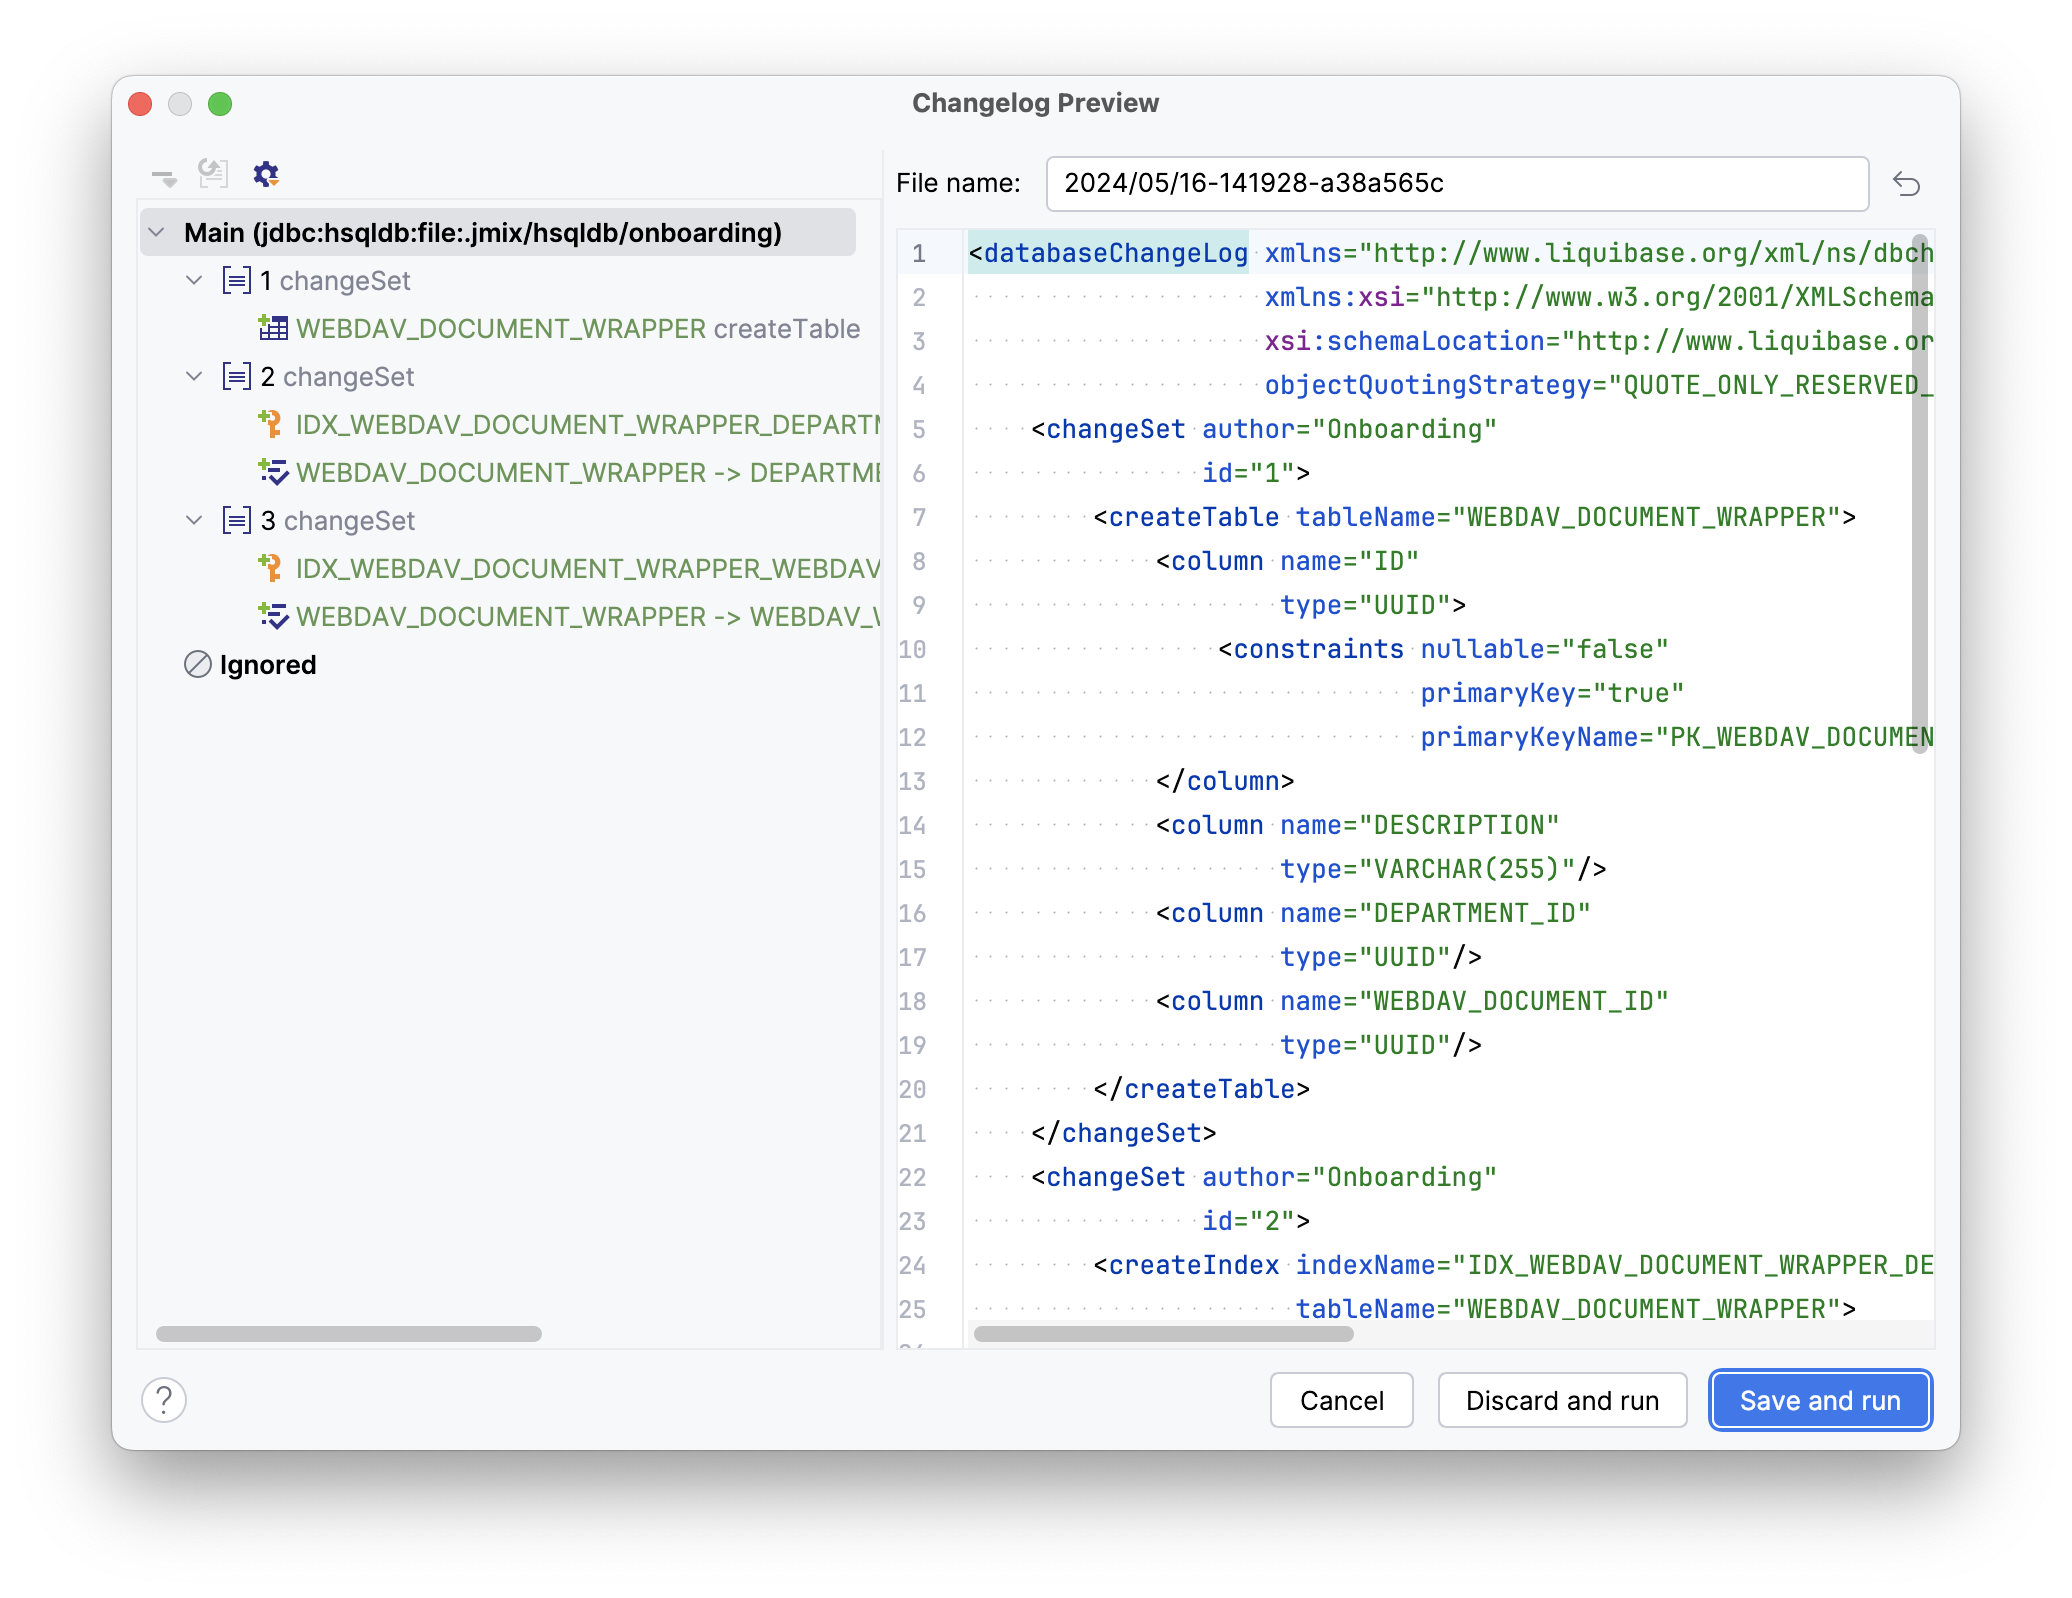
Click Save and run.
Studio will carry out the changelog on your database, followed by building and running the application.
Once the application is up and running, navigate to http://localhost:8080 using your web browser and sign in to the application with the credentials admin/admin.
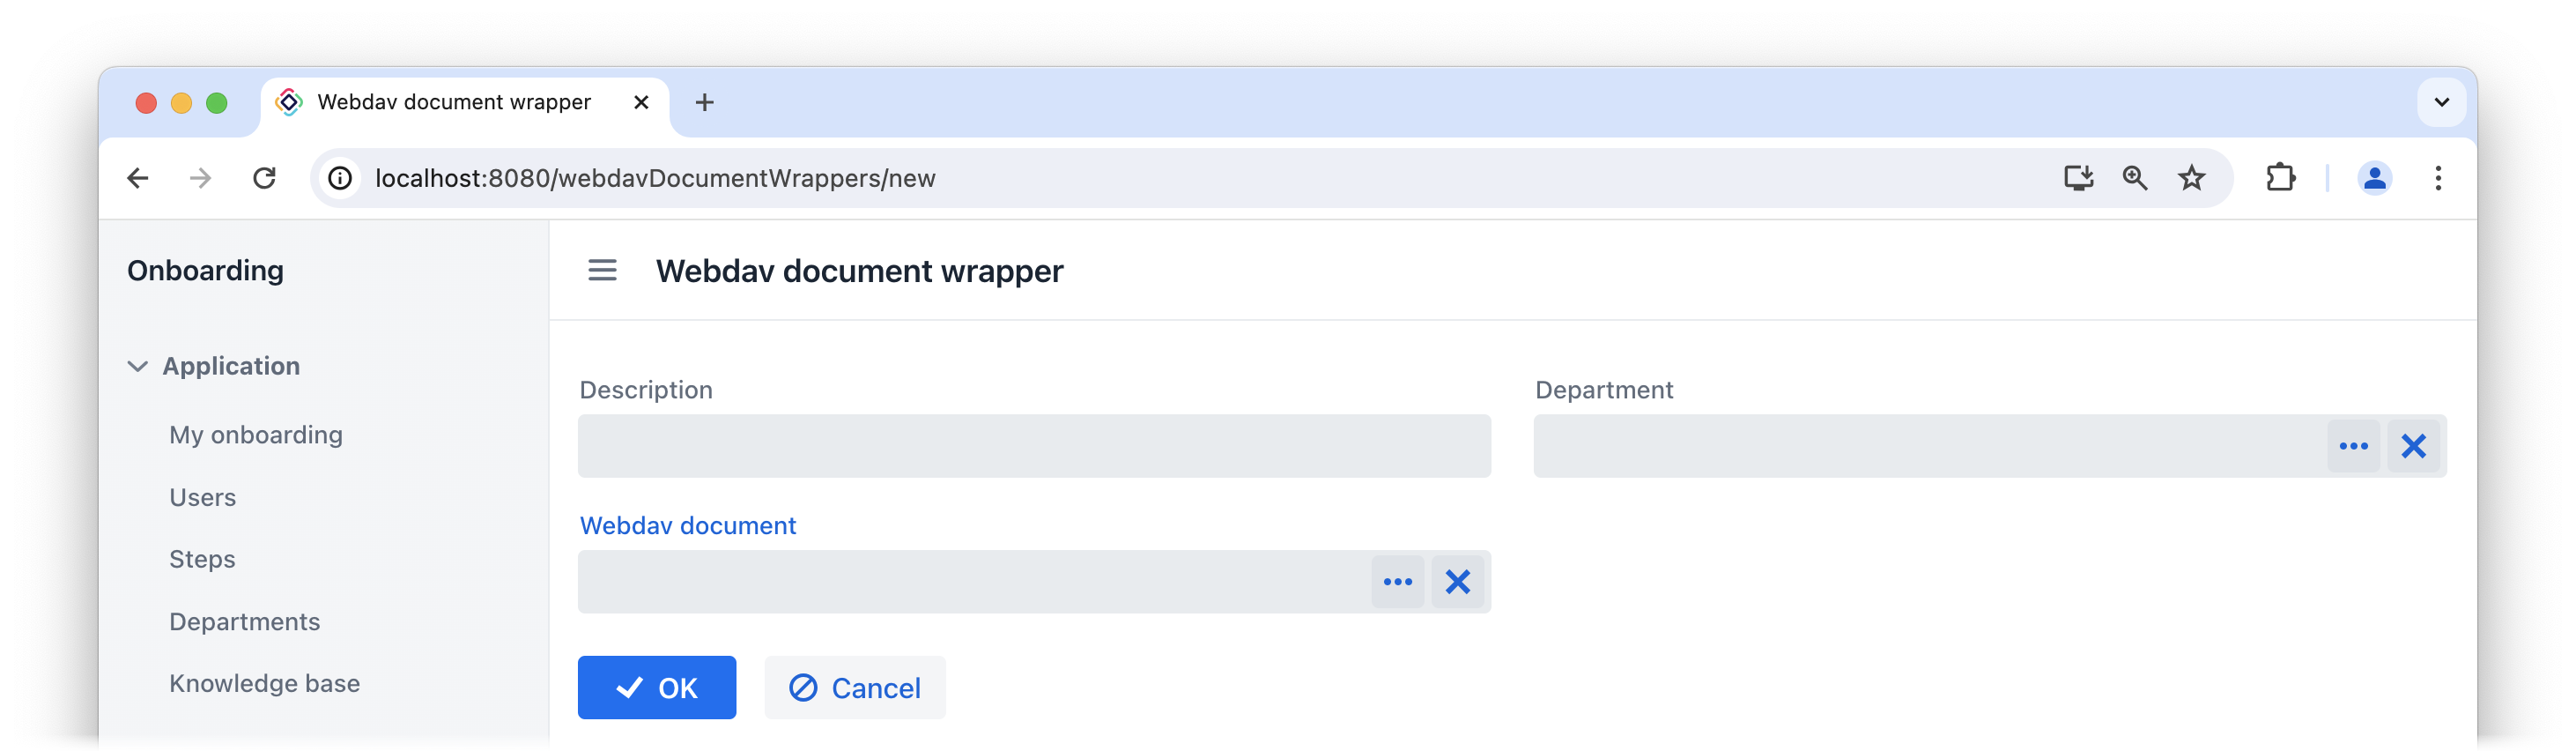
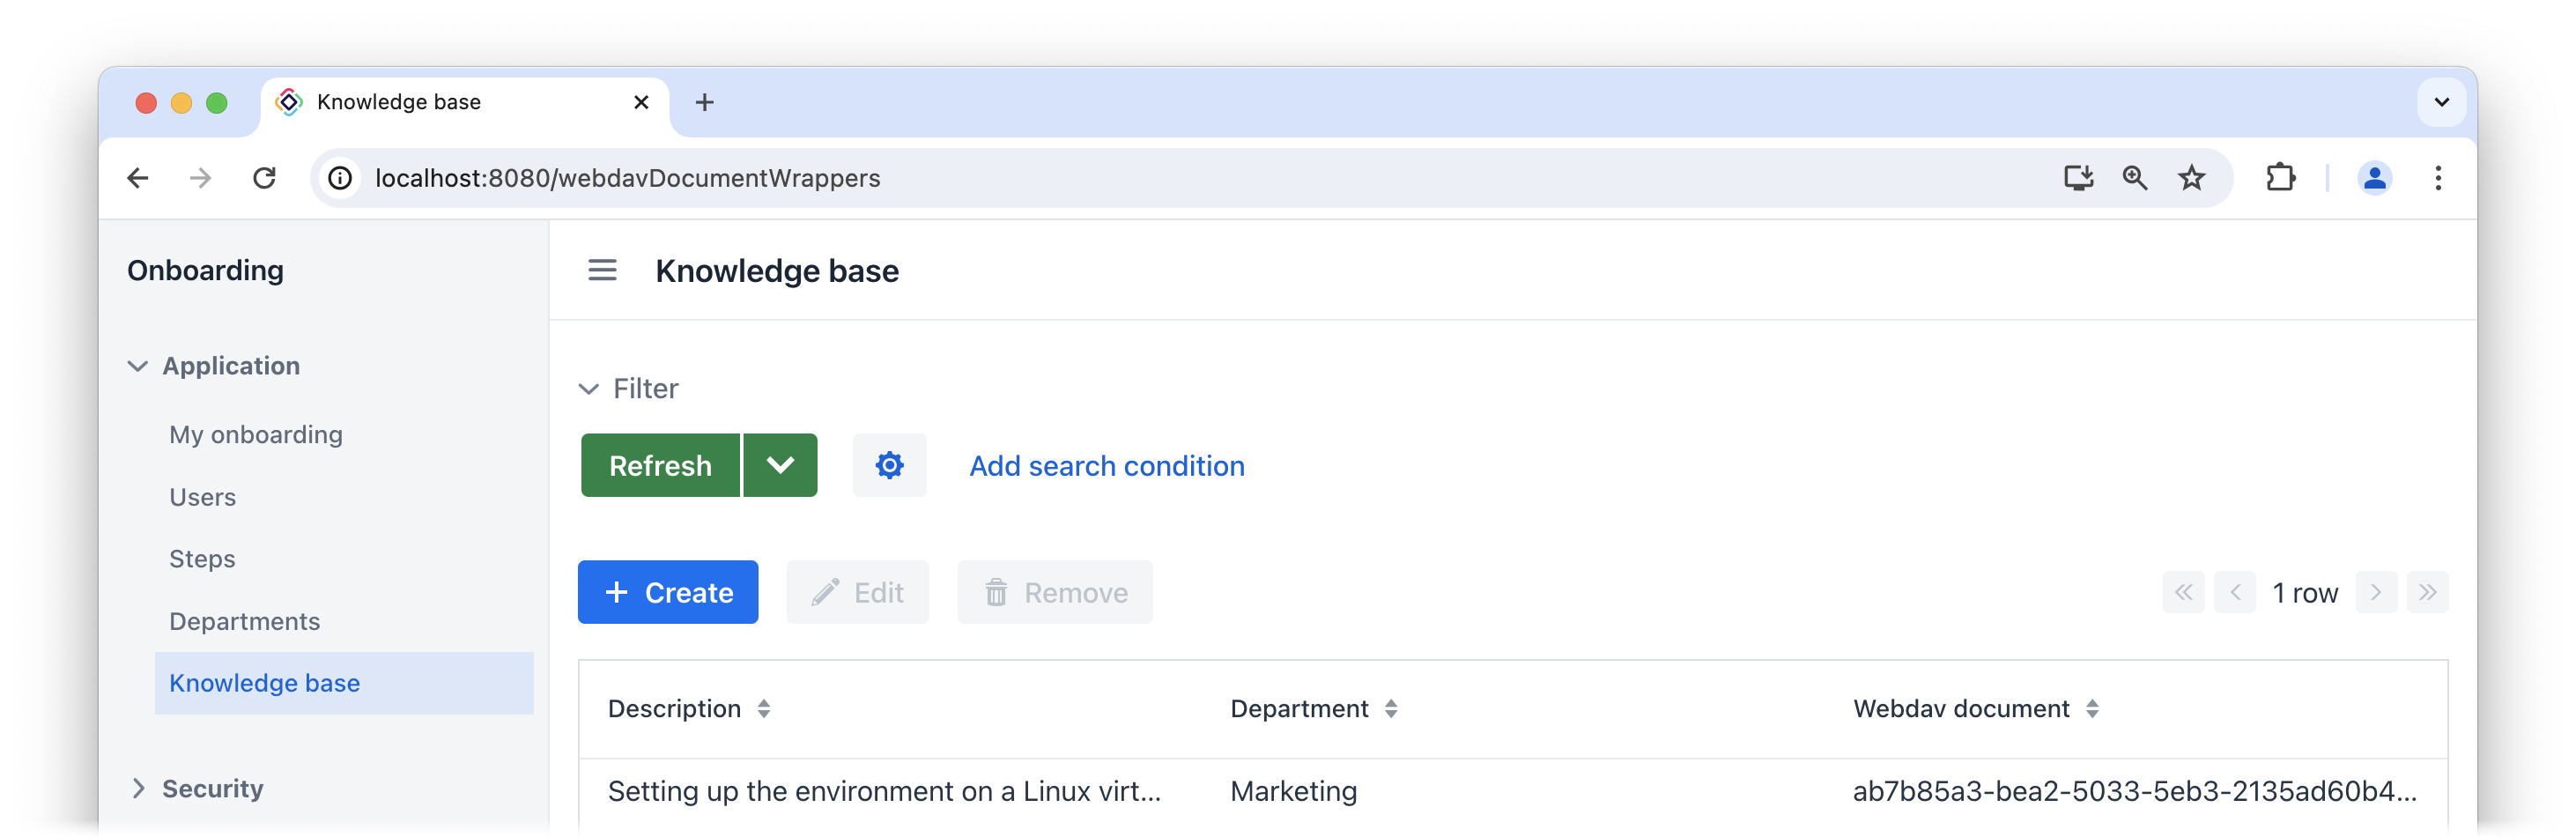
Choose the Knowledge base item from the Application menu. You will see the Webdav document wrapper.list view. Click Create. The Webdav document wrappers.detail view will open. Besides the text field used for file description, you may notice the Department and Webdav document entity pickers.
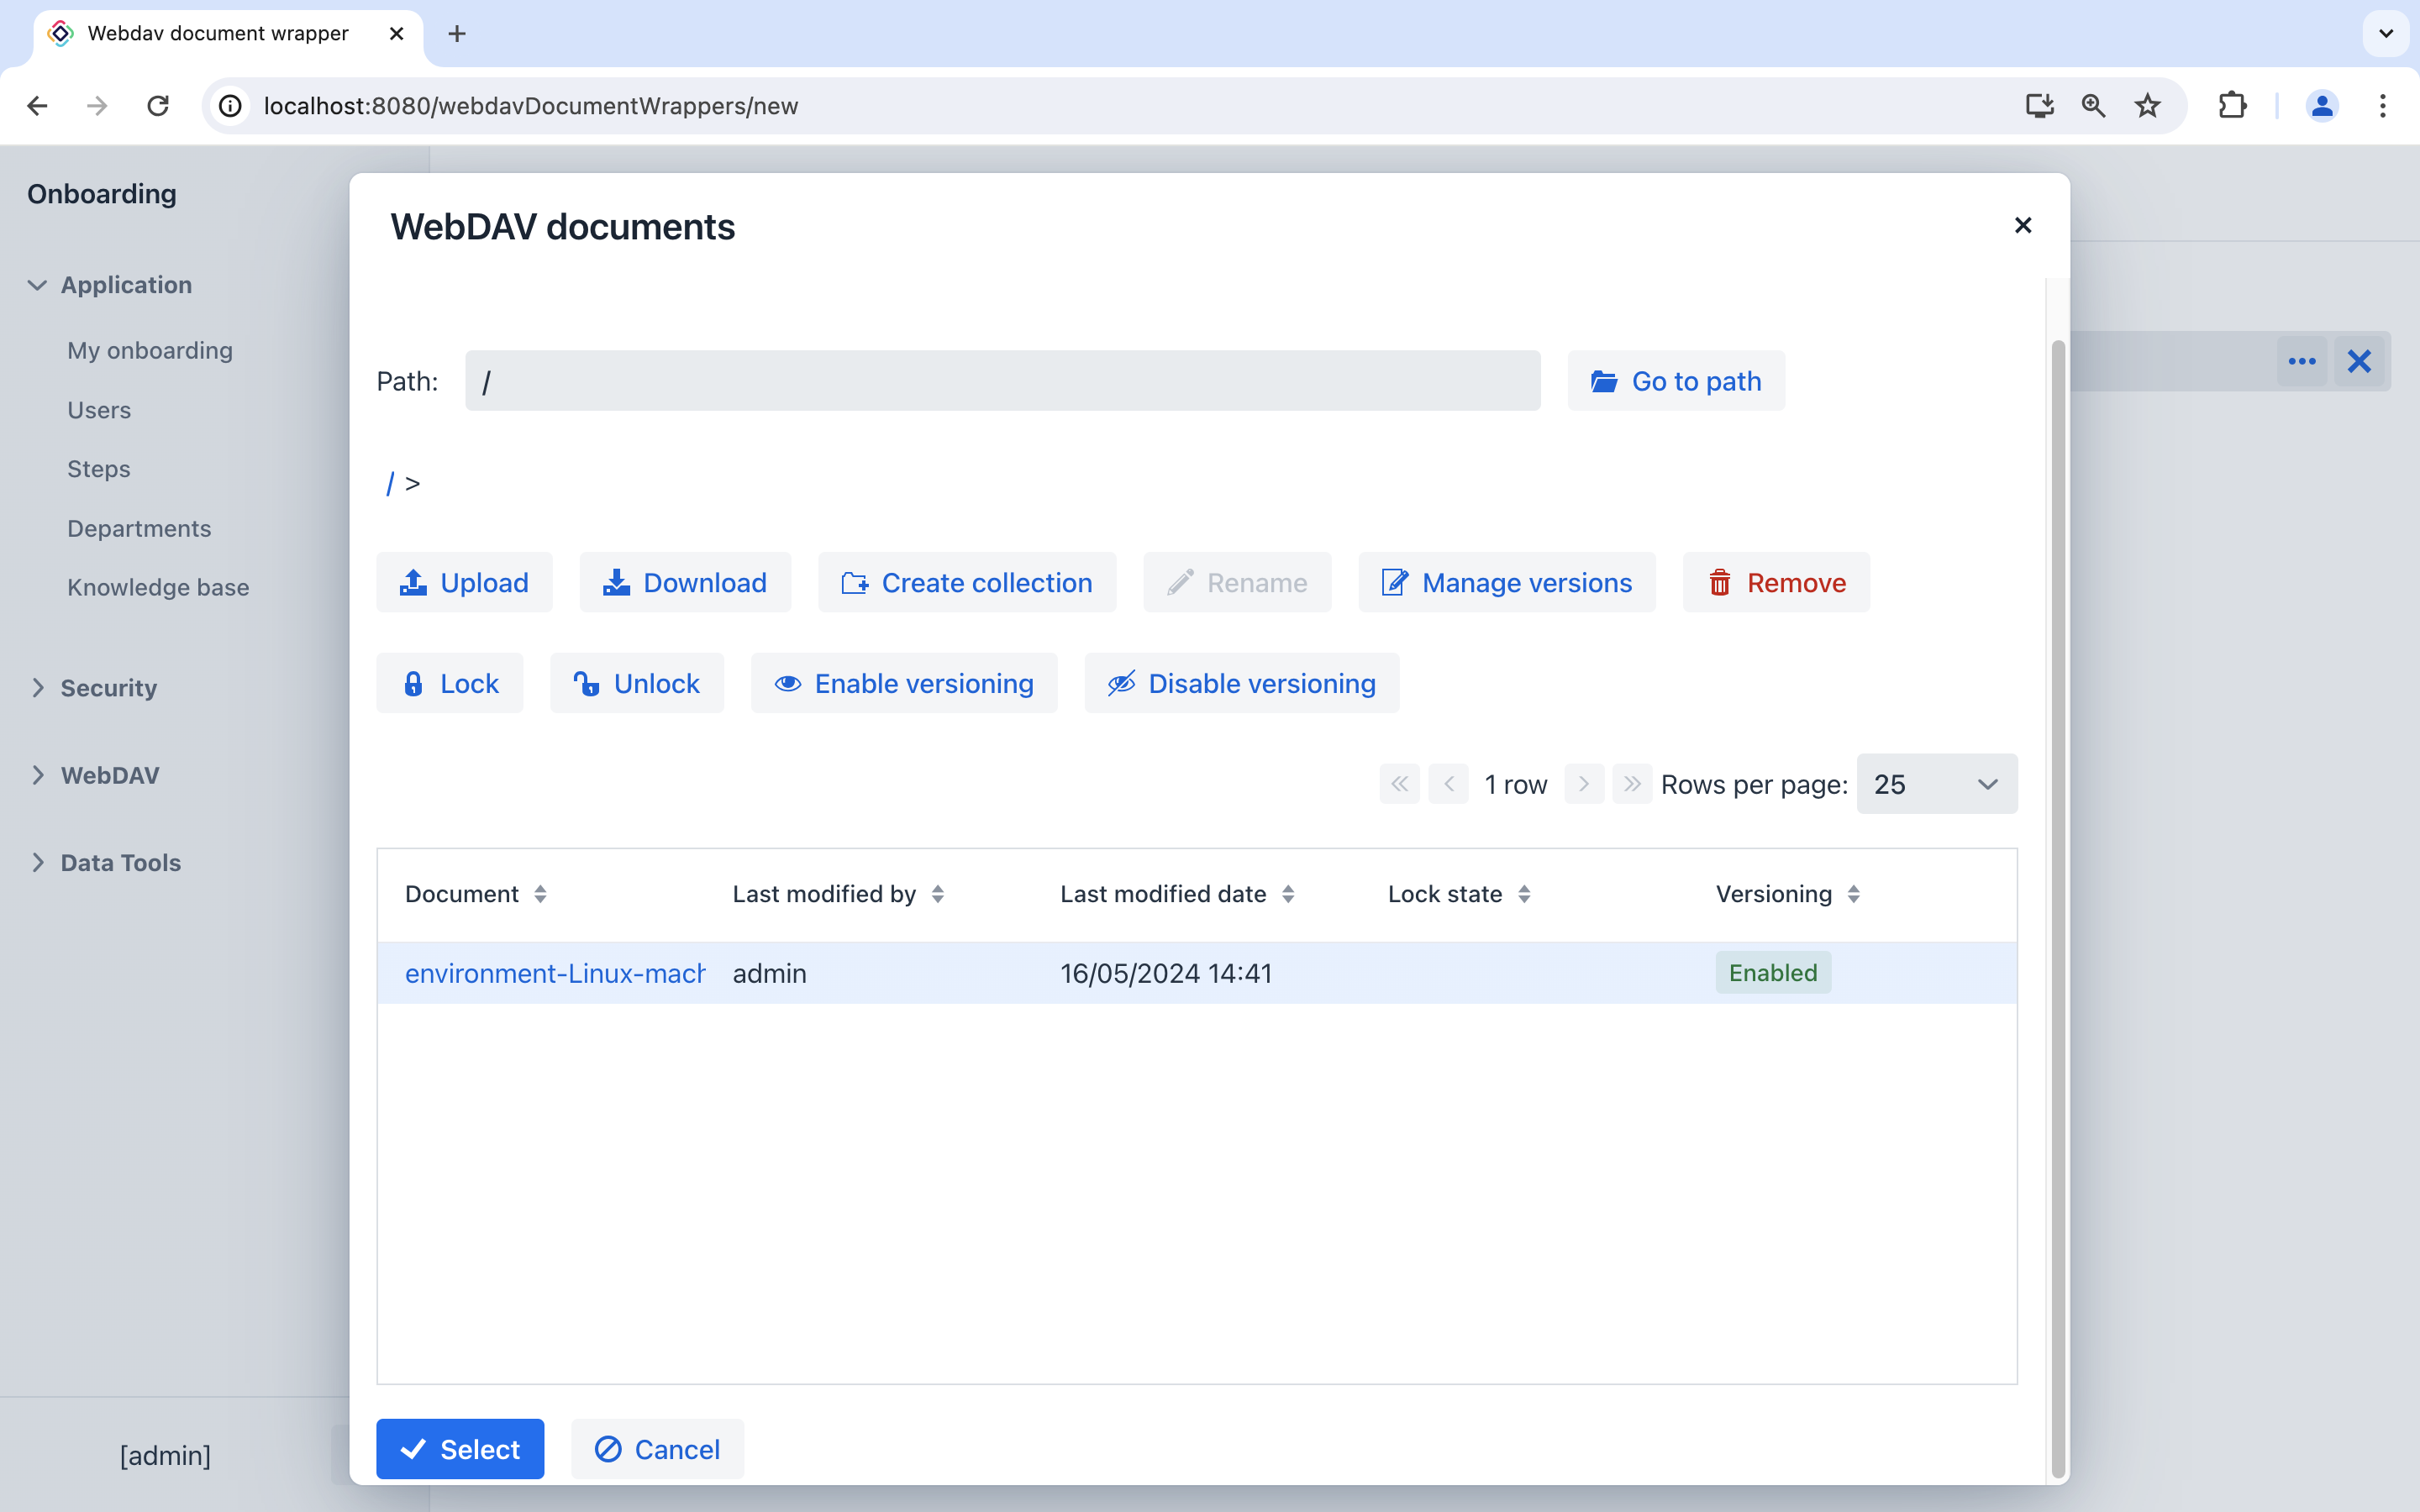
You can select a WebDAV document by clicking on the ellipsis button in the picker field. The WebDAV Documents view, provided by the add-on, will be opened in a dialog window. Select a row from the WebDAV documents data grid, or upload a new document, and scroll down to reveal the Select button:
Select a WebDAV document and click Select. The WebDAV document’s id will be displayed in the picker field:
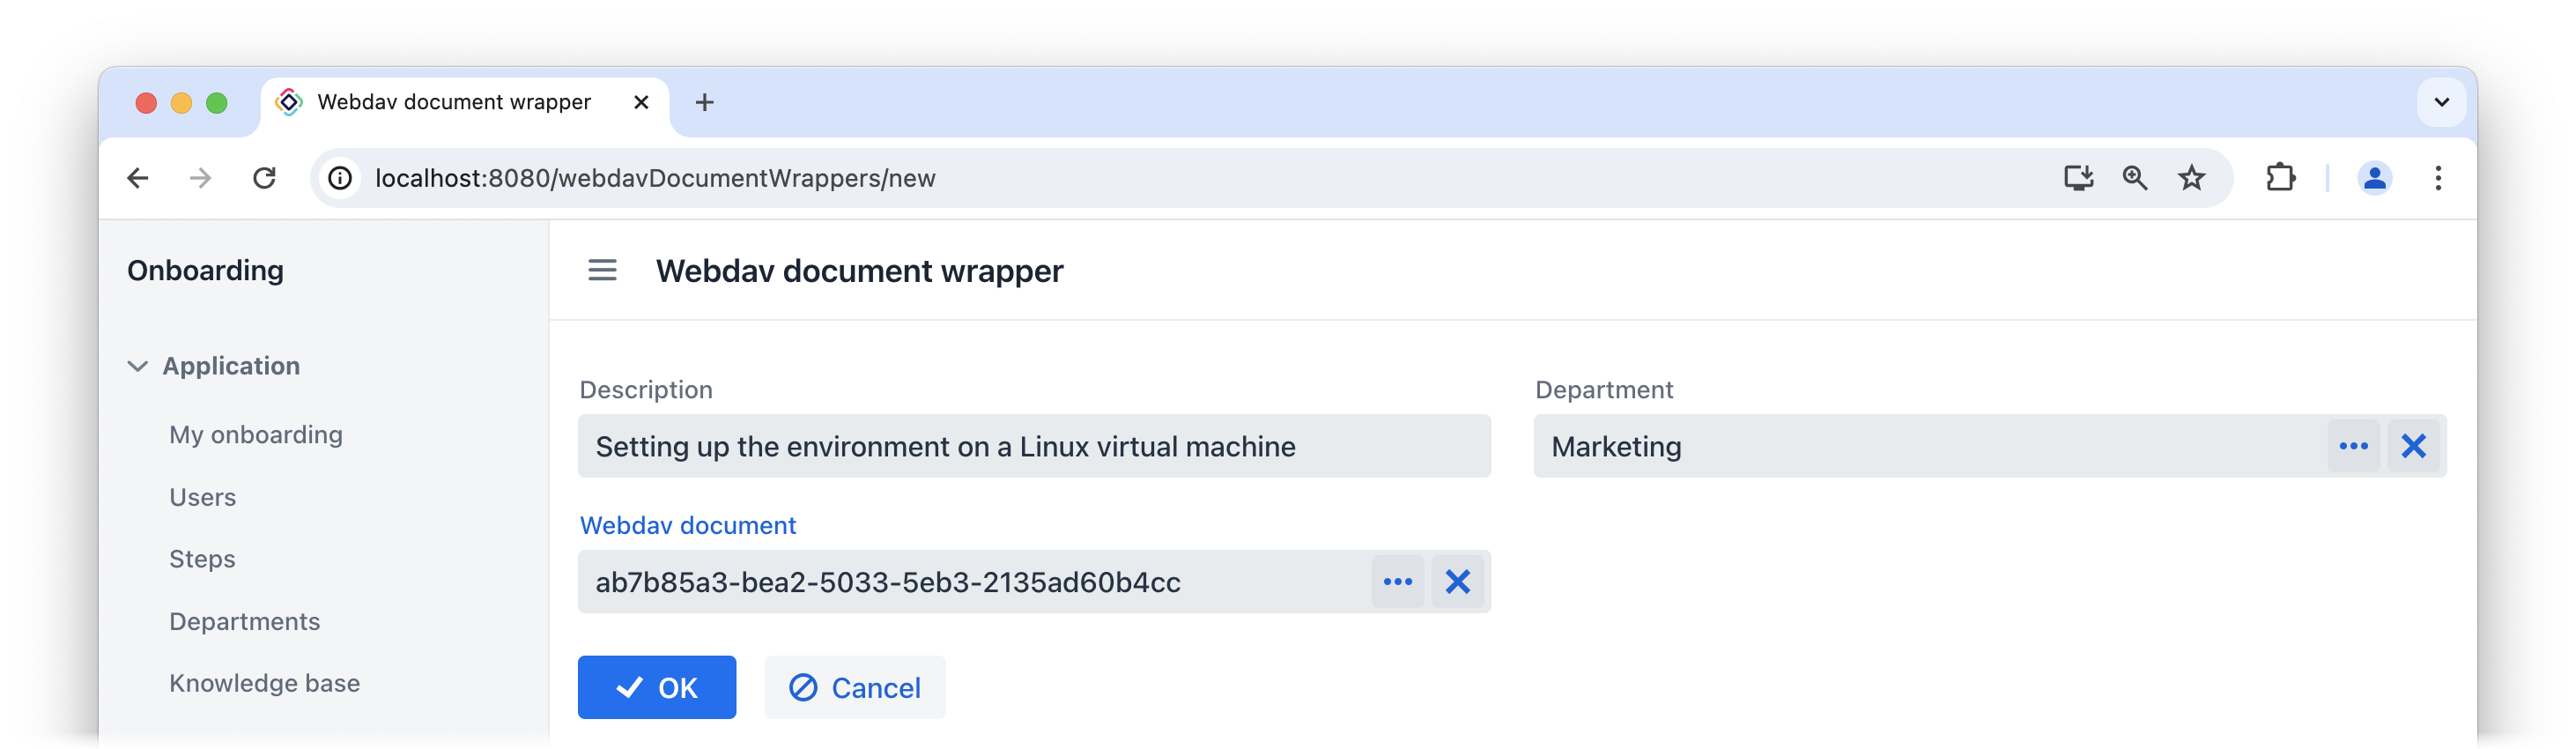
Click OK. The referenced WebDAV document’s id will be displayed in the data grid too:
As you can see, working with WebDAV documents is not very convenient at this stage. Uploading a document to the application requires a lot of steps, and after uploading, we only see the document identifier without any additional information about it. In the next section, we will utilize UI components provided by the add-on and enhance the appearance of the Knowledge Base view.
Summary
In this section, you have created the basic feature of the application: a knowledge base management system.
You have learned that:
-
The WebDAV add-on offers the
WebdavDocumententity, which represents a document within the WebDAV functionality. This entity facilitates editing and viewing documents using external applications such as Microsoft Word and Excel, managing document versions, and controlling access to specific documents. -
The entityPicker component is used by default to select a reference in a generated detail view. Clicking the ellipsis button for the WebDAV document field will open the standard WebDAV documents view provided by the add-on.