2. Working with WebDav Components
At this stage of development, the application features a knowledge base management system represented by the Knowledge base view.
In this chapter, you will:
-
Enhance the webDav document wrapper data grid to display a link to the WebDAV document instead of the document identifier.
-
Utilize the webdavDocumentUpload component on the webDav document wrapper detail view to upload the WebDAV document into the system.
Adding WebdavDocumentUploadField on View
Locate webdav-document-wrapper-detail-view.xml in the Jmix tool window and double-click it. The view designer will appear:
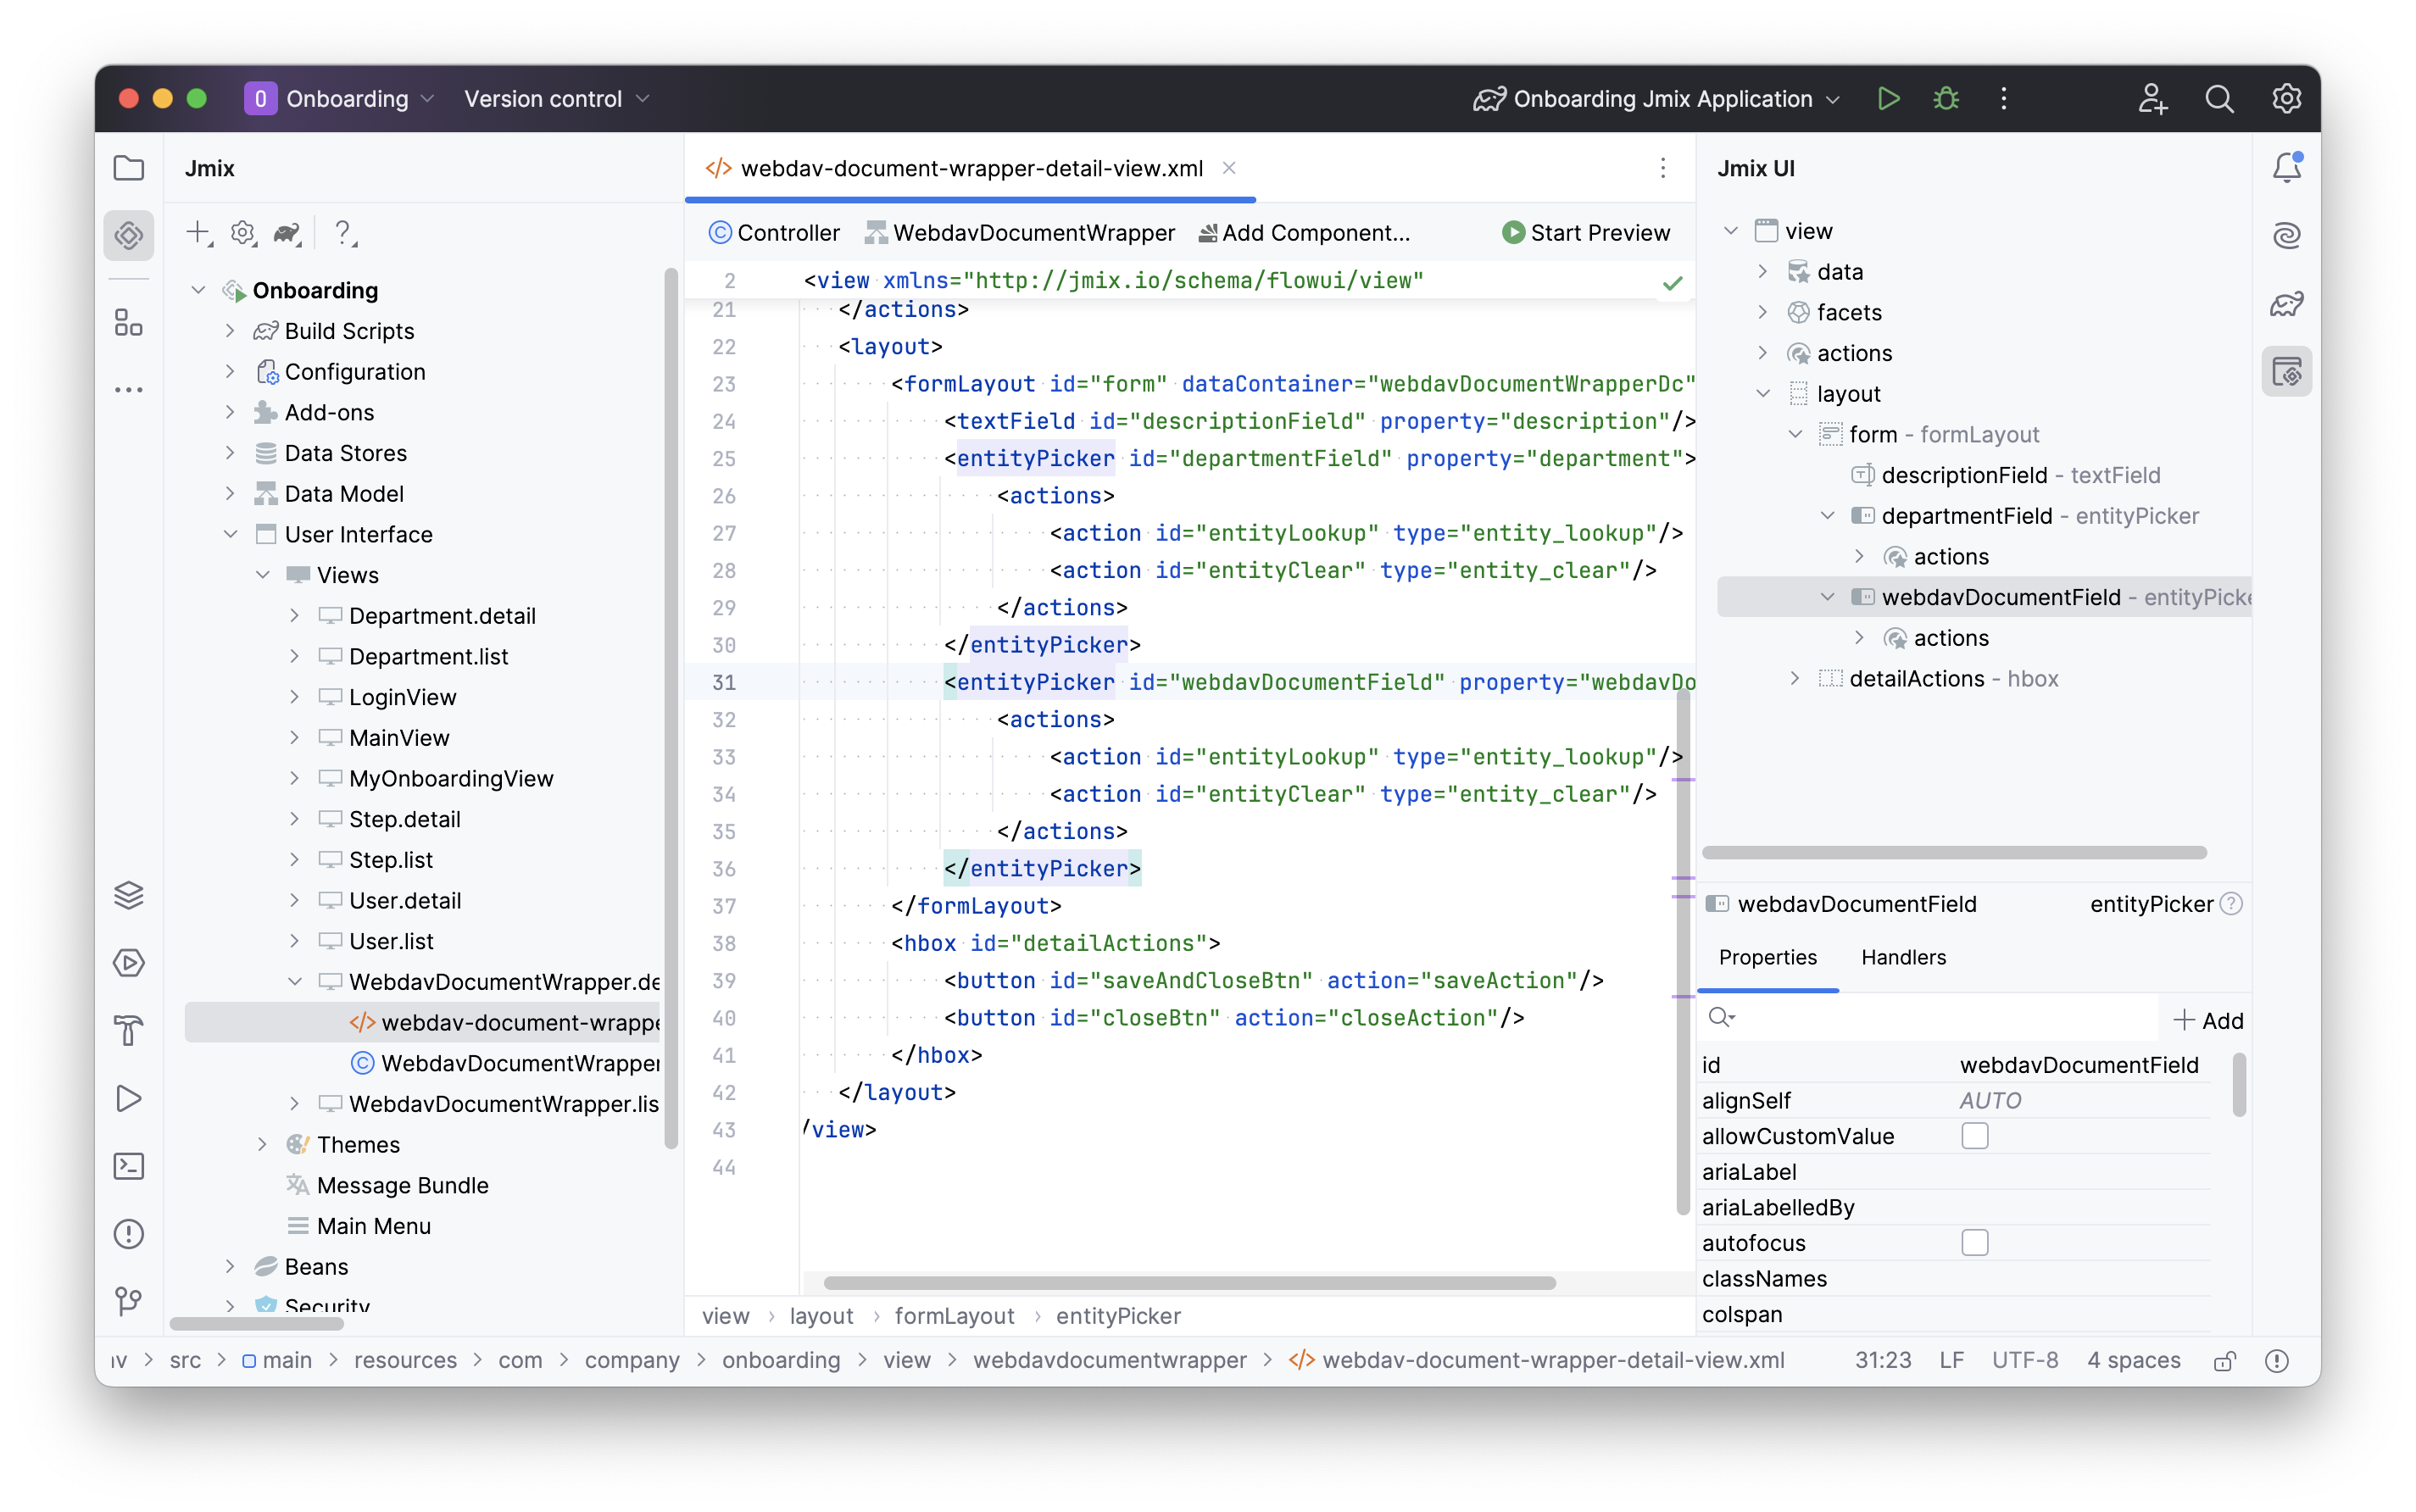
You’ll notice that the entityPicker component is being used to show the webdavDocument attribute.
If you want to display the special component designed to work with documents, you should include the WebdavDocumentUploadField UI component in the XML descriptor.
Remove the entityPicker component description from the XML descriptor and place the cursor after the departmentField. Next, click Add Component in the actions panel, then find the WebdavDocumentUploadField item and double-click it.

The new webdavDocumentUpload element will be added beneath the formLayout element in both the Jmix UI structure panel and in the XML. Configure the id, colspan, and property attributes as shown below.
<formLayout id="form" dataContainer="webdavDocumentWrapperDc">
    <textField id="descriptionField" property="description"
               colspan="2"/>
    <entityPicker id="departmentField" property="department"
                  colspan="2">
        <actions>
            <action id="entityLookup" type="entity_lookup"/>
            <action id="entityClear" type="entity_clear"/>
        </actions>
    </entityPicker>
    <webdav:webdavDocumentUpload id="webdavDocumentField"
                                 property="webdavDocument"
                                 colspan="2"/>
</formLayout>
Displaying WebdavDocumentLink in Data Grid
Let’s display a link to the document in the data grid instead of its identifier.
Open webdav-document-wrapper-list-view.xml and find webdavDocumentWrappersDataGrid.
Select the webdavDocument column, switch to the Handlers tab of the component inspector and create the renderer handler method:
@Supply(to = "webdavDocumentWrappersDataGrid.webdavDocument", subject = "renderer")
private Renderer<WebdavDocumentWrapper> webdavDocumentWrappersDataGridWebdavDocumentRenderer() {
    return null;
}
Inject UiComponents object into controller class:
@Autowired
private UiComponents uiComponents;| You can use the Inject button in the top actions panel of the editor to inject dependencies into view controllers and Spring beans. |
Implement the webdavDocumentWrappersDataGridWebdavDocumentRenderer method:
@Supply(to = "webdavDocumentWrappersDataGrid.webdavDocument", subject = "renderer")
private Renderer<WebdavDocumentWrapper> webdavDocumentWrappersDataGridWebdavDocumentRenderer() {
    return new ComponentRenderer<>( (1)
            () -> uiComponents.create(WebdavDocumentLink.class), (2)
            (link, wrapper) -> {
                WebdavDocument webdavDocument = wrapper.getWebdavDocument();
                if (webdavDocument != null) {
                    link.setWebdavDocument(webdavDocument);
                }
            });
}| 1 | The method returns a Renderer object that creates a UI component to be rendered in the column. |
| 2 | The WebdavDocumentLink component instance is created using the UiComponents factory. |
Running the Application
Let’s run the application to observe the new feature in action.
Navigate to http://localhost:8080 using your web browser and sign in to the application with the credentials admin/admin.
Choose the Knowledge base item from the Application menu. You will see the Webdav document wrappers.list view.
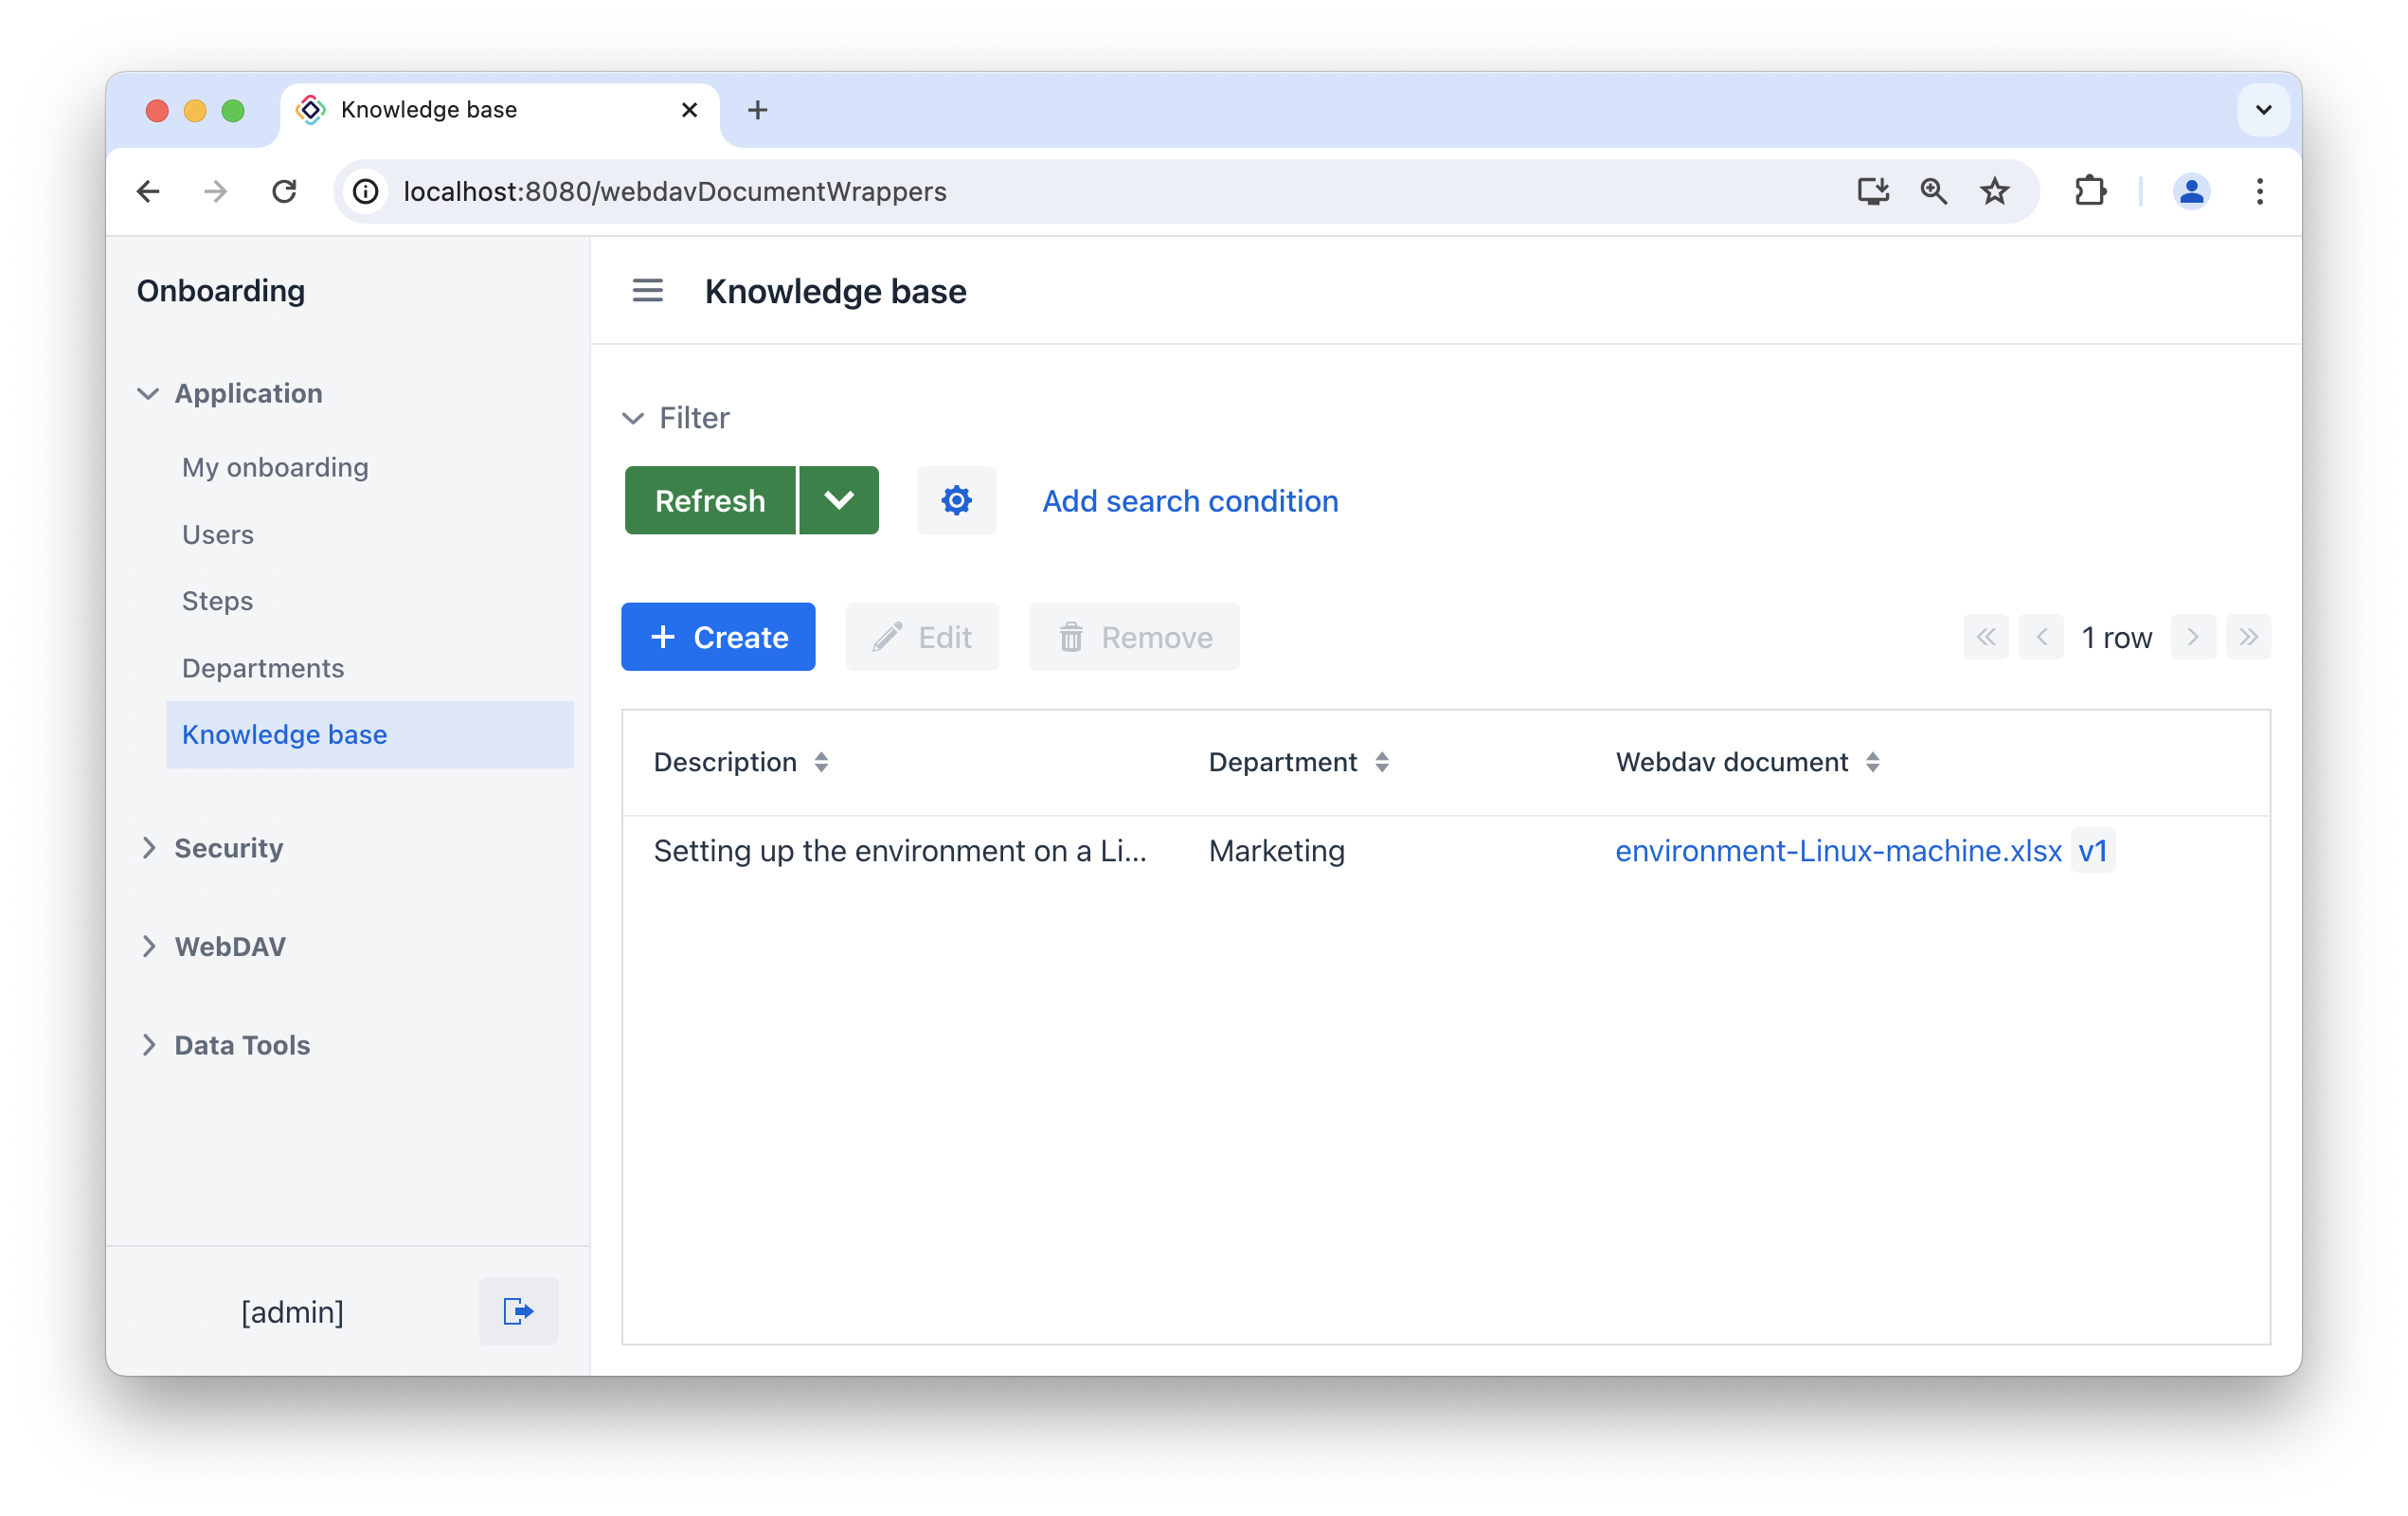
The Webdav document column contains a link to the WebDav document and a button allowing you to open the standard WebDAV document versions view.
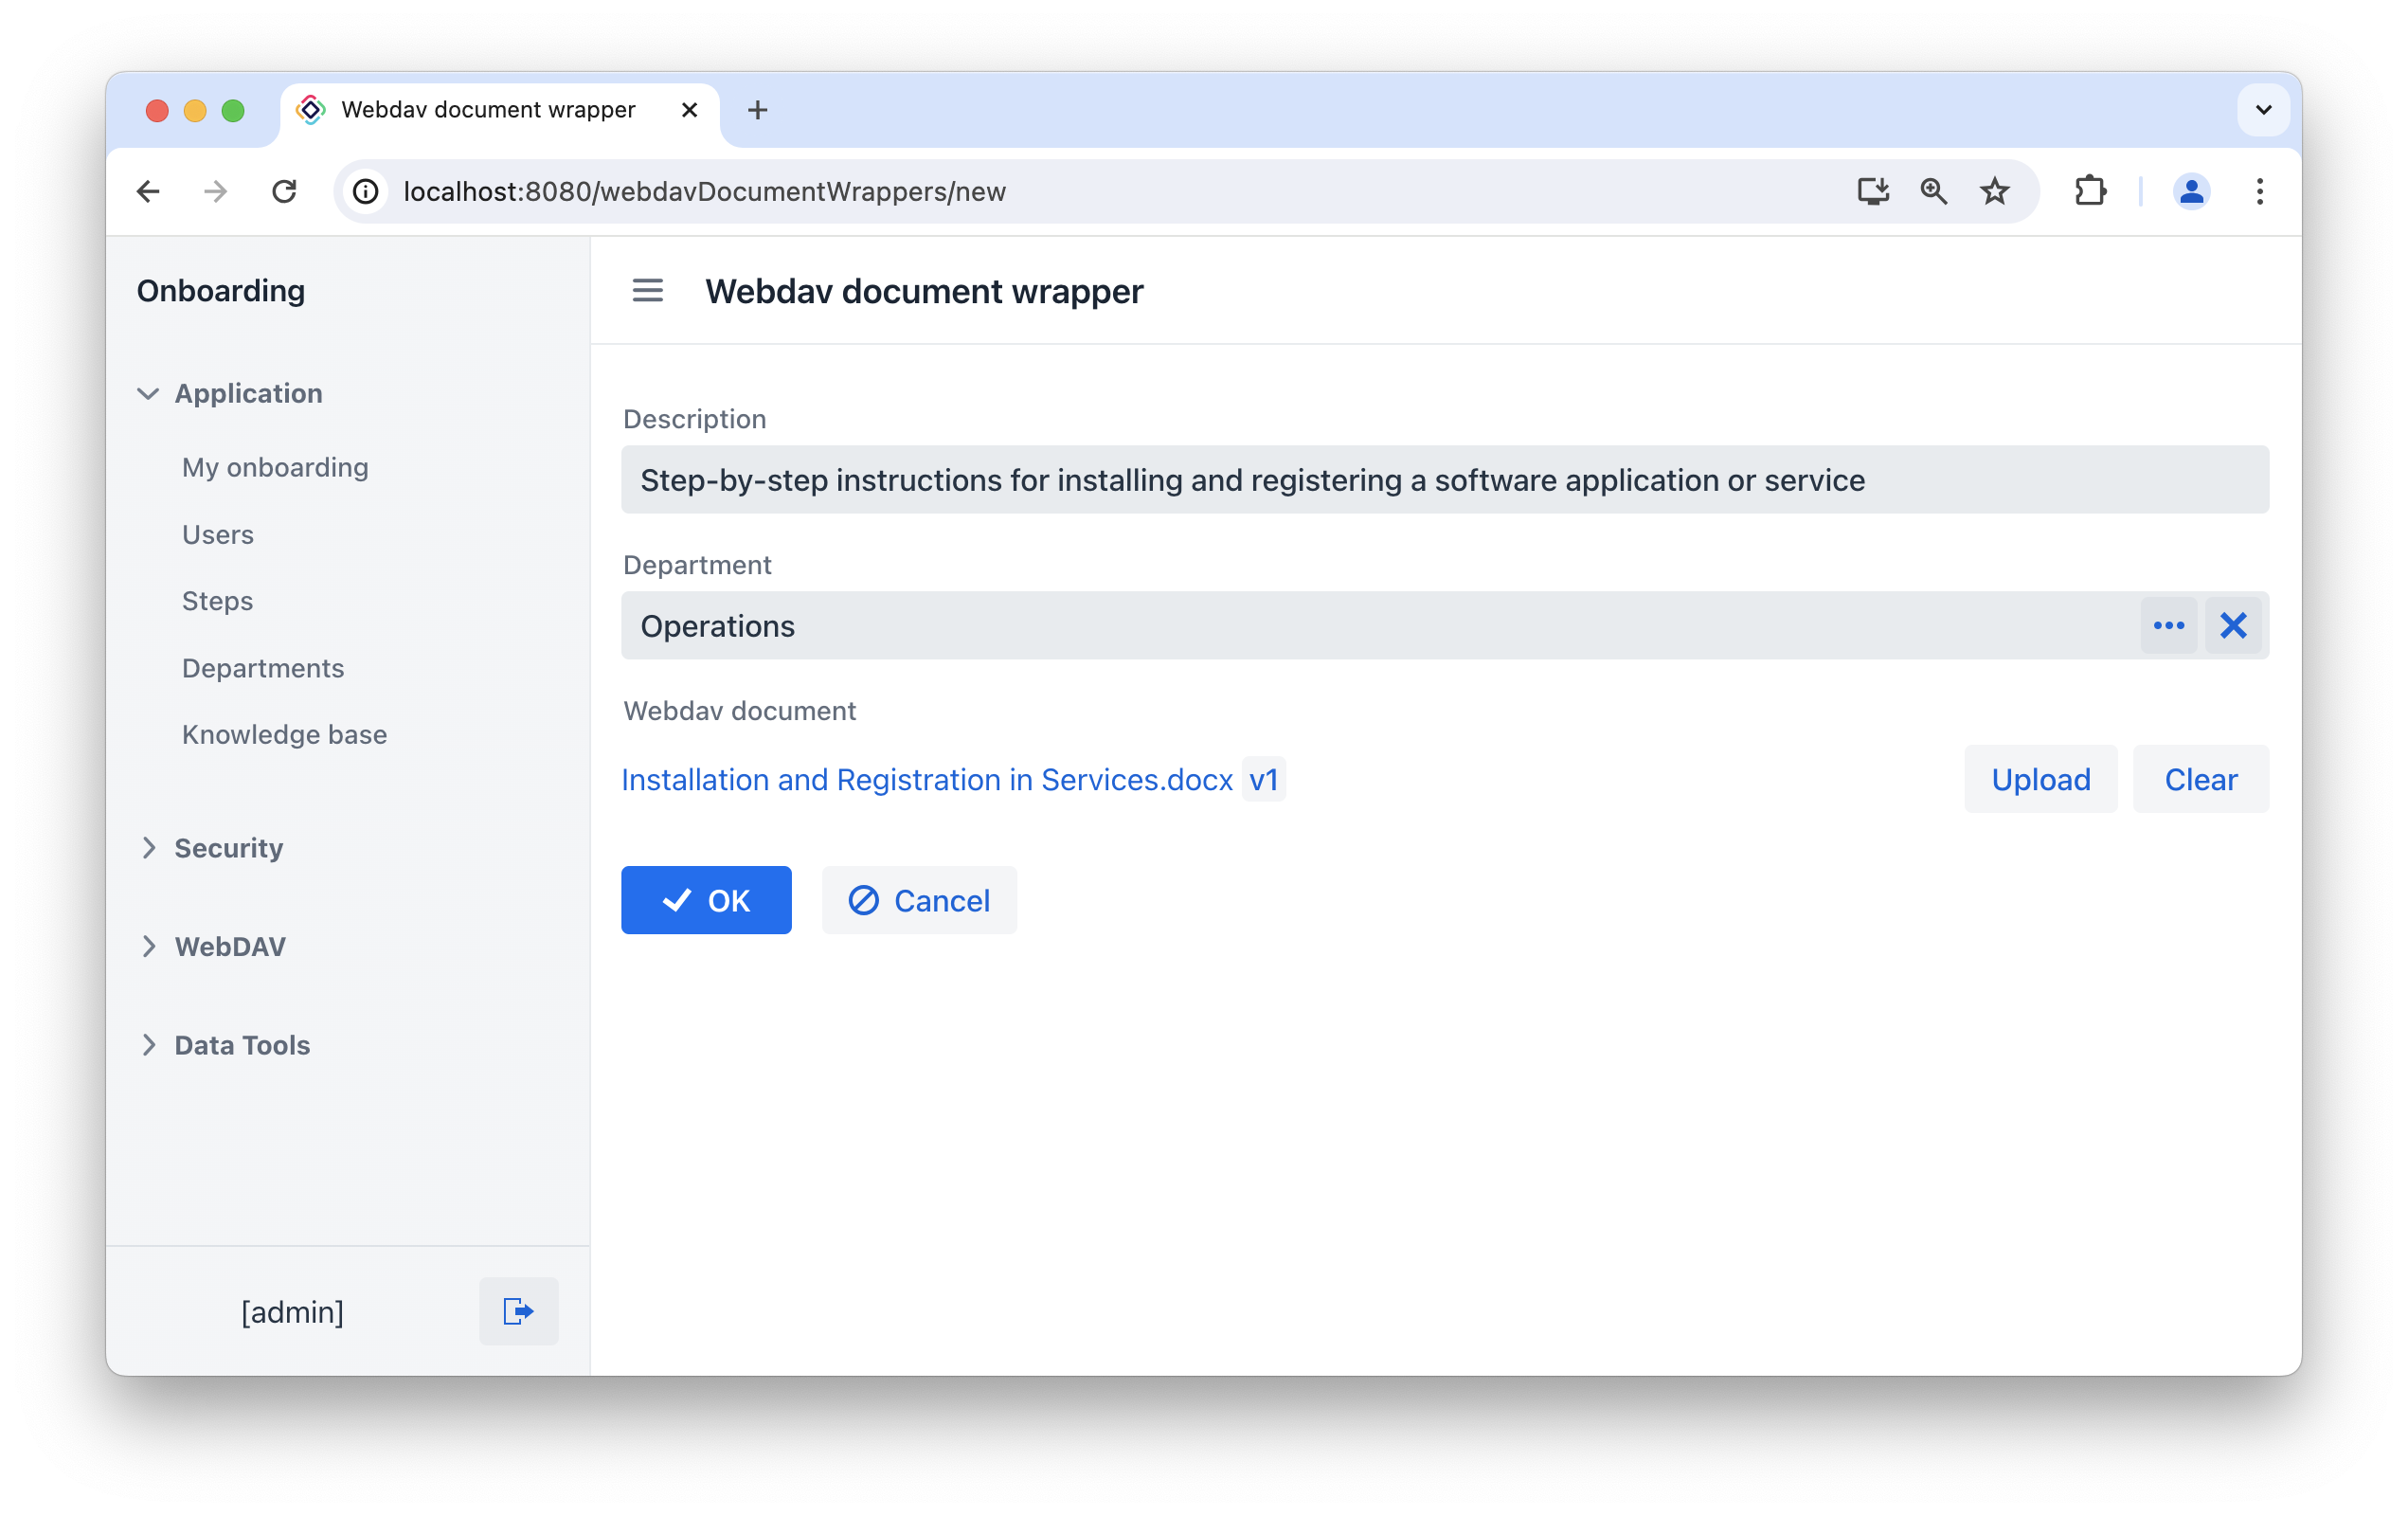
Click Create. The Webdav document wrappers.detail view will open. Besides the text field used for a file description, and the picker for a department, you may notice the built-in WebDAV add-on component for file upload. Try uploading a file using this component:
After clicking the OK button, you will be redirected to the list view.
Hover your mouse over the WebDAV document name. In the bottom left corner, you will see the link where the document is located on the WebDAV server.
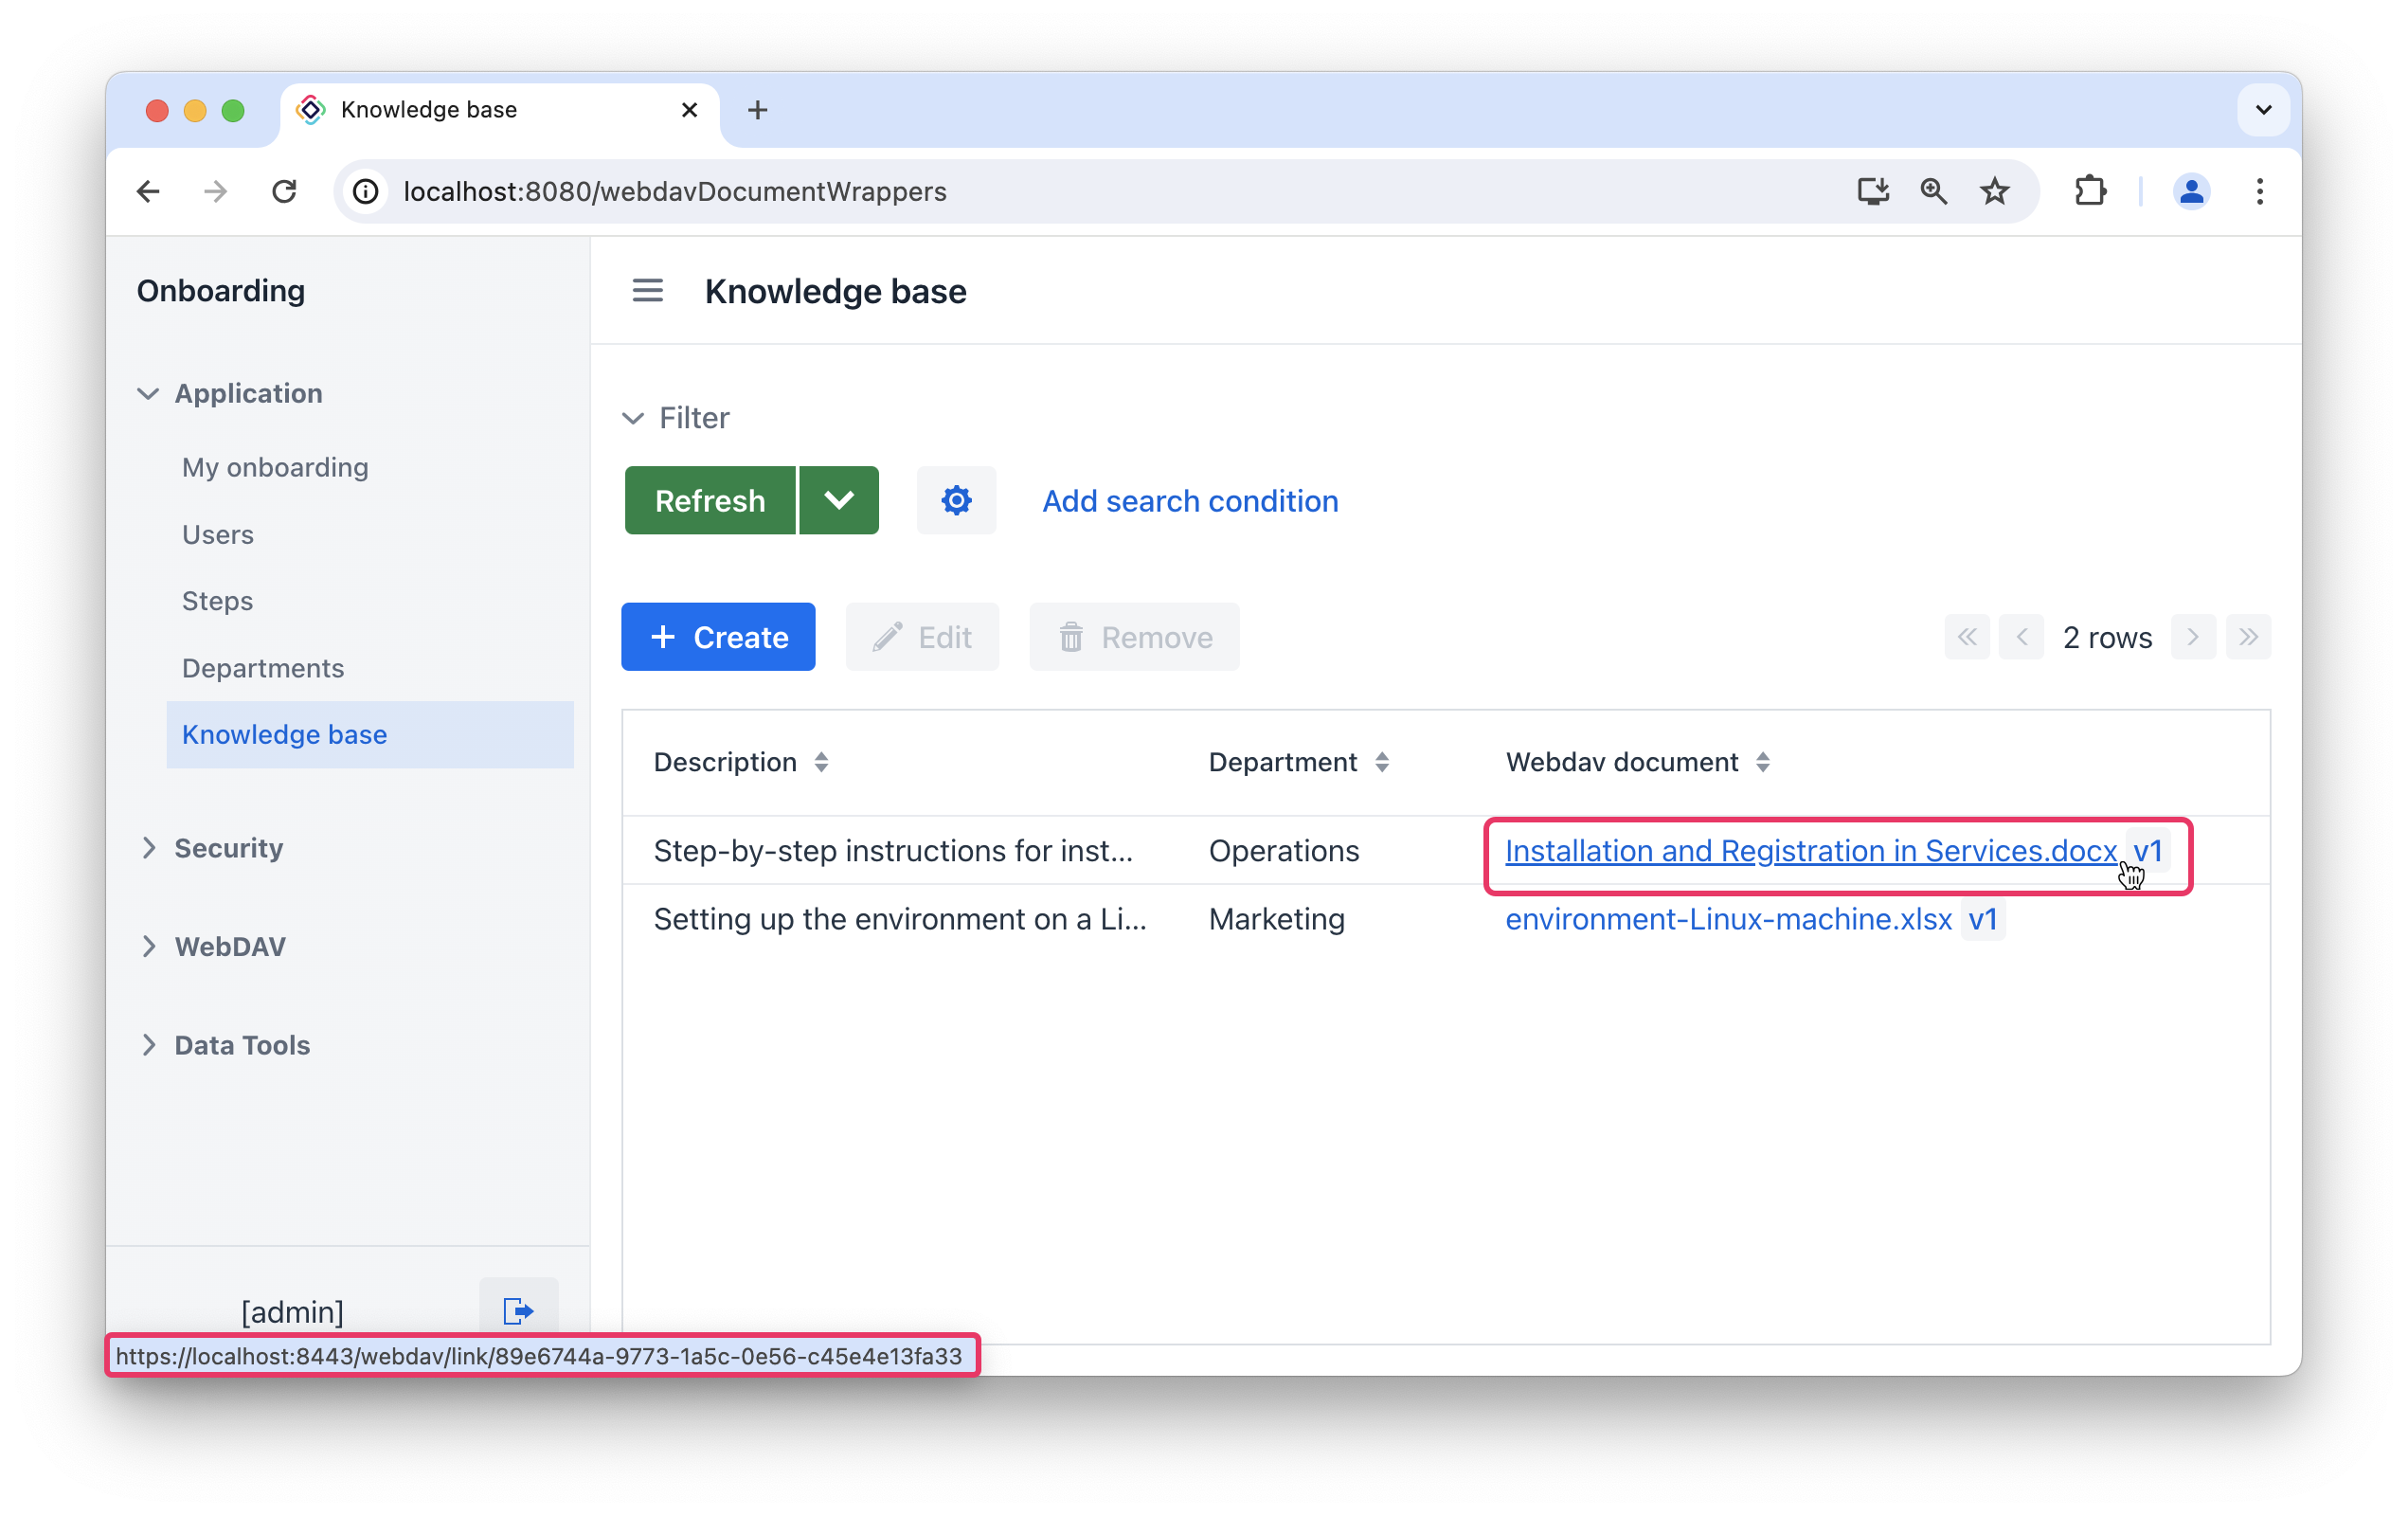
However, when attempting to open the document, the browser will display a message indicating that it failed to establish a connection to the site.
This situation occurs because the necessary configurations have not been made yet. We will discuss this in the next section.
Summary
In this section, you have learned how to utilize components provided by the WebDAV add-on.
You have learned that:
-
The WebDAVDocumentUploadField component includes convenient built-in tools for viewing and uploading WebDAV documents.
-
You can use the WebDavDocumentLink component in a data grid by providing a ComponentRenderer for a column.