virtualList
The virtualList component is designed for displaying lists of items with a complex content. Only the visible portion of items is rendered at a time.
-
XML element:
virtualList -
Java class:
JmixVirtualList
Basics
virtualList is connected to a data container. By default, it shows the instance name of the entity in the container. Using the renderer handler, you can display custom content.
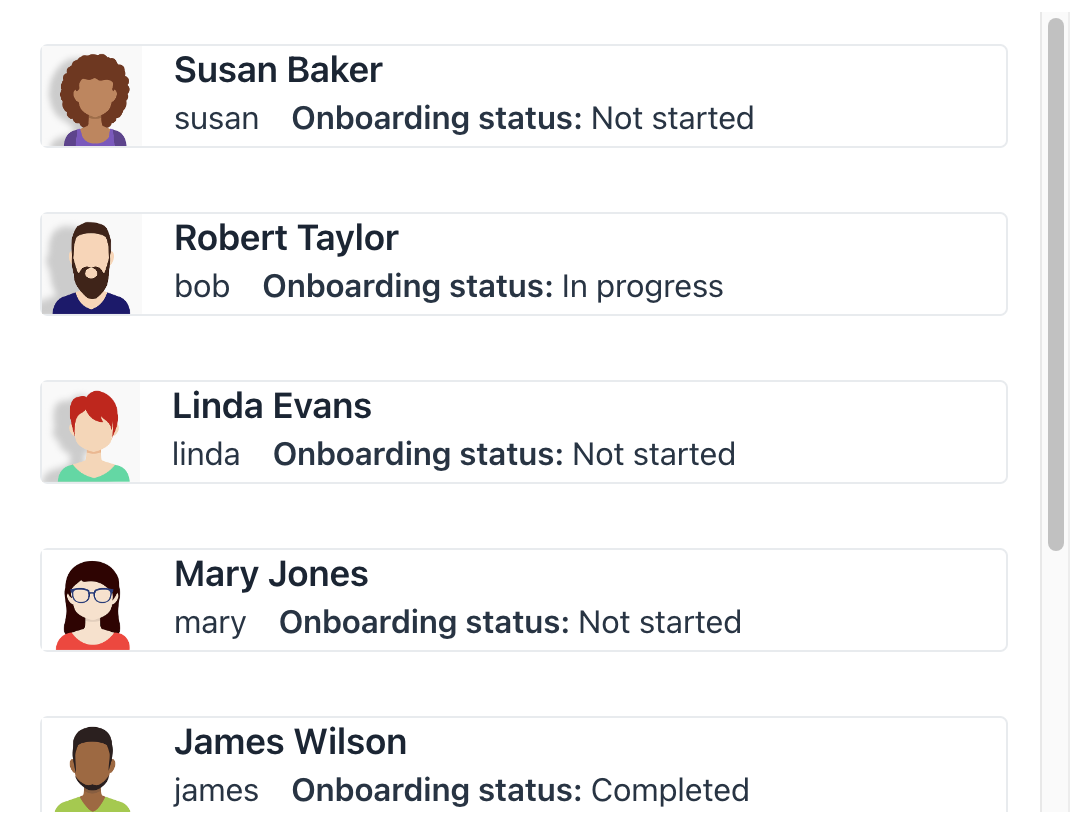
Below is an example of using virtualList in a list view instead of dataGrid:
<data>
    <collection id="usersDc" class="com.company.onboarding.entity.User">
        <loader id="usersDl" readOnly="true">
            <query>
                <![CDATA[select e from User e]]>
            </query>
        </loader>
        <fetchPlan extends="_base"/>
    </collection>
</data>
<layout>
    <virtualList id="virtualList" itemsContainer="usersDc"/>
</layout>
@Autowired
private Messages messages;
@Autowired
protected MetadataTools metadataTools;
@Autowired
private FileStorage fileStorage;
@Autowired
private UiComponents uiComponents;
@Supply(to = "virtualList", subject = "renderer")
private Renderer<User> virtualListRenderer() {
return new ComponentRenderer<>(this::createUserRenderer);
}
protected HorizontalLayout createUserRenderer(User user) {
HorizontalLayout cardLayout = uiComponents.create(HorizontalLayout.class);
cardLayout.setMargin(true);
cardLayout.addClassNames(LumoUtility.Border.ALL,
LumoUtility.BorderColor.CONTRAST_10,
LumoUtility.BorderRadius.MEDIUM);
Image image = uiComponents.create(Image.class);
FileRef fileRef = user.getPicture();
if (fileRef != null) {
image.setWidth("50px");
image.setHeight("50px");
StreamResource streamResource = new StreamResource(
fileRef.getFileName(),
() -> fileStorage.openStream(fileRef));
image.setSrc(streamResource);
}
VerticalLayout infoLayout = new VerticalLayout();
infoLayout.setSpacing(false);
infoLayout.setPadding(false);
HorizontalLayout itemDetailLayout = new HorizontalLayout();
itemDetailLayout.add(new Text(user.getUsername()));
itemDetailLayout.add(new Html(
messages.formatMessage(getClass(), "statusDescription",
user.getOnboardingStatus() == null ? ""
: metadataTools.format(user.getOnboardingStatus()))));
itemDetailLayout.setPadding(false);
itemDetailLayout.setAlignItems(FlexComponent.Alignment.CENTER);
H4 userName = new H4(user.getFirstName() + " " + user.getLastName());
infoLayout.add(userName);
infoLayout.add(itemDetailLayout);
cardLayout.add(image,infoLayout);
return cardLayout;
}Note that items in virtualList can’t be selected or navigated using the keyboard. The standard List Component Actions will not work with virtualList. If needed, define your own actions for CRUD operations.
Inline Editor
You can use virtualList to build an inline editor. Check out an example in the UI Samples application.
Attributes
id - alignSelf - classNames - colspan - css - enabled - focusShortcut - height - itemsContainer - itemsEnum - maxHeight - maxWidth - minHeight - minWidth - tabIndex - visible - width
Handlers
|
Чтобы сгенерировать заглушку обработчика в Jmix Studio, используйте вкладку Handlers панели инспектора Jmix UI, или команду Generate Handler, доступную на верхней панели контроллера экрана и через меню Code → Generate (Alt+Insert / Cmd+N). |
Renderer
A custom renderer for list items can only be set in the view controller using Java code.
You can use the setRenderer() method or @Supply annotation to do this.
-
Example of using
@Supplyannotation:@Supply(to = "usersVirtualList", subject = "renderer") private Renderer<User> usersVirtualListRenderer() { return new ComponentRenderer<>(user -> { Button button = uiComponents.create(Button.class); button.setText(user.getFirstName() + ", " + user.getLastName()); return button; }); } -
Example of using the
setRenderer()method:@Subscribe public void onInit(final InitEvent event) { ComponentRenderer<Button, User> renderer = new ComponentRenderer<>(user -> { Button button = uiComponents.create(Button.class); button.setText(user.getFirstName() + ", " + user.getLastName()); return button; }); usersVirtualList.setRenderer(renderer); }
See Also
See Vaadin Docs for more information.