virtualList
Компонент virtualList предназначен для отображения списков элементов со сложным содержимым. В каждый момент времени рендерится только видимая часть элементов.
-
XML-элемент:
virtualList -
Java-класс:
JmixVirtualList
Основы
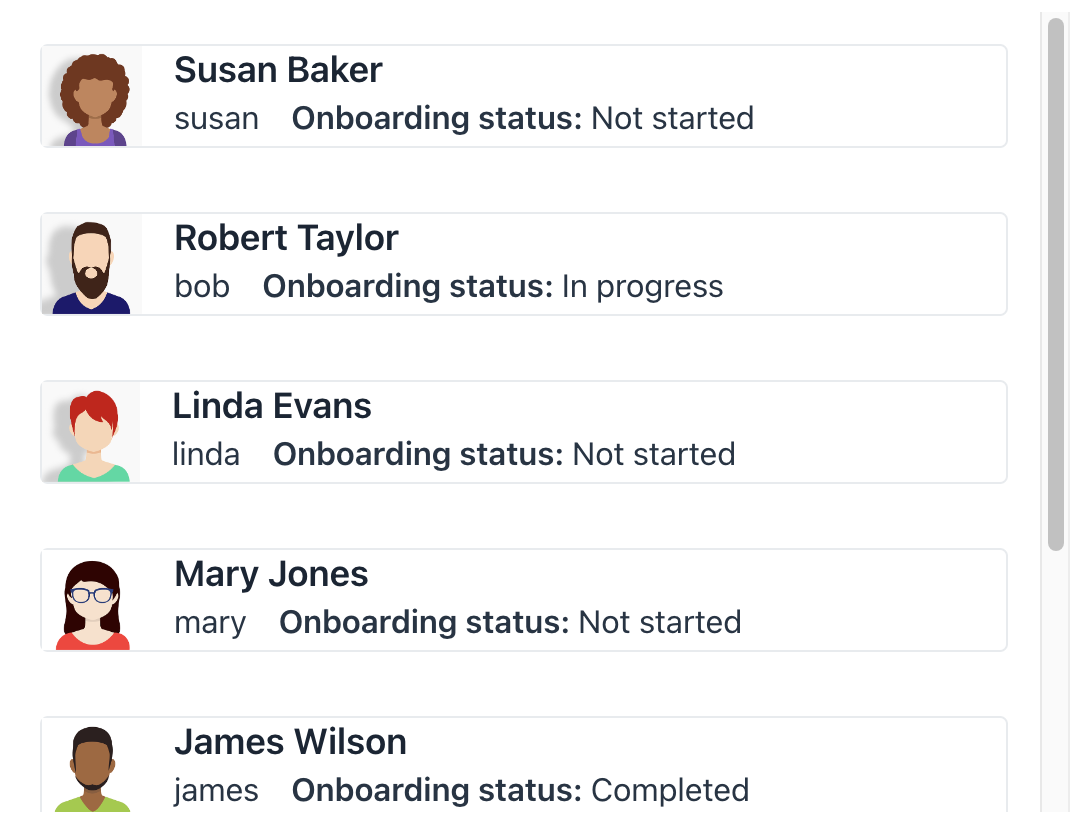
virtualList связывается с контейнером данных. По умолчанию отображается имя экземпляра сущности из контейнера. С помощью обработчика renderer можно выводить пользовательское содержимое.

Альтернативно можно рендерить элементы с помощью вложенного элемента fragmentRenderer. Подробнее смотрите раздел Рендерер фрагментов.
Ниже приведен пример использования virtualList в списке вместо dataGrid:
<data>
    <collection id="usersDc" class="com.company.onboarding.entity.User">
        <loader id="usersDl" readOnly="true">
            <query>
                <![CDATA[select e from User e]]>
            </query>
        </loader>
        <fetchPlan extends="_base"/>
    </collection>
</data>
<layout>
    <virtualList id="virtualList" itemsContainer="usersDc"/>
</layout>
@Autowired
private Messages messages;
@Autowired
protected MetadataTools metadataTools;
@Autowired
private FileStorage fileStorage;
@Autowired
private UiComponents uiComponents;
@Supply(to = "virtualList", subject = "renderer")
private Renderer<User> virtualListRenderer() {
return new ComponentRenderer<>(this::createUserRenderer);
}
protected HorizontalLayout createUserRenderer(User user) {
HorizontalLayout cardLayout = uiComponents.create(HorizontalLayout.class);
cardLayout.setMargin(true);
cardLayout.addClassNames(LumoUtility.Border.ALL,
LumoUtility.BorderColor.CONTRAST_10,
LumoUtility.BorderRadius.MEDIUM);
Image image = uiComponents.create(Image.class);
FileRef fileRef = user.getPicture();
if (fileRef != null) {
image.setWidth("50px");
image.setHeight("50px");
StreamResource streamResource = new StreamResource(
fileRef.getFileName(),
() -> fileStorage.openStream(fileRef));
image.setSrc(streamResource);
}
VerticalLayout infoLayout = new VerticalLayout();
infoLayout.setSpacing(false);
infoLayout.setPadding(false);
HorizontalLayout itemDetailLayout = new HorizontalLayout();
itemDetailLayout.add(new Text(user.getUsername()));
itemDetailLayout.add(new Html(
messages.formatMessage(getClass(), "statusDescription",
user.getOnboardingStatus() == null ? ""
: metadataTools.format(user.getOnboardingStatus()))));
itemDetailLayout.setPadding(false);
itemDetailLayout.setAlignItems(FlexComponent.Alignment.CENTER);
H4 userName = new H4(user.getFirstName() + " " + user.getLastName());
infoLayout.add(userName);
infoLayout.add(itemDetailLayout);
cardLayout.add(image,infoLayout);
return cardLayout;
}Обратите внимание, что элементы в virtualList нельзя выделять или перемещаться по ним с помощью клавиатуры. Стандартные действия списка не работают с virtualList. При необходимости определите собственные действия для CRUD-операций.
Встроенный редактор
Компонент virtualList можно использовать для создания встроенного редактора. Пример реализации доступен в приложении UI Samples.
Атрибуты
id - alignSelf - classNames - colspan - css - enabled - focusShortcut - height - itemsContainer - itemsEnum - maxHeight - maxWidth - minHeight - minWidth - tabIndex - visible - width
Обработчики
|
Чтобы сгенерировать заглушку обработчика в Jmix Studio, используйте вкладку Handlers панели инспектора Jmix UI, или команду Generate Handler, доступную на верхней панели контроллера экрана и через меню Code → Generate (Alt+Insert / Cmd+N). |
Renderer
Пользовательский рендерер для элементов списка можно задать только в контроллере экрана с использованием Java-кода.
Для этого можно использовать метод setRenderer() или аннотацию @Supply.
-
Пример использования аннотации
@Supply:@Supply(to = "usersVirtualList", subject = "renderer") private Renderer<User> usersVirtualListRenderer() { return new ComponentRenderer<>(user -> { Button button = uiComponents.create(Button.class); button.setText(user.getFirstName() + ", " + user.getLastName()); return button; }); } -
Пример использования метода
setRenderer():@Subscribe public void onInit(final InitEvent event) { ComponentRenderer<Button, User> renderer = new ComponentRenderer<>(user -> { Button button = uiComponents.create(Button.class); button.setText(user.getFirstName() + ", " + user.getLastName()); return button; }); usersVirtualList.setRenderer(renderer); }
Смотрите также
Смотрите документацию Vaadin для получения дополнительной информации.