Начало работы с отчетами
Этот раздел поможет вам быстро ознакомиться с базовой функциональностью дополнения Reports, создав пару отчетов с минимальными усилиями.
Примеры в этом разделе основаны на приложении Onboarding, созданном в Самоучителе. Вы создадите два отчета:
-
User Profile (Профиль пользователя): Показывает основные данные и список этапов онбординга для выбранного пользователя.
-
List of Users (Список пользователей): Отображает список пользователей и их роли.
| Также ознакомьтесь с руководством Report Generation для получения практических примеров отчетов со сложной структурой и различными типами вывода. |
Настройка проекта
-
Скачайте и распакуйте исходный код проекта Jmix Onboarding или клонируйте его с помощью Git:
git clone https://github.com/jmix-framework/jmix-onboarding.git
-
Откройте проект
jmix-onboardingв Studio, как описано в разделе Открытие существующего проекта. -
Добавьте дополнение Reports в проект, как описано в разделе Установка.
Создание отчета во время выполнения
В этом разделе вы создадите отчет User Profile (Профиль пользователя) с помощью мастера, доступного в работающем приложении. Определение отчета и шаблон будут храниться в базе данных.
Запустите приложение, используя конфигурацию запуска/отладки Onboarding Jmix Application в вашей IDE, перейдите по адресу http://localhost:8080 и войдите как admin с паролем admin.
-
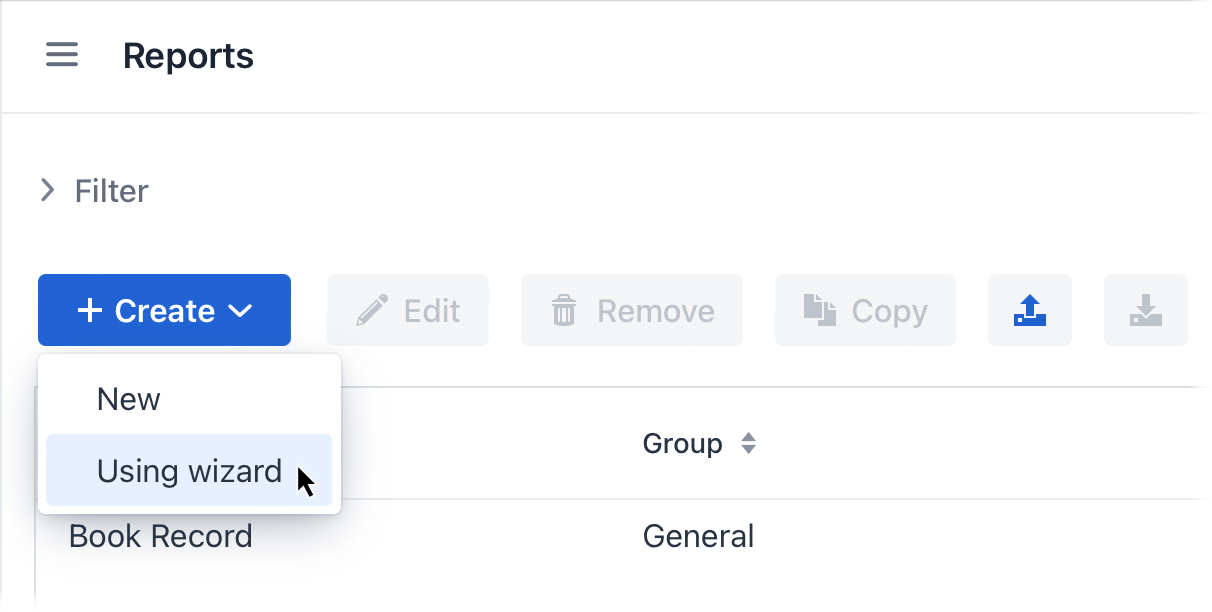
Откройте экран Reports → Reports и запустите мастер создания отчетов, нажав Create → Using wizard.
Введите следующие параметры на первом шаге мастера:
-
Entity:
User -
Template type:
DOCX -
Report name:
User Profile -
Report code:
user-profile -
Report type:
Report for single entity
-
-
На следующем шаге мастера укажите атрибуты сущности
Userи связанной сущностиDepartment, которые должны отображаться в отчете. Эти атрибуты сформируют "простой регион".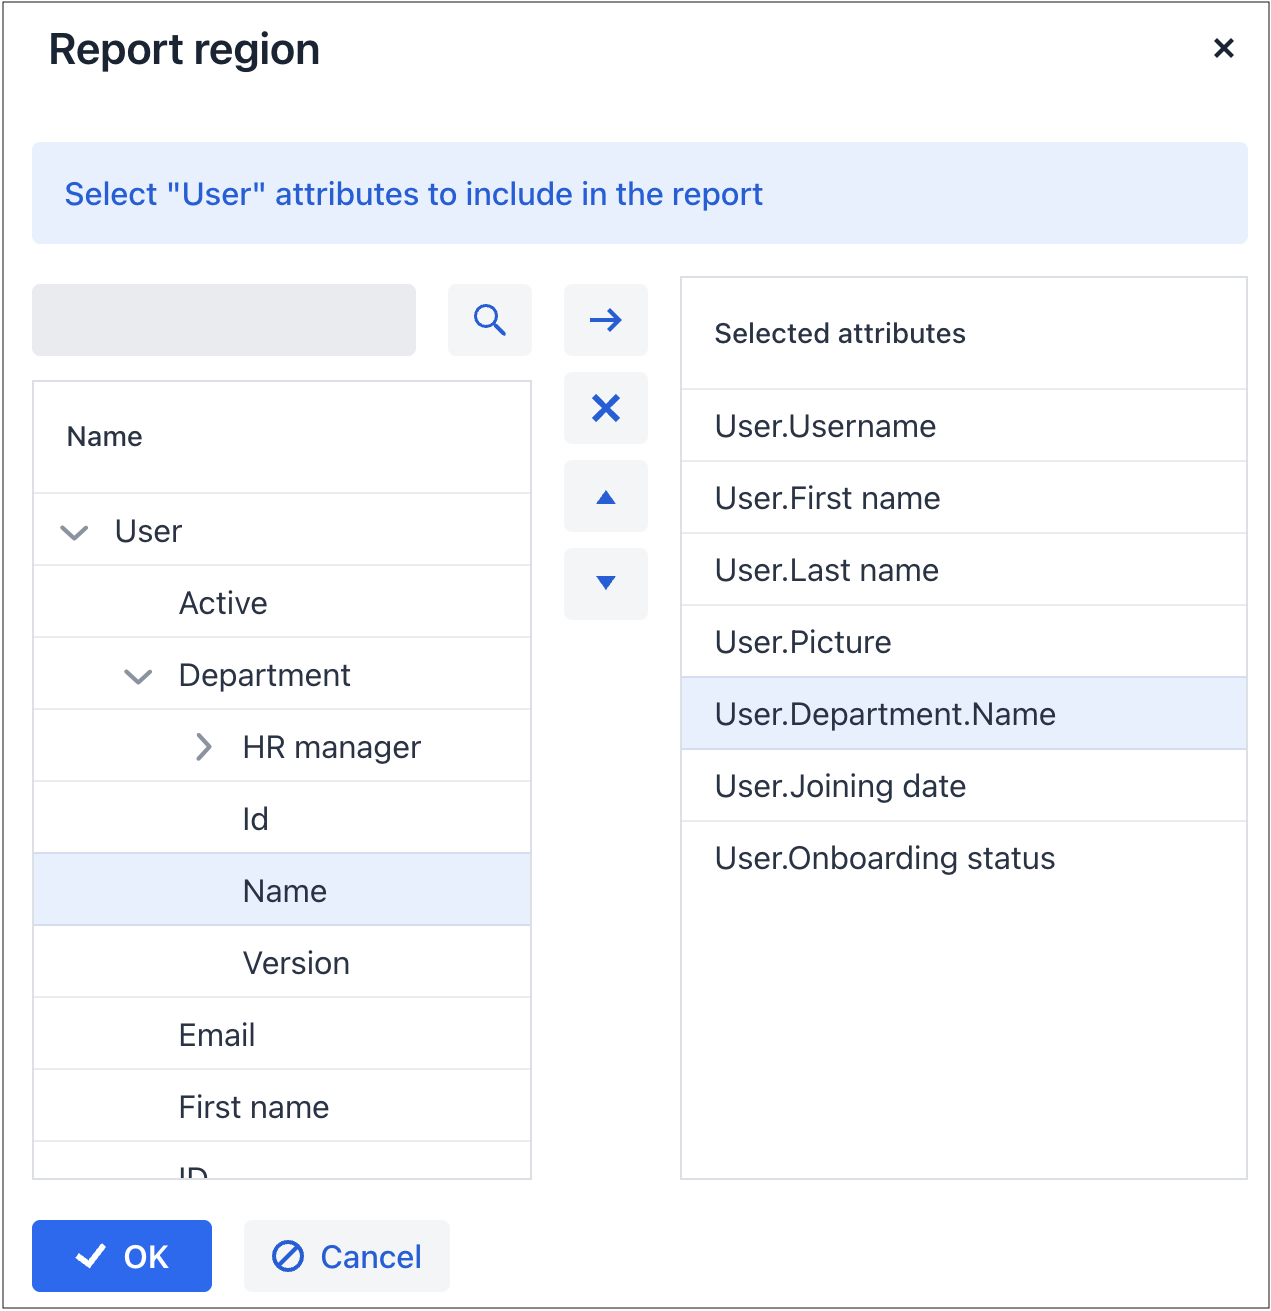
Нажмите OK, чтобы перейти к следующему шагу: редактированию регионов отчета.
-
Появившийся экран содержит список именованных регионов (или бэндов), которые отображают связанные данные. Если сущность включает атрибуты-коллекции, кнопка Add tabulated region становится активной.
Нажмите кнопку Add tabulated region, чтобы создать бэнд для отображения списка этапов онбординга данного экземпляра
User.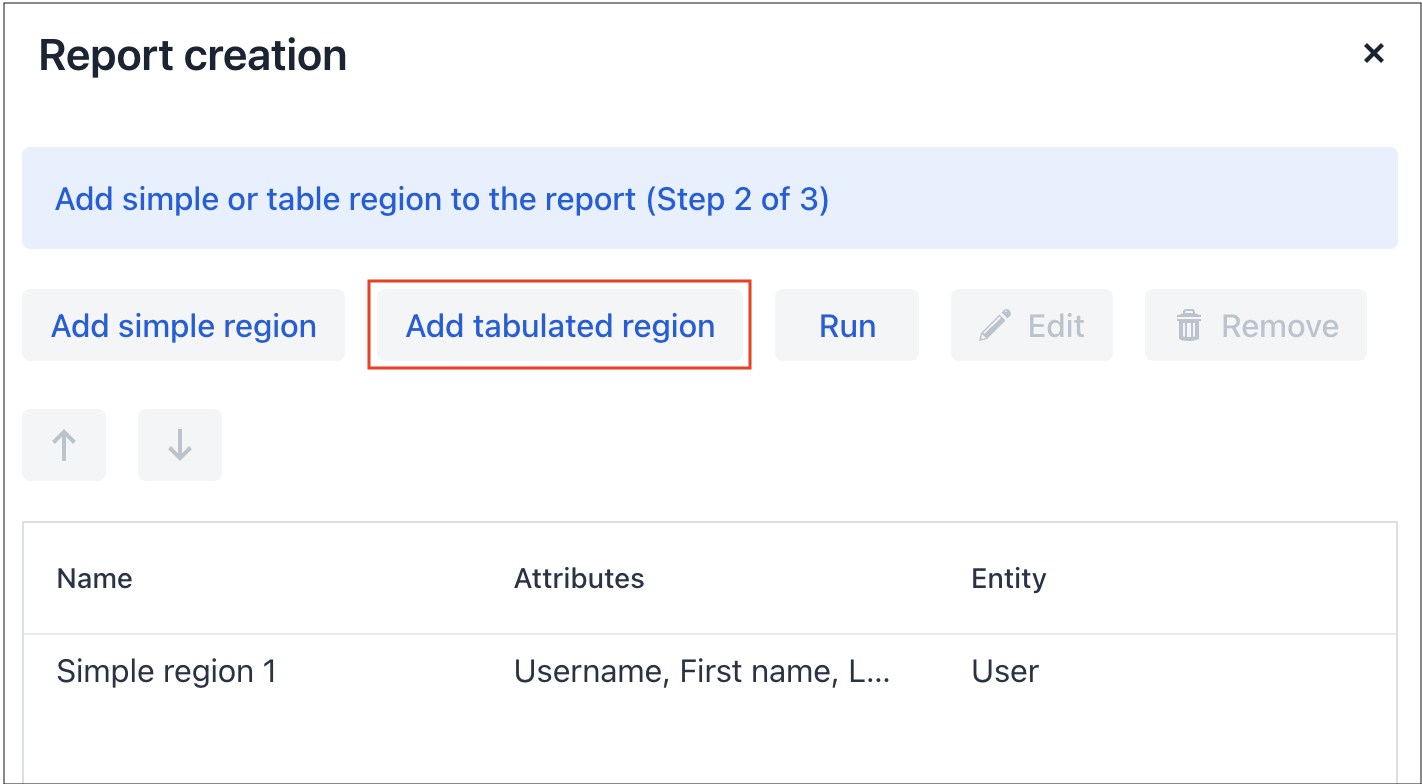
Выберите
User.Stepsв диалоговом окне Select attributes.Затем выберите атрибуты
Steps.Step.Name,Due dateиCompleted date.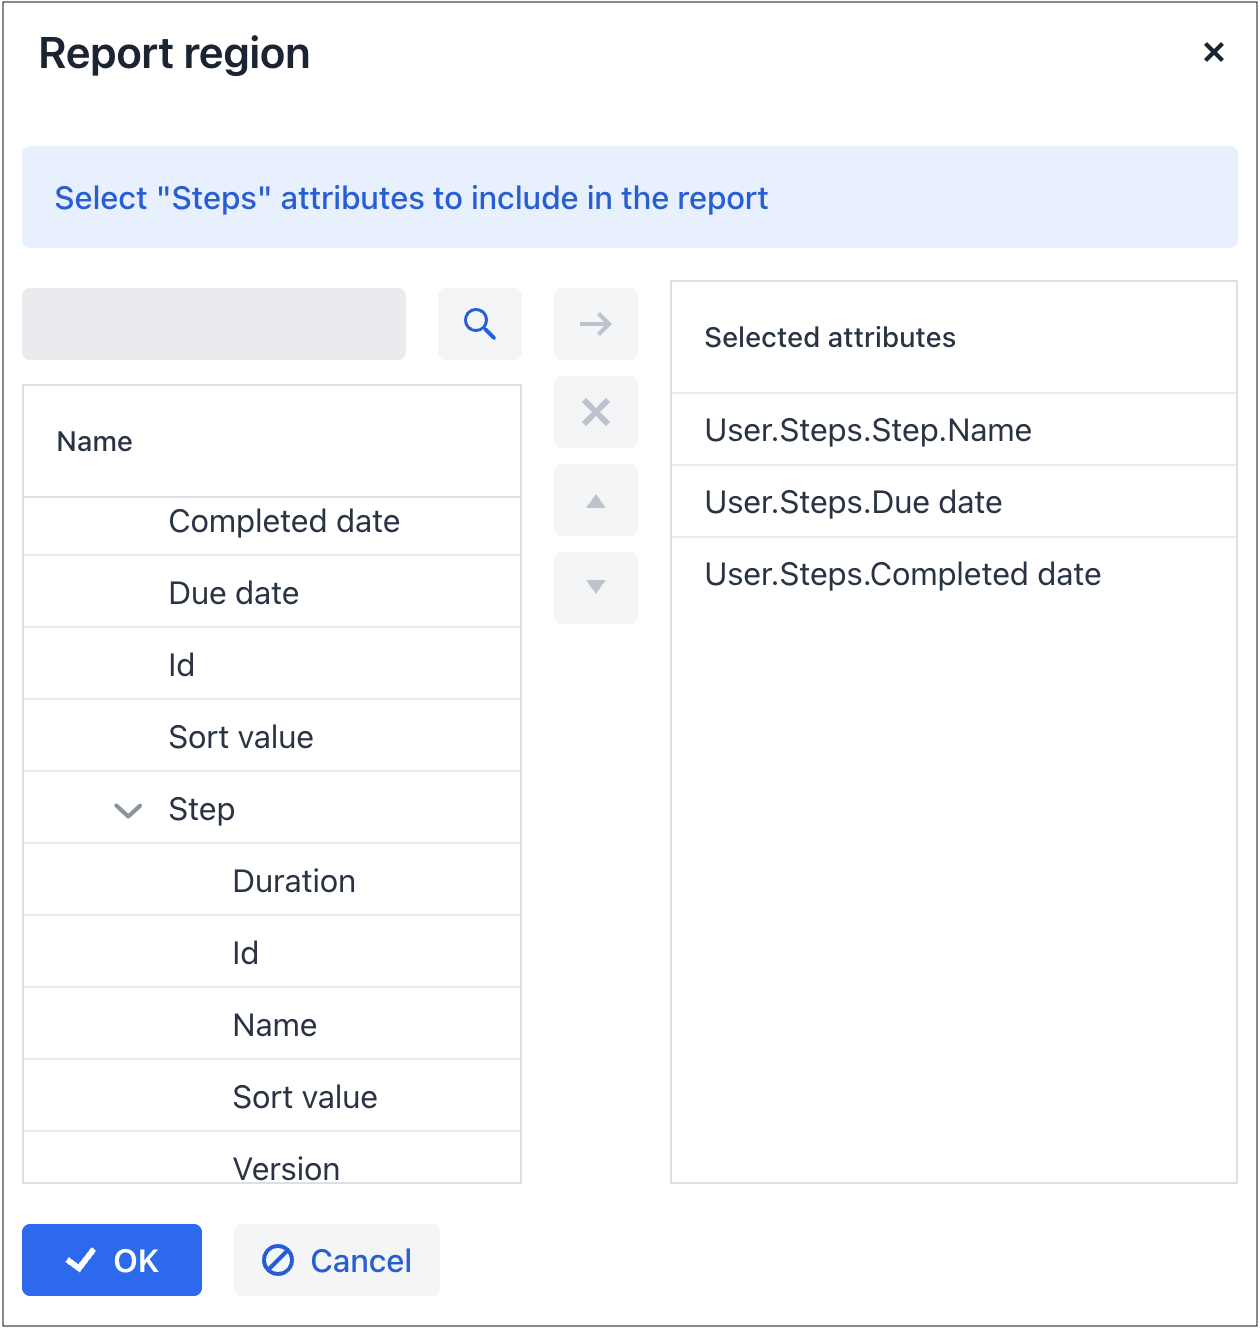
Нажмите OK, затем Next, чтобы перейти к финальному шагу, где можно настроить имя выходного файла и формат. Нажмите Save.
-
Мастер завершает работу, и открывается экран деталей отчета. Вы можете изучить созданную структуру отчета и запустить отчет.
-
Чтобы отобразить изображение пользователя в отчете, создайте формат значения для этого поля. Перейдите на вкладку Value formats и нажмите Create. Введите
User1.pictureв поле Name и${imageFileId:200x200}в поле Format string: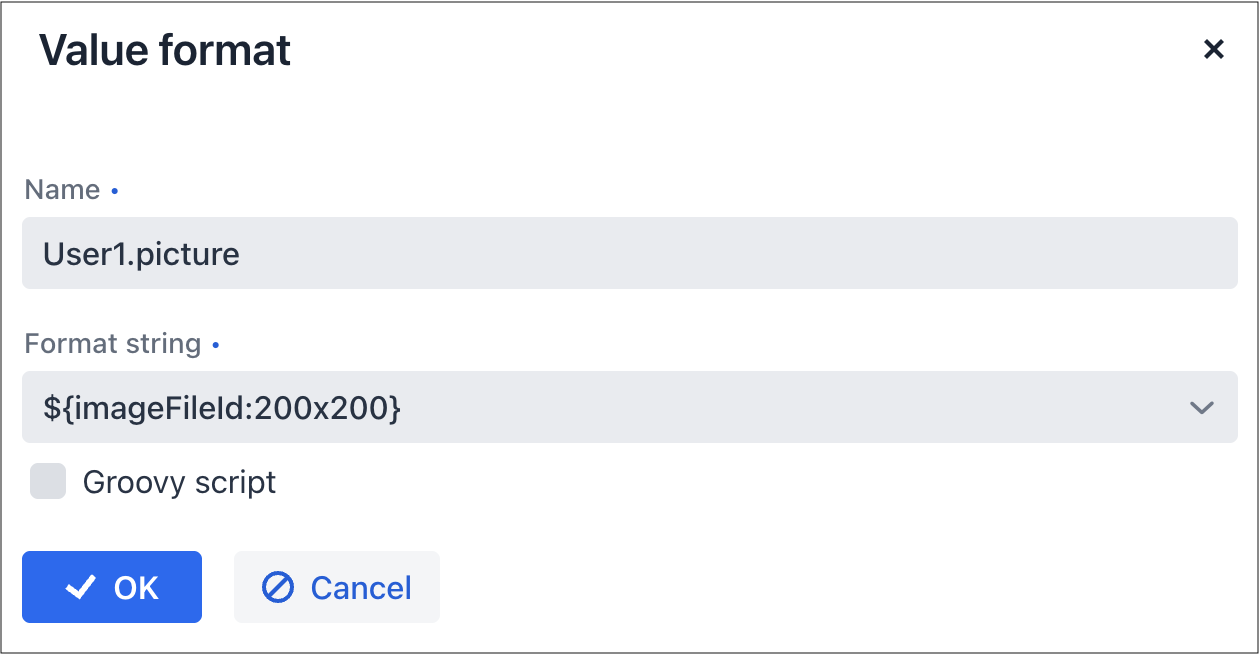
Сохраните формат значения.
-
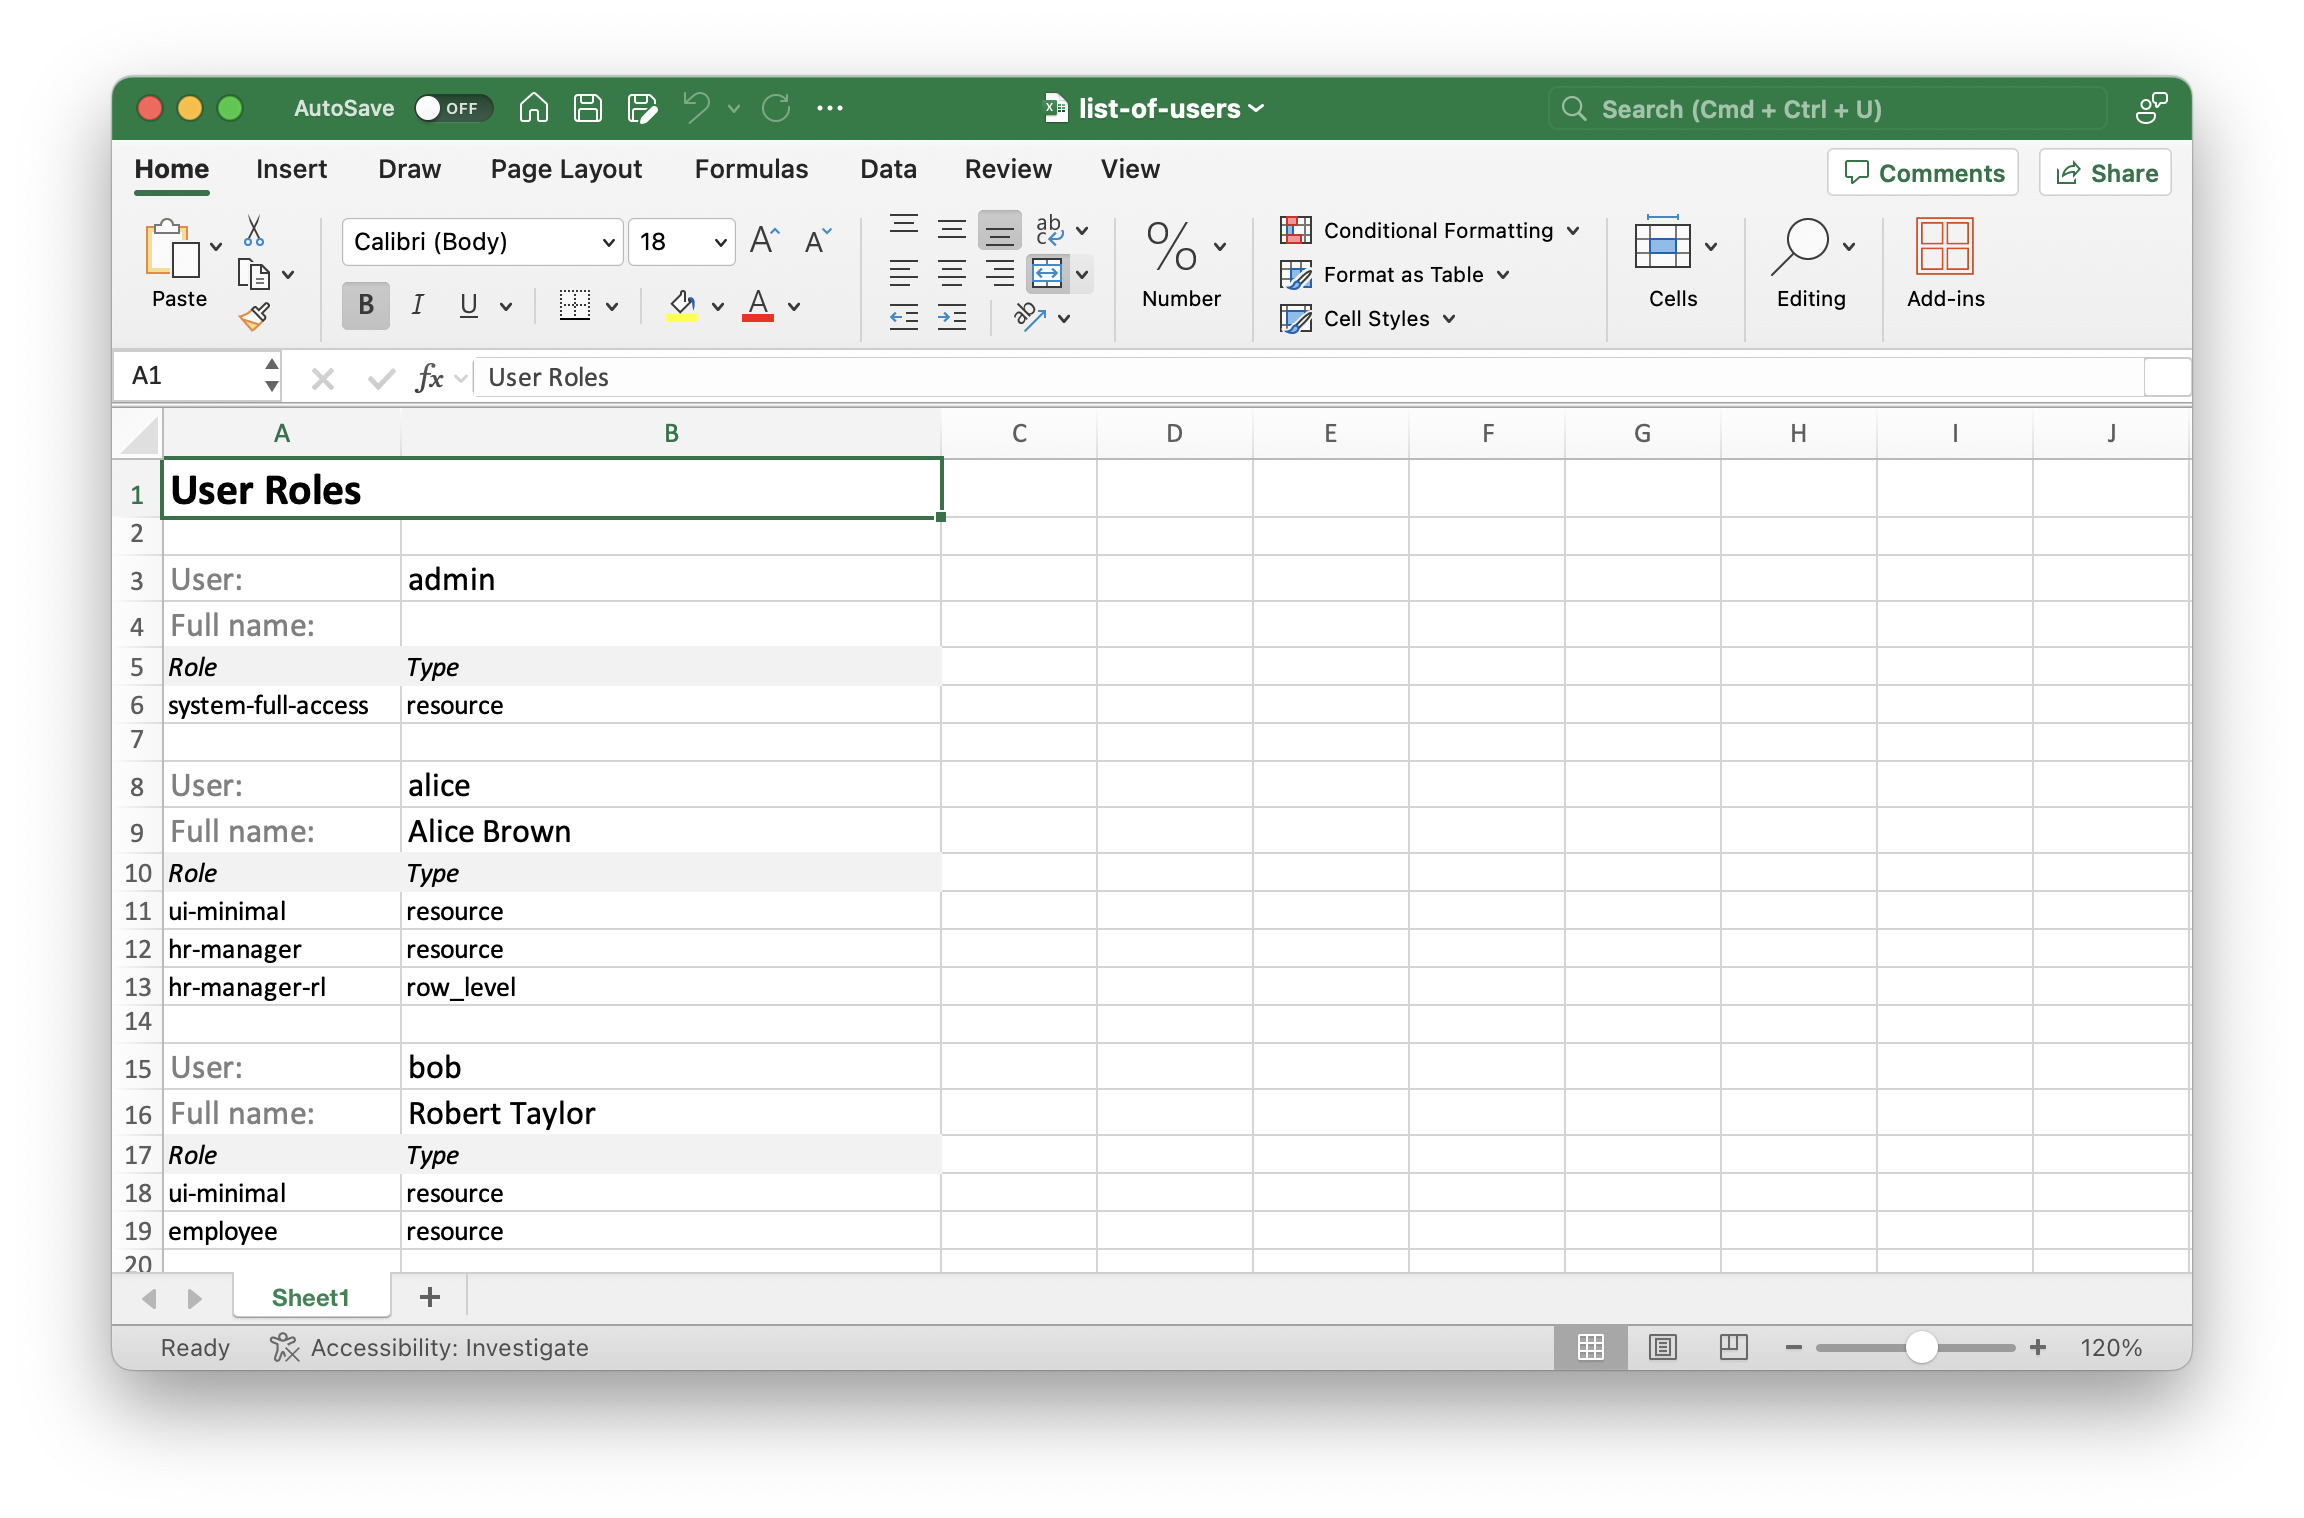
Вы можете настроить визуальное представление отчета, изменив шаблон на вкладке Templates. Ниже мы покажем вывод, сгенерированный из шаблона по умолчанию, созданного мастером автоматически.
-
Нажмите Run и выберите пользователя в диалоговом окне Input parameters.
Отчет будет сгенерирован и загружен вашим браузером как файл
User Profile.docx.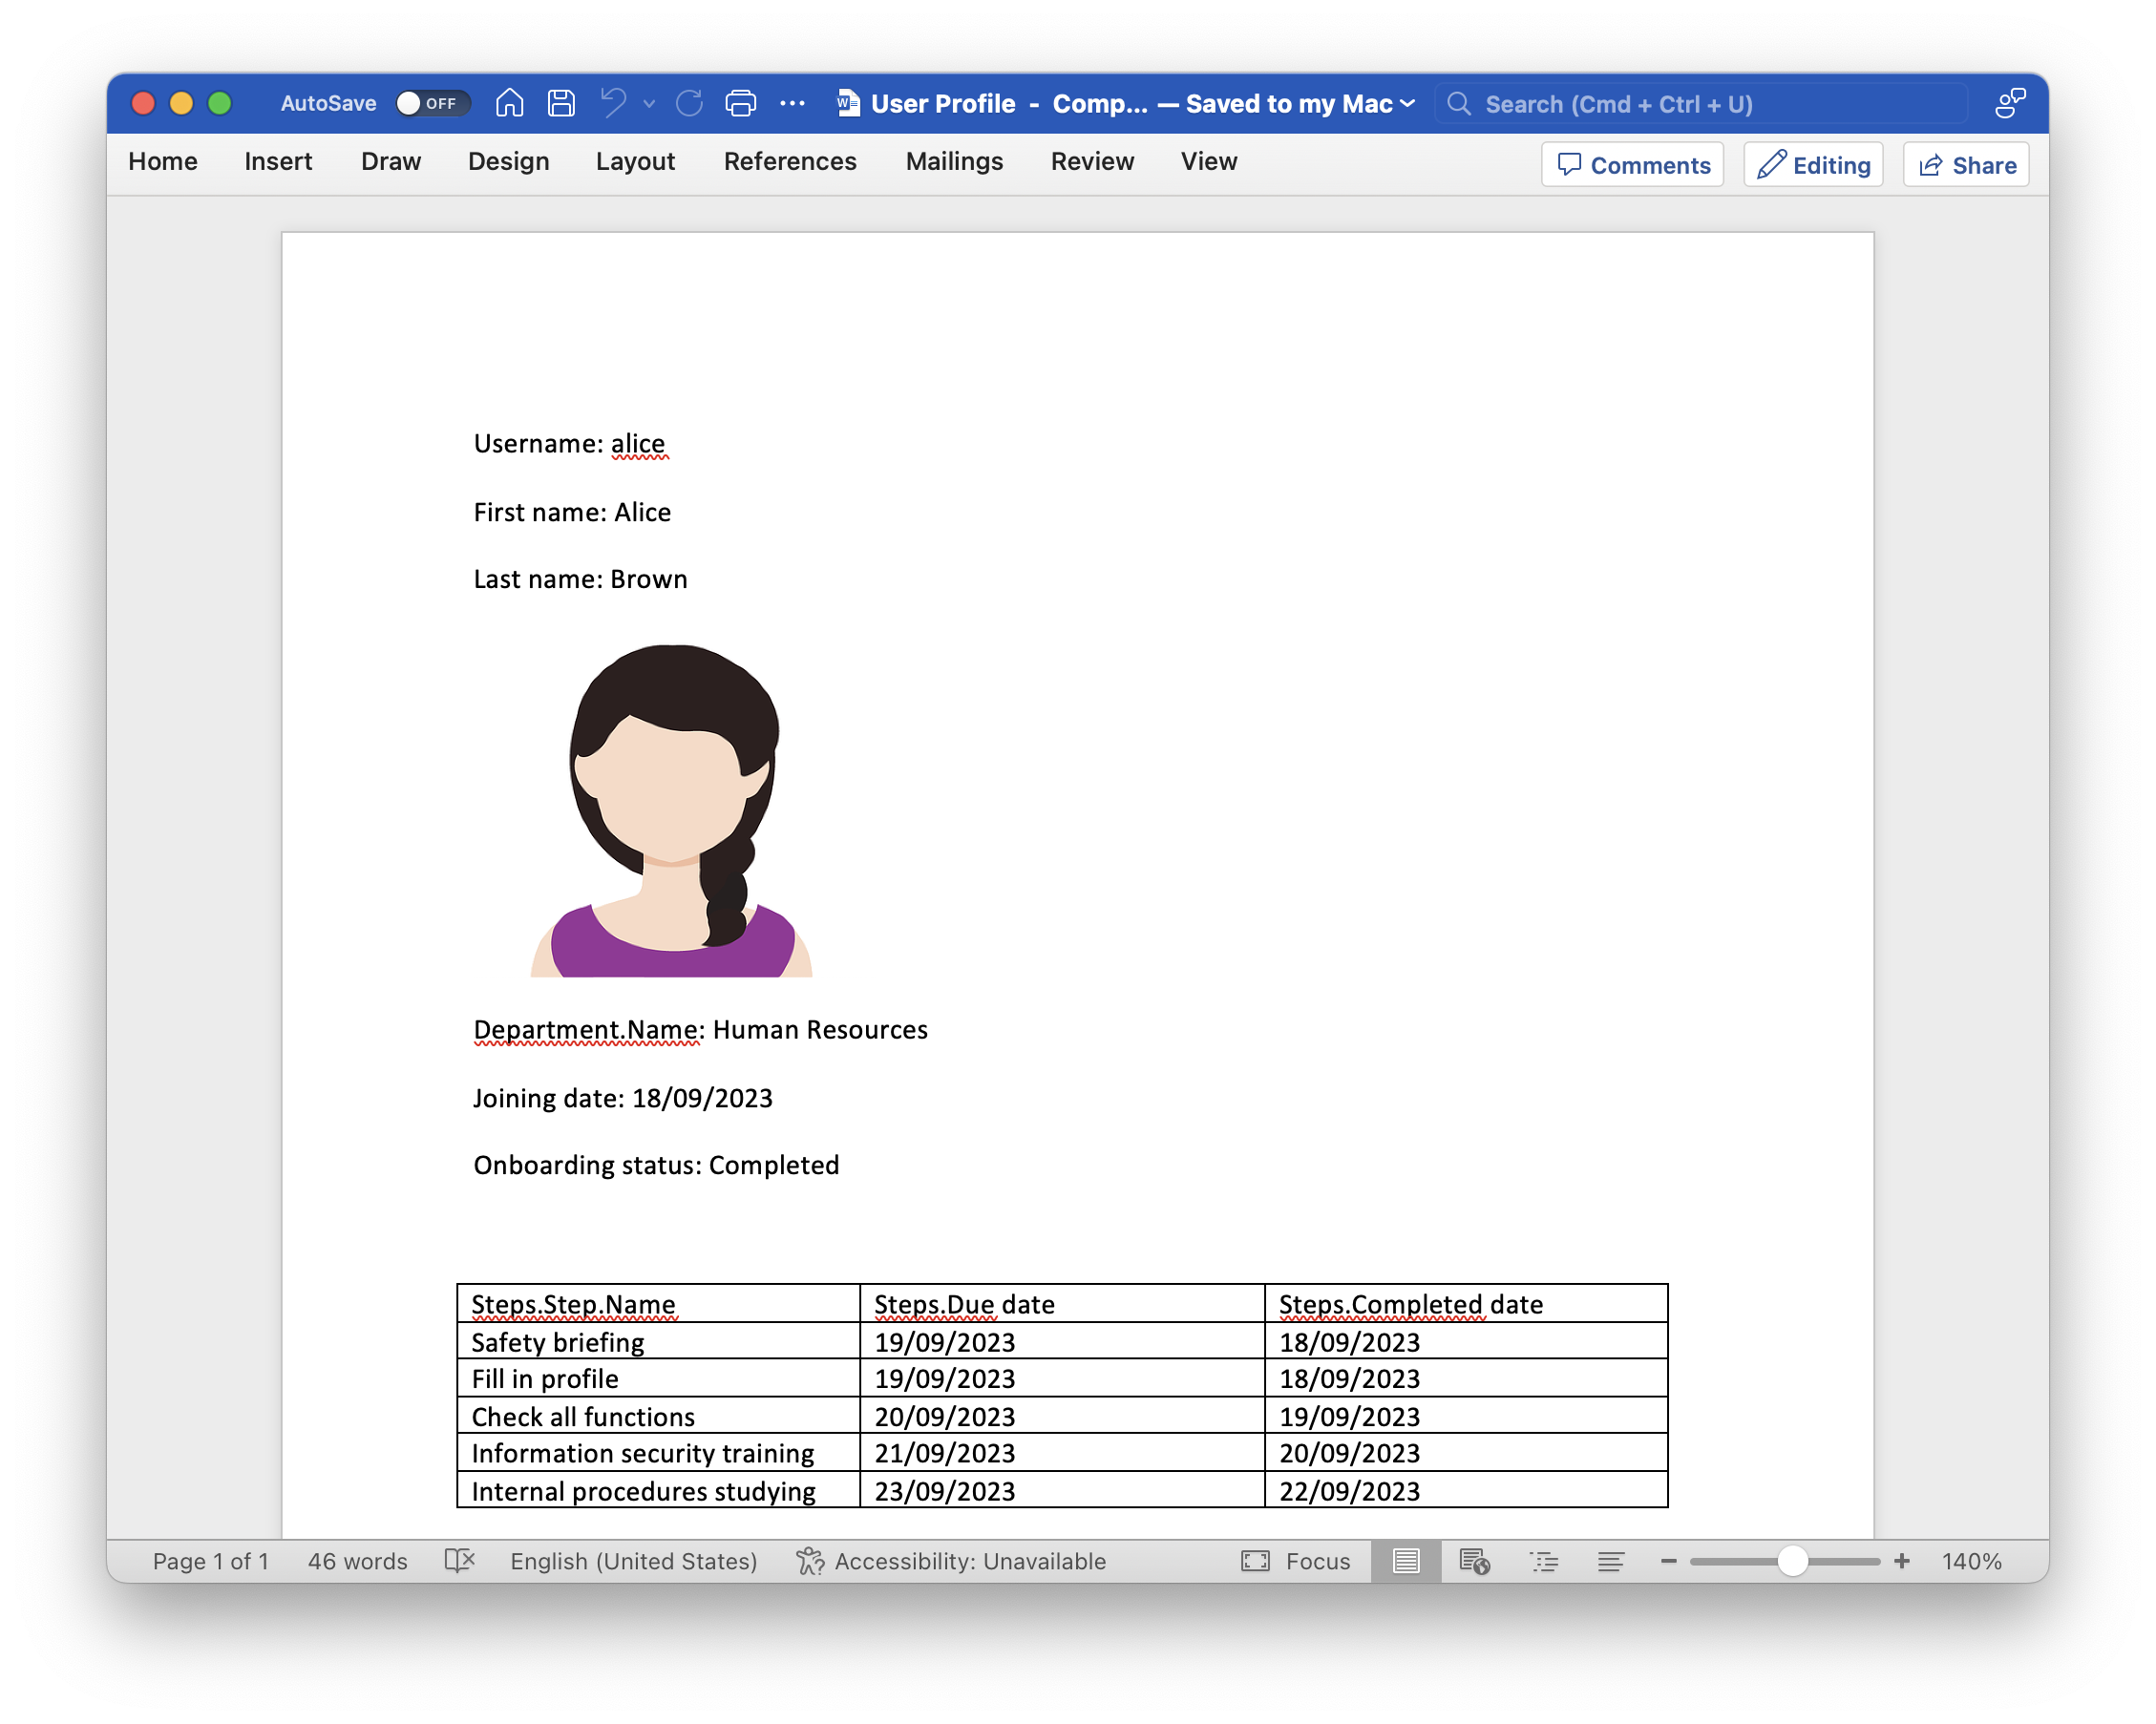
-
Теперь давайте настроим приложение для запуска отчета из экрана Users.
Перейдите на вкладку Roles and views экрана деталей отчета и добавьте
User.listв список Views: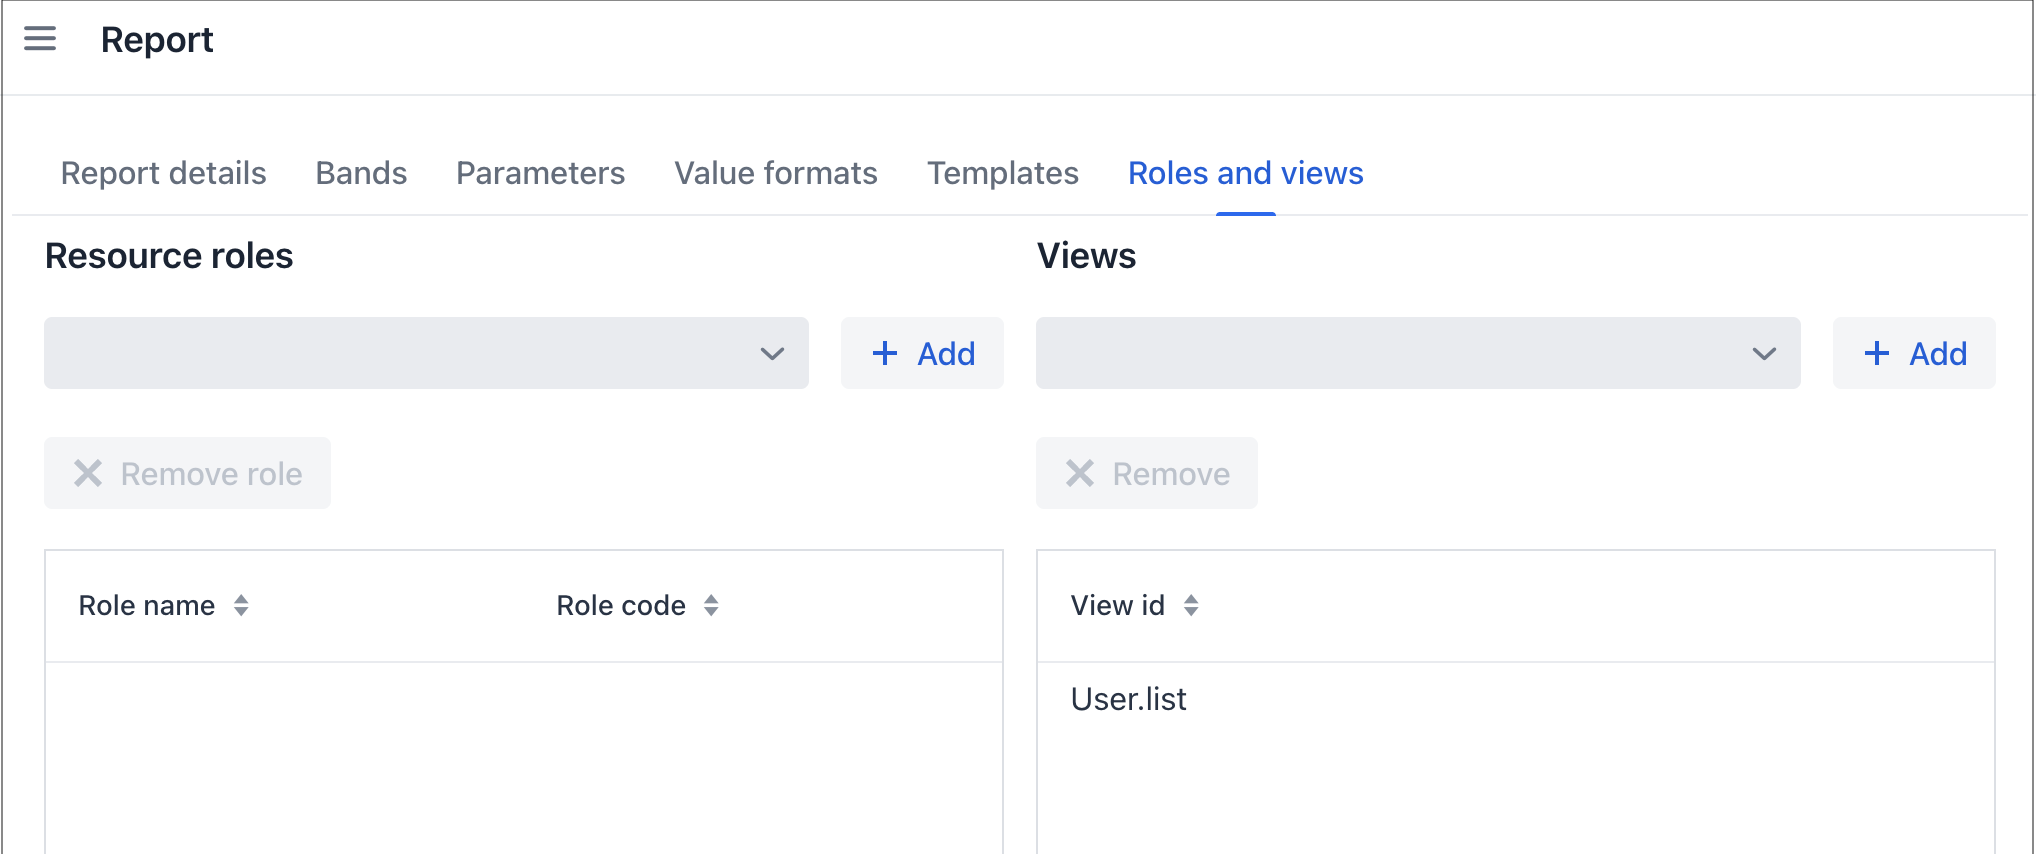
Нажмите OK, чтобы сохранить определение отчета.
Откройте
user-list-view.xmlв вашей IDE и добавьте действие типаreport_runListEntityReportи соответствующую кнопку в контейнер экрана:src/main/resources/com/company/onboarding/view/user/user-list-view.xml<hbox id="buttonsPanel" classNames="buttons-panel"> <!-- ... --> <button action="usersDataGrid.runListEntityReport"/> </hbox> <dataGrid id="usersDataGrid" width="100%" minHeight="20em" dataContainer="usersDc"> <actions> <!-- ... --> <action id="runListEntityReport" type="report_runListEntityReport"/>Убедитесь, что экран обновлен через hot deploy, или перезапустите приложение. Откройте экран Users, выберите пользователя в таблице данных и нажмите кнопку Print reports. Отчет для выбранного пользователя будет сгенерирован и загружен.
Создание отчета во время разработки
В этом разделе вы создадите отчет List of Users (Список пользователей) в Studio. Определение отчета и шаблон будут храниться в исходных кодах приложения.
| Мастер в Studio в настоящее время не может настроить структуру и поля создаваемого отчета так же, как это делает мастер, доступный в работающем приложении. Он просто создает рабочий пример, который отображает пользователей приложения и их роли, независимо от того, как вы вызовете отчет. |
-
В окне Jmix нажмите New (+) → Report Definition. На первом шаге мастера New Report Definition введите
ListOfUsersв поле Class Name: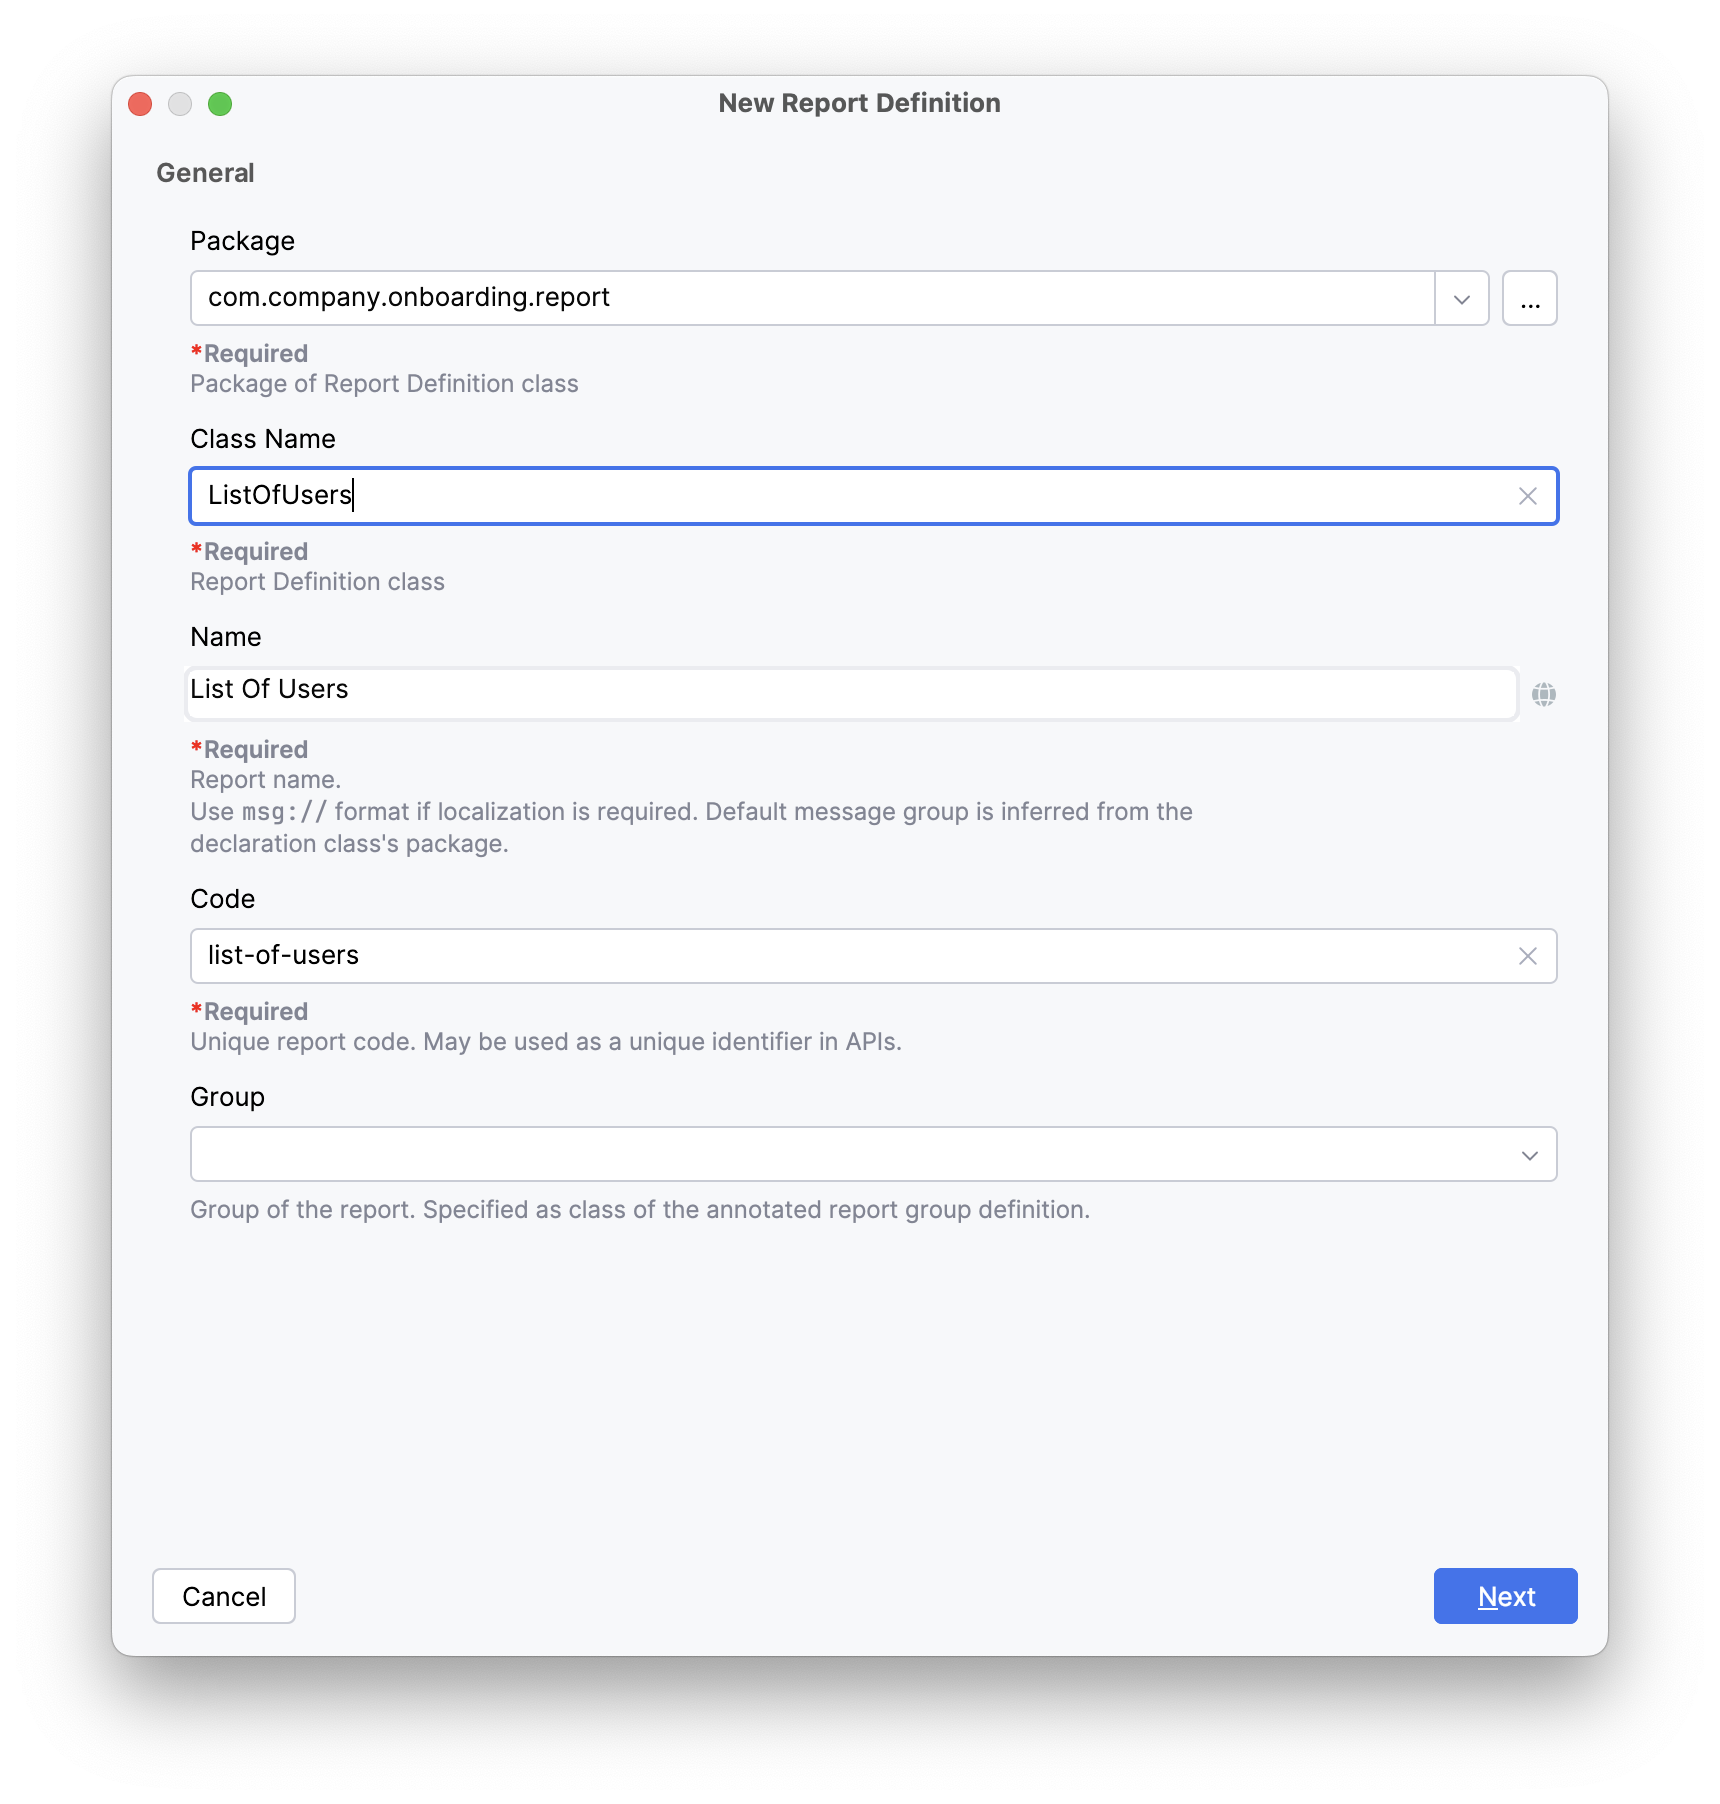
-
На шаге Additional Parameters оставьте все поля пустыми и убедитесь, что установлен флажок Generate code and template for printing the list of users and their roles:

-
На шаге Availability мастера добавьте
UserListViewв список Available in Views: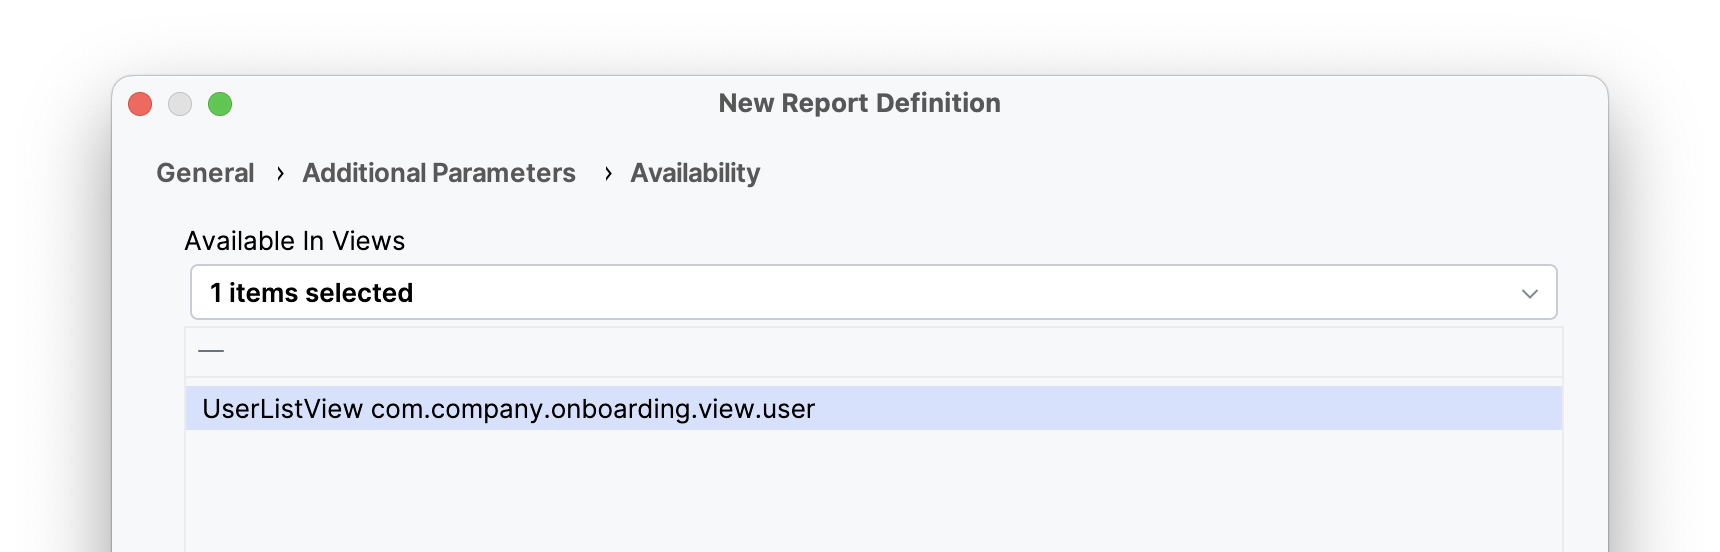
-
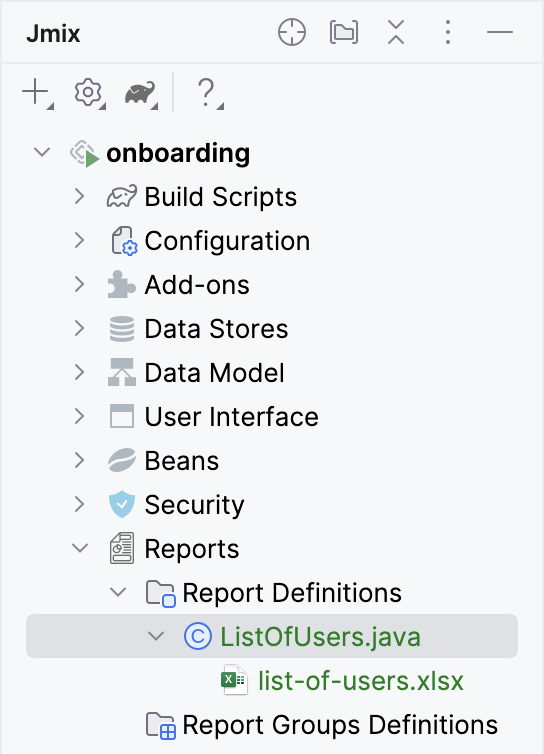
После завершения работы мастера созданный класс отчета и шаблон доступны в разделе Report Definitions окна Jmix:
Класс отчета определяет структуру отчета с использованием аннотаций и включает метод для загрузки списка пользователей. Вложенный бэнд
Rolesвыбирает роли пользователей с помощью SQL.src/main/java/com/company/onboarding/report/ListOfUsers.javapackage com.company.onboarding.report; import com.company.onboarding.entity.User; import com.company.onboarding.view.user.UserListView; import io.jmix.core.DataManager; import io.jmix.core.Sort; import io.jmix.core.querycondition.PropertyCondition; import io.jmix.reports.annotation.*; import io.jmix.reports.entity.DataSetType; import io.jmix.reports.entity.ParameterType; import io.jmix.reports.entity.ReportOutputType; import io.jmix.reports.yarg.loaders.ReportDataLoader; import java.util.HashMap; import java.util.List; import java.util.Map; @ReportDef( code = "list-of-users", name = "List Of Users" ) @AvailableInViews(viewClasses = UserListView.class) @TemplateDef( isDefault = true, code = "DEFAULT", filePath = "com/company/onboarding/report/list-of-users.xlsx", outputType = ReportOutputType.XLSX, outputNamePattern = "list-of-users.xlsx" ) // >>> begin example code @InputParameterDef( alias = "username", name = "Username contains (leave empty to select all)", type = ParameterType.TEXT ) @BandDef( name = "Root", root = true ) @BandDef( name = "Header", parent = "Root" ) @BandDef( name = "Users", parent = "Root", dataSets = @DataSetDef( name = "users", type = DataSetType.DELEGATE ) ) @BandDef( name = "Roles", parent = "Users", dataSets = @DataSetDef( name = "roles", type = DataSetType.SQL, query = """ select ra.role_code as "role", ra.role_type as "type" from sec_role_assignment ra where ra.username = ${Users.username}""" ) ) // <<< end example code public class ListOfUsers { private final DataManager dataManager; public ListOfUsers(DataManager dataManager) { this.dataManager = dataManager; } // >>> begin example code @DataSetDelegate(name = "users") public ReportDataLoader usersDataLoader() { return (reportQuery, parentBand, params) -> { List<User> users = dataManager.load(User.class) .condition(PropertyCondition.contains("username", params.get("username")).skipNullOrEmpty()) .sort(Sort.by("username")) .list(); return users.stream() .map(user -> { Map<String, Object> map = new HashMap<>(); map.put("username", user.getUsername()); map.put("firstName", user.getFirstName()); map.put("lastName", user.getLastName()); return map; }) .toList(); }; } // <<< end example code } -
Теперь вы можете запустить отчет из экранов Reports и Run report.
-
Чтобы запустить отчет из экрана Users, откройте
user-list-view.xmlи добавьте действие типаreport_runReportи соответствующую кнопку в контейнер экрана:src/main/resources/com/company/onboarding/view/user/user-list-view.xml<hbox id="buttonsPanel" classNames="buttons-panel"> <!-- ... --> <button action="usersDataGrid.runReport"/> </hbox> <dataGrid id="usersDataGrid" width="100%" minHeight="20em" dataContainer="usersDc"> <actions> <!-- ... --> <action id="runReport" type="report_runReport"/>Убедитесь, что экран обновлен через hot deploy, или перезапустите приложение. Откройте экран Users и нажмите кнопку Run report. Вы увидите диалоговое окно Run report со списком отчетов, доступных в экране Users.