Начало работы с Email
В этом разделе представлен минимальный пример использования дополнения Email Sending. Цель - создать ленту новостей для пользователей приложения. Такая лента может использоваться для отправки объявлений, обновлений, уведомлений, статистики использования и другой связанной информации по электронной почте.
Чтобы следовать инструкциям, создайте новый проект Jmix и установите дополнение.
Создание сущности и экранов
Сначала создайте сущность для хранения новостных записей, а также простые экраны CRUD для управления ими. Следуйте инструкциям ниже:
-
Создайте сущность
NewsItemсо следующими атрибутами:-
dateтипаLocalDate. -
subjectтипаString. -
contentтипаStringс неограниченной длиной.
-
-
Создайте экраны списка и деталей для этой сущности.
-
Откройте экран списка и добавьте новую кнопку, привязав ее к действию отправки письма:
news-item-list-view.xml<hbox id="buttonsPanel" classNames="buttons-panel"> <button id="createButton" action="newsItemsDataGrid.createAction"/> <button id="editButton" action="newsItemsDataGrid.editAction"/> <button id="removeButton" action="newsItemsDataGrid.removeAction"/> <button id="sendEmailButton" action="newsItemsDataGrid.sendEmailAction"/> (1) <simplePagination id="pagination" dataLoader="newsItemsDl"/> </hbox> <dataGrid id="newsItemsDataGrid" width="100%" minHeight="20em" dataContainer="newsItemsDc" columnReorderingAllowed="true"> <actions> <action id="createAction" type="list_create"/> <action id="editAction" type="list_edit"/> <action id="removeAction" type="list_remove"/> <action id="sendEmailAction" type="list_itemTracking" icon="vaadin:envelope" text="Send Email"/> (2) </actions> <columns resizable="true"> <column property="date"/> <column property="subject"/> <column property="content"/> </columns> </dataGrid>1 Добавьте новую кнопку. 2 Добавьте новое действие.
Логика отправки письма
С готовым пользовательским интерфейсом добавьте логику, чтобы сделать его функциональным. Эта логика будет использовать API дополнения.
-
Настройте обработчик для действия
sendEmailAction. В обработчике покажите диалог с вопросом, можно ли поставить новость в очередь на отправку:@Autowired private Dialogs dialogs; (1) @Subscribe("newsItemsDataGrid.sendEmailAction") public void onNewsItemsDataGridSendEmailAction(final ActionPerformedEvent event) { NewsItem newsItem = newsItemsDataGrid.getSingleSelectedItem(); dialogs.createOptionDialog() .withHeader("Sending email") .withText("Emails will be queued for sending. Continue?") .withActions( new DialogAction(DialogAction.Type.YES) { @Override public void actionPerform(Component component) { try { sendNewsByEmail(newsItem); } catch (IOException e) { log.error("Error sending email"); notifications.create("Error sending email").show(); } } }, new DialogAction(DialogAction.Type.NO) ) .open(); }1 Инжектируйте объект io.jmix.flowui.Dialogsв класс контроллера. -
Реализуйте метод
sendNewsByEmail().@Autowired private Emailer emailer; (1) @Autowired private Resources resources; (2) private void sendNewsByEmail(NewsItem newsItem) throws IOException { InputStream resourceAsStream = resources.getResourceAsStream("/META-INF/resources/icons/icon.png"); (3) byte[] bytes = IOUtils.toByteArray(resourceAsStream); EmailAttachment emailAttachment = new EmailAttachment(bytes, "logo.png", "logoId"); (4) final EmailInfo emailInfo = EmailInfoBuilder.create() (5) .setAddresses("john.doe@company.com,jane.doe@company.com") .setSubject(newsItem.getSubject()) .setFrom(null) (6) .setBodyContentType("text/plain; charset=UTF-8") .setBody(newsItem.getContent()) .setAttachments(emailAttachment) .setImportant(false) .build(); emailer.sendEmailAsync(emailInfo); (7) }1 Инжектируйте интерфейс io.jmix.email.Emailer.2 Инжектируйте интерфейс io.jmix.core.Resources.3 Для демонстрации добавления вложения мы будем использовать файл значка приложения. 4 Создайте объект io.jmix.email.EmailAttachment.5 Создайте объект io.jmix.email.EmailInfoс помощьюio.jmix.email.EmailInfoBuilder.6 Адрес from будет взят из свойства jmix.email.from-address. 7 Отправьте письмо асинхронно (в фоновом режиме).
Настройка параметров SMTP-сервера
Используйте свойства Spring Boot для почты, чтобы определить основные параметры отправки писем, такие как протокол, хост, порт и другие, в файле application.properties.
| Возможно, вам потребуется получить параметры конфигурации SMTP-сервера у вашего системного администратора или поставщика услуг. Смотрите Настройка OAuth для Google и Microsoft, чтобы узнать о шагах по настройке отправки писем с помощью этих провайдеров. |
Работа с пользовательским интерфейсом
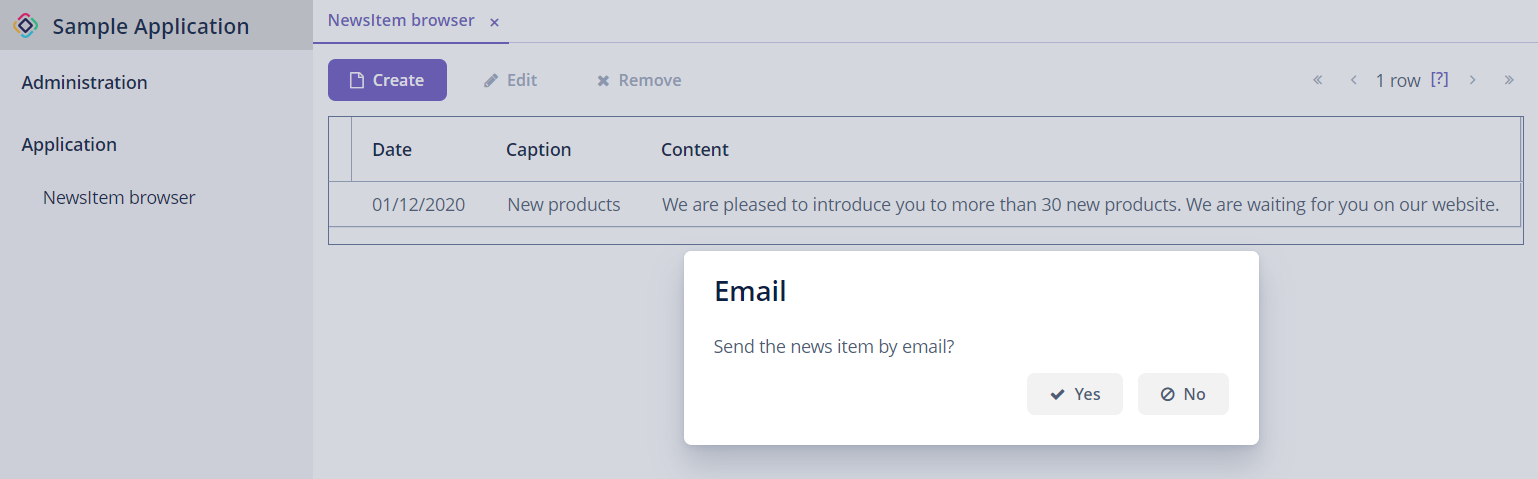
Запустите приложение, откройте экран News items. Нажмите Create, чтобы создать новостную запись. После сохранения и возврата к предыдущему экрану выберите вашу запись и нажмите Send Email. Появится диалог подтверждения - нажмите Yes, чтобы продолжить.
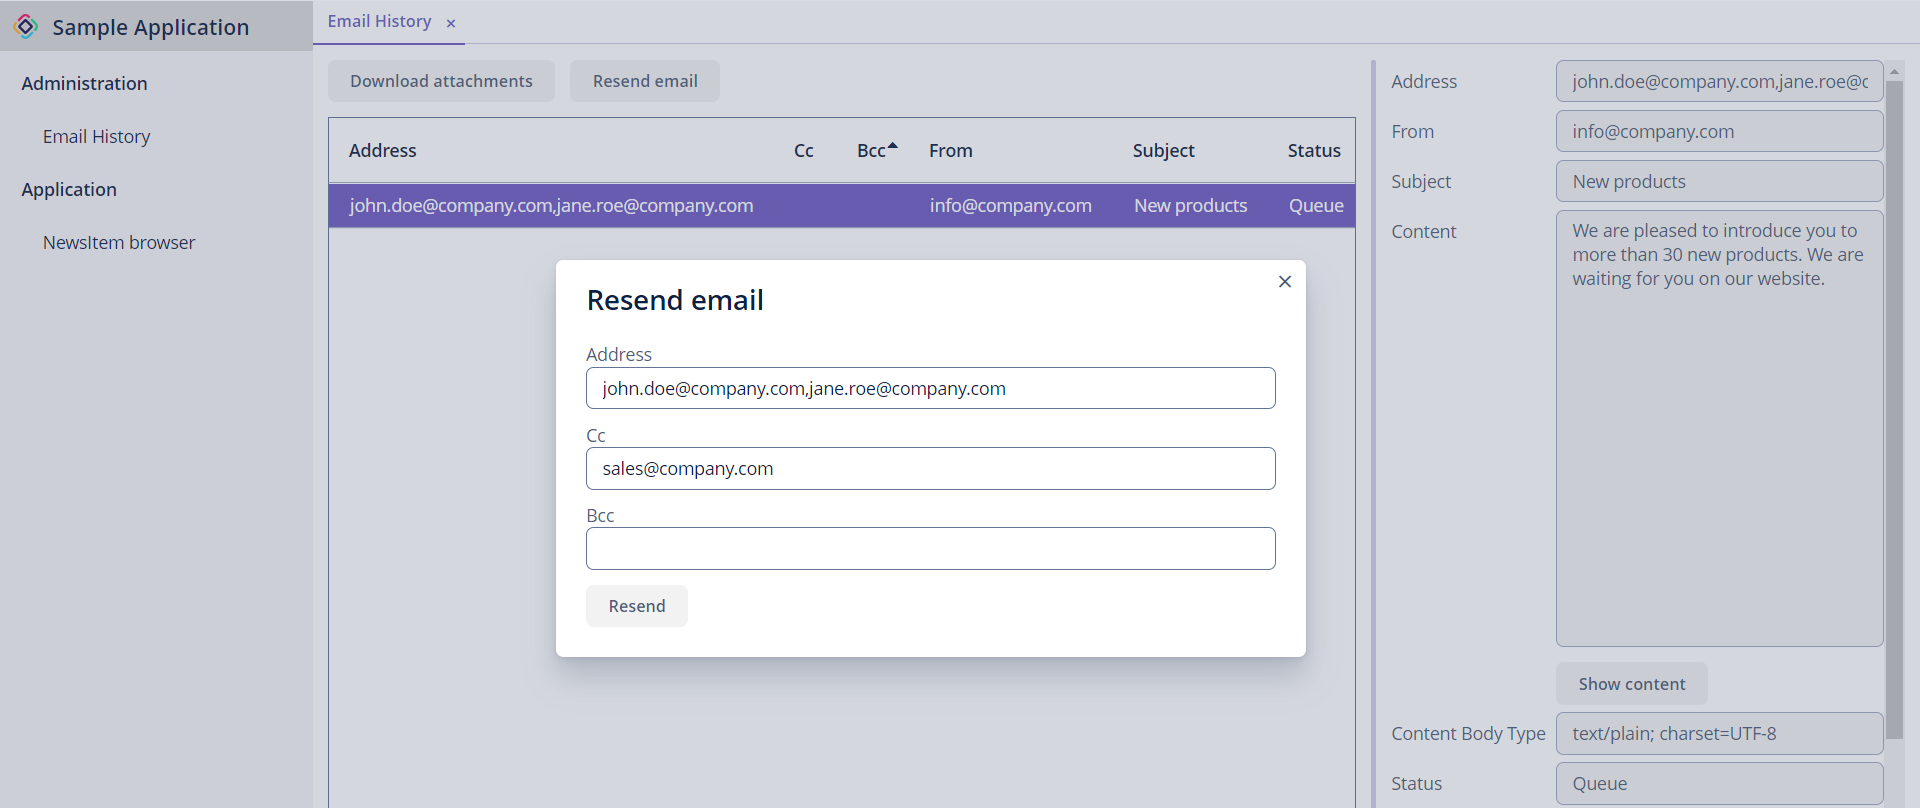
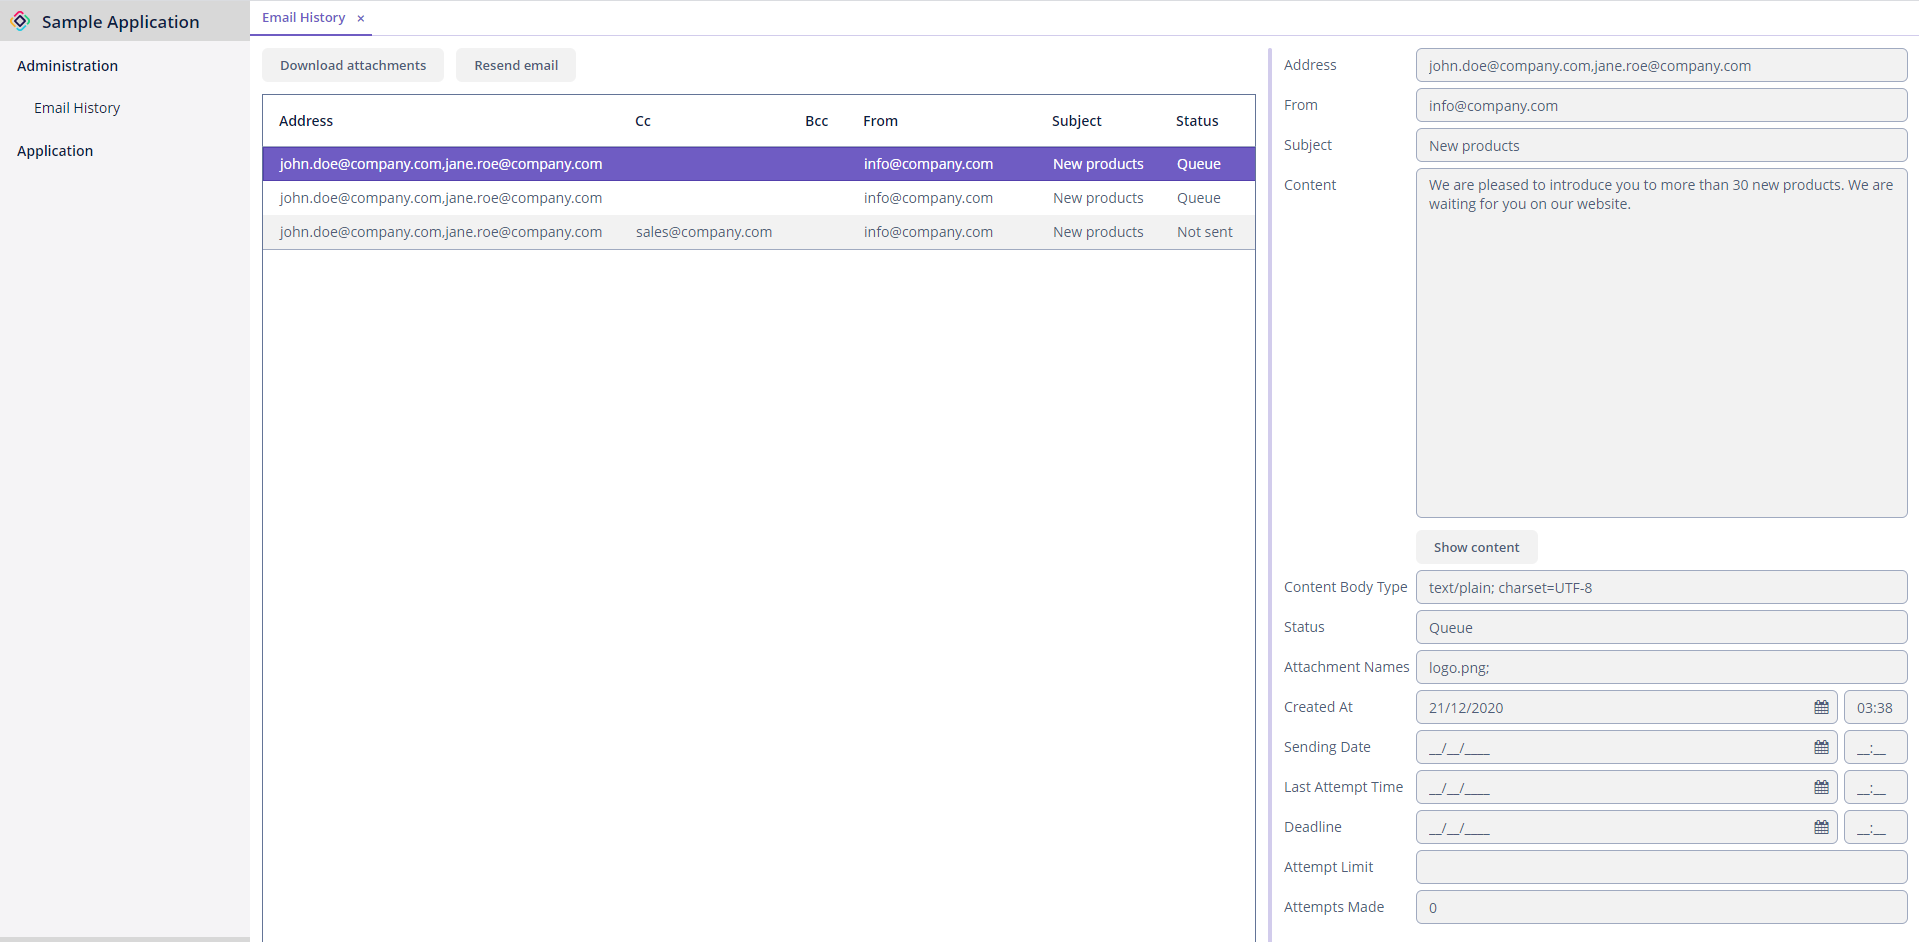
Перейдите в экран Email → Email History. Запись со статусом Queue указывает на то, что письмо ожидает отправки. Детали письма будут отображены справа при его выборе.
Чтобы отправить письмо из пользовательского интерфейса, выберите его из списка и нажмите Resend email. Вы можете изменить или добавить получателей перед отправкой. Как только письмо будет отправлено, статус изменится на Sent.
| Для регулярной отправки писем из очереди или отправки по конкретному расписанию настройте Планировщик Quartz. |