BPMN Моделер в Jmix Studio
Jmix Studio предоставляет встроенный BPMN Моделер, который позволяет строить процессы непосредственно в IDE. Моделер становится доступным сразу после добавления дополнения BPM в проект.
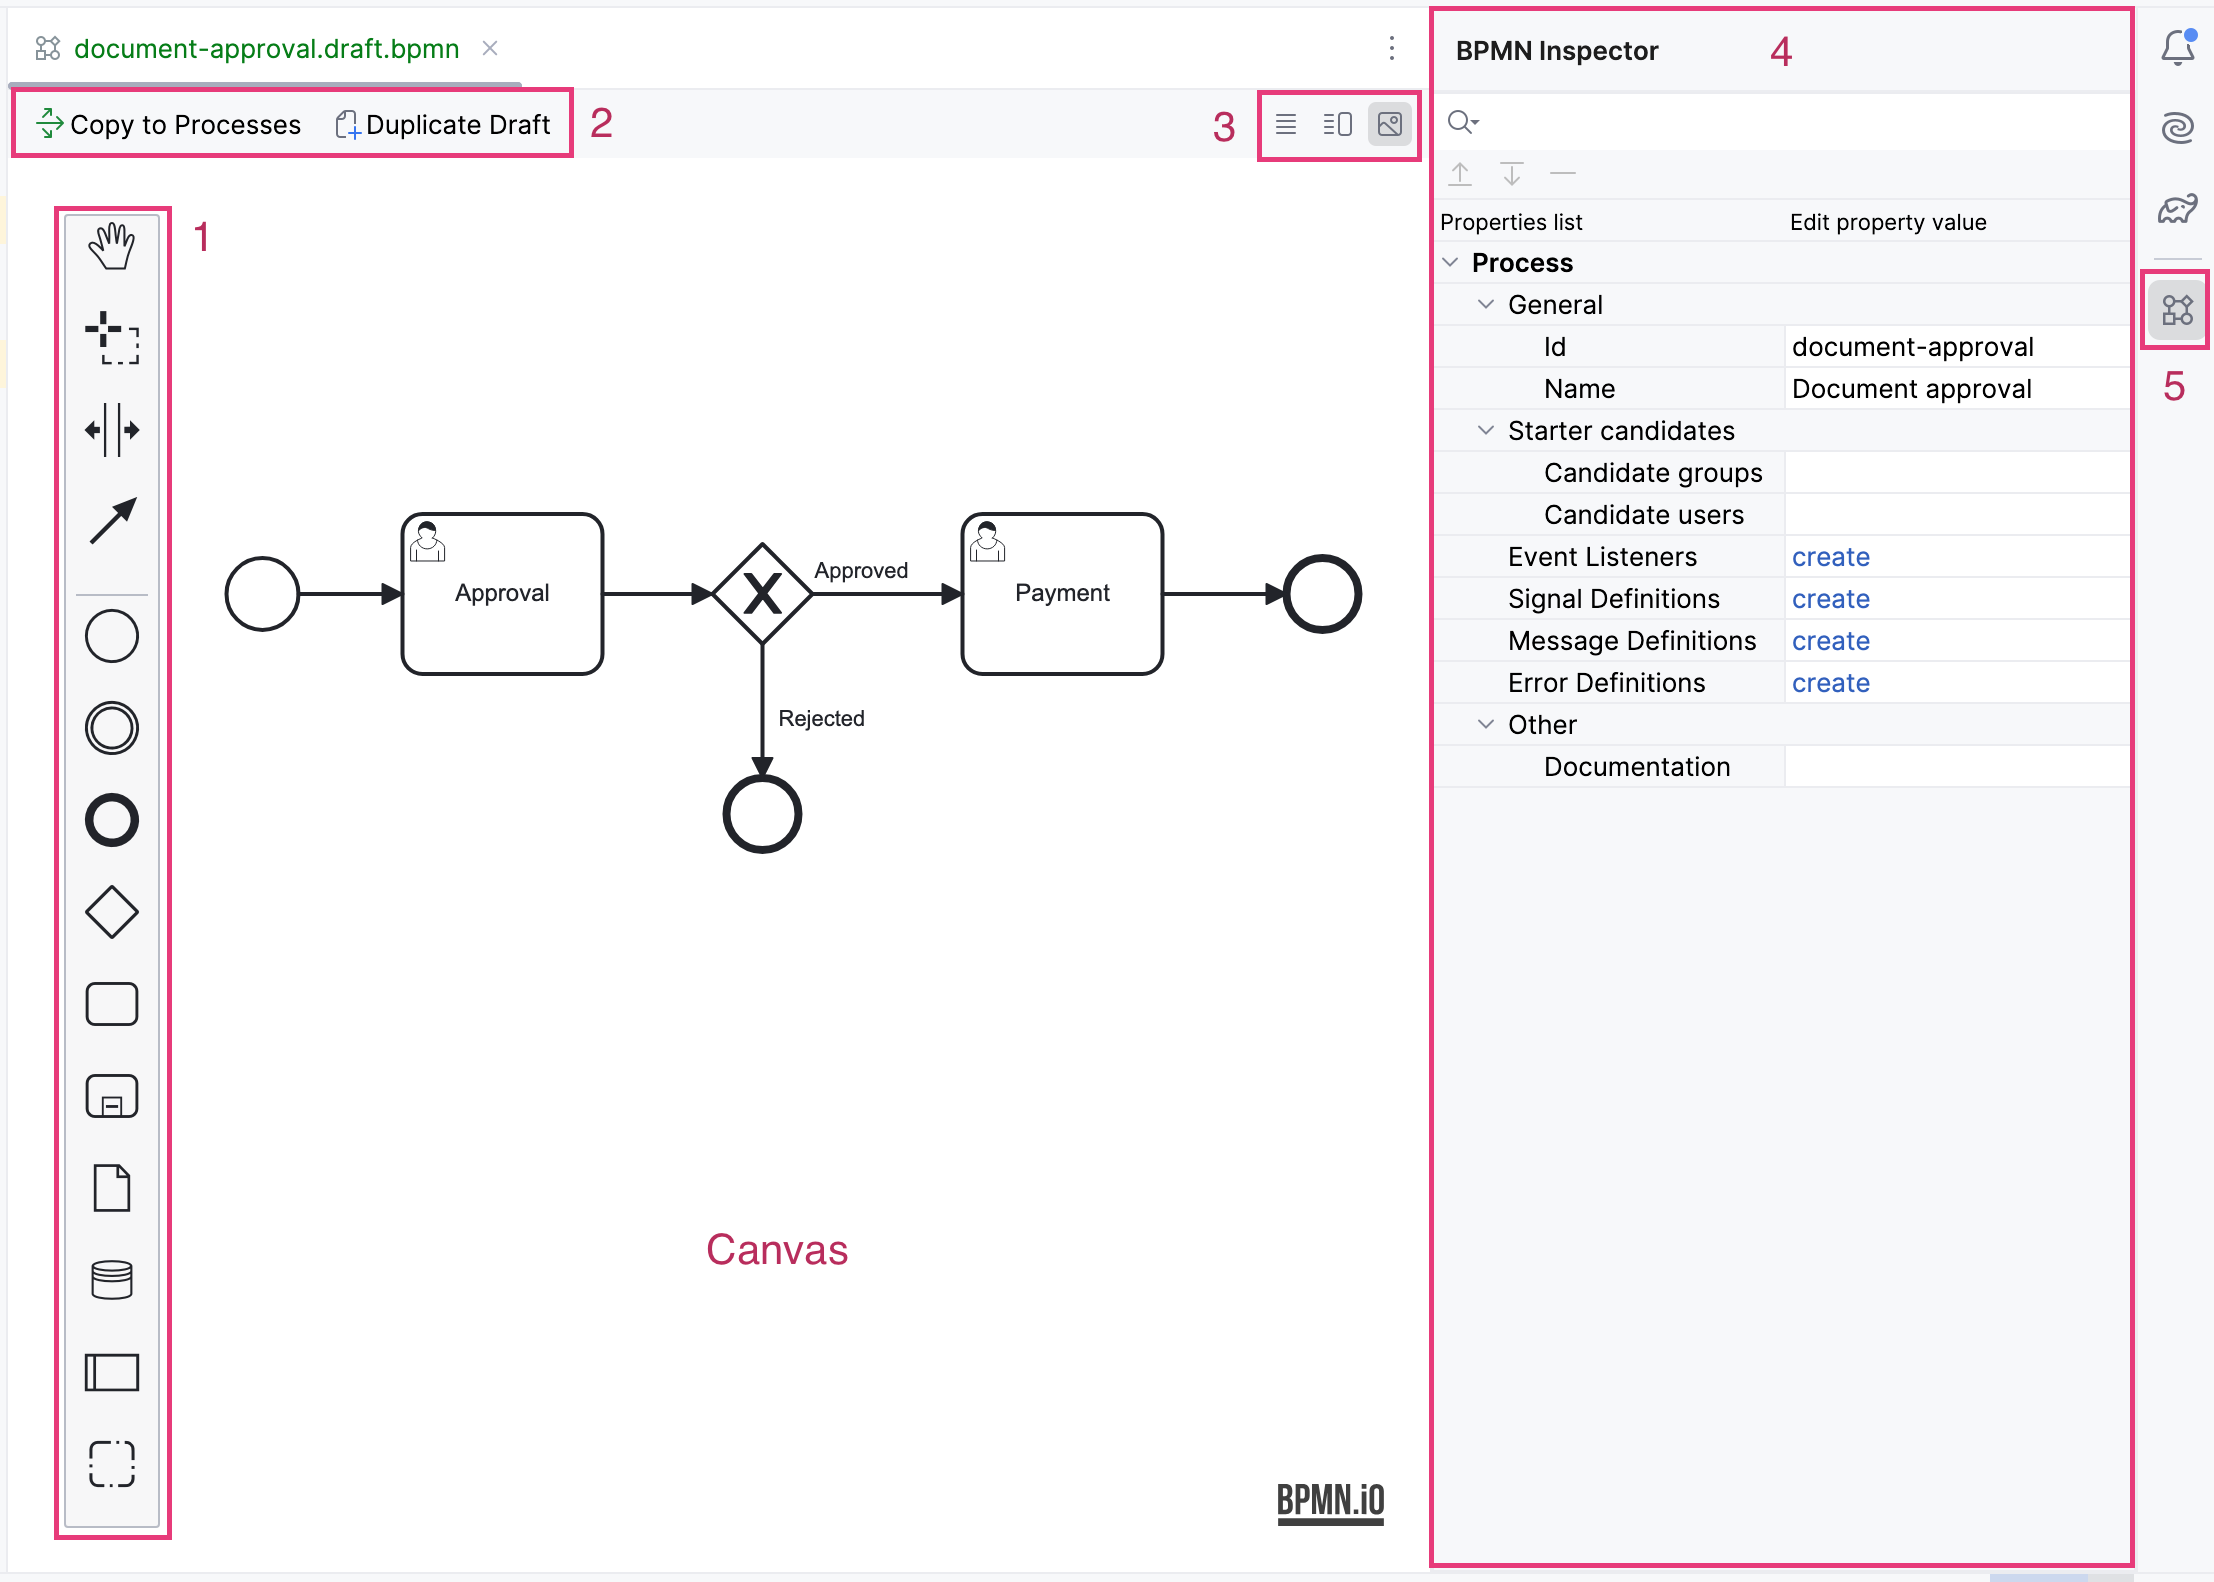
Интерфейс моделера состоит из следующих элементов:
-
Canvas – рабочая область для создания схемы процесса.
-
BPMN Palette (1) – палитра BPMN предоставляет полный набор элементов для построения диаграмм BPMN.
-
Process Actions (2) – панель доступных действий для процесса или черновика.
-
Editor Modes (3) – доступны три режима просмотра: только XML, XML и модель, только модель.
-
BPMN Inspector (4) – панель инспектора отображает атрибуты выбранного элемента и позволяет их редактировать.
-
Visibility Button (5) – переключатель видимости для инспектора.
Навигация по коду
С помощью Modeler вы можете перейти к Java-коду, связанному с элементом или его атрибутом.
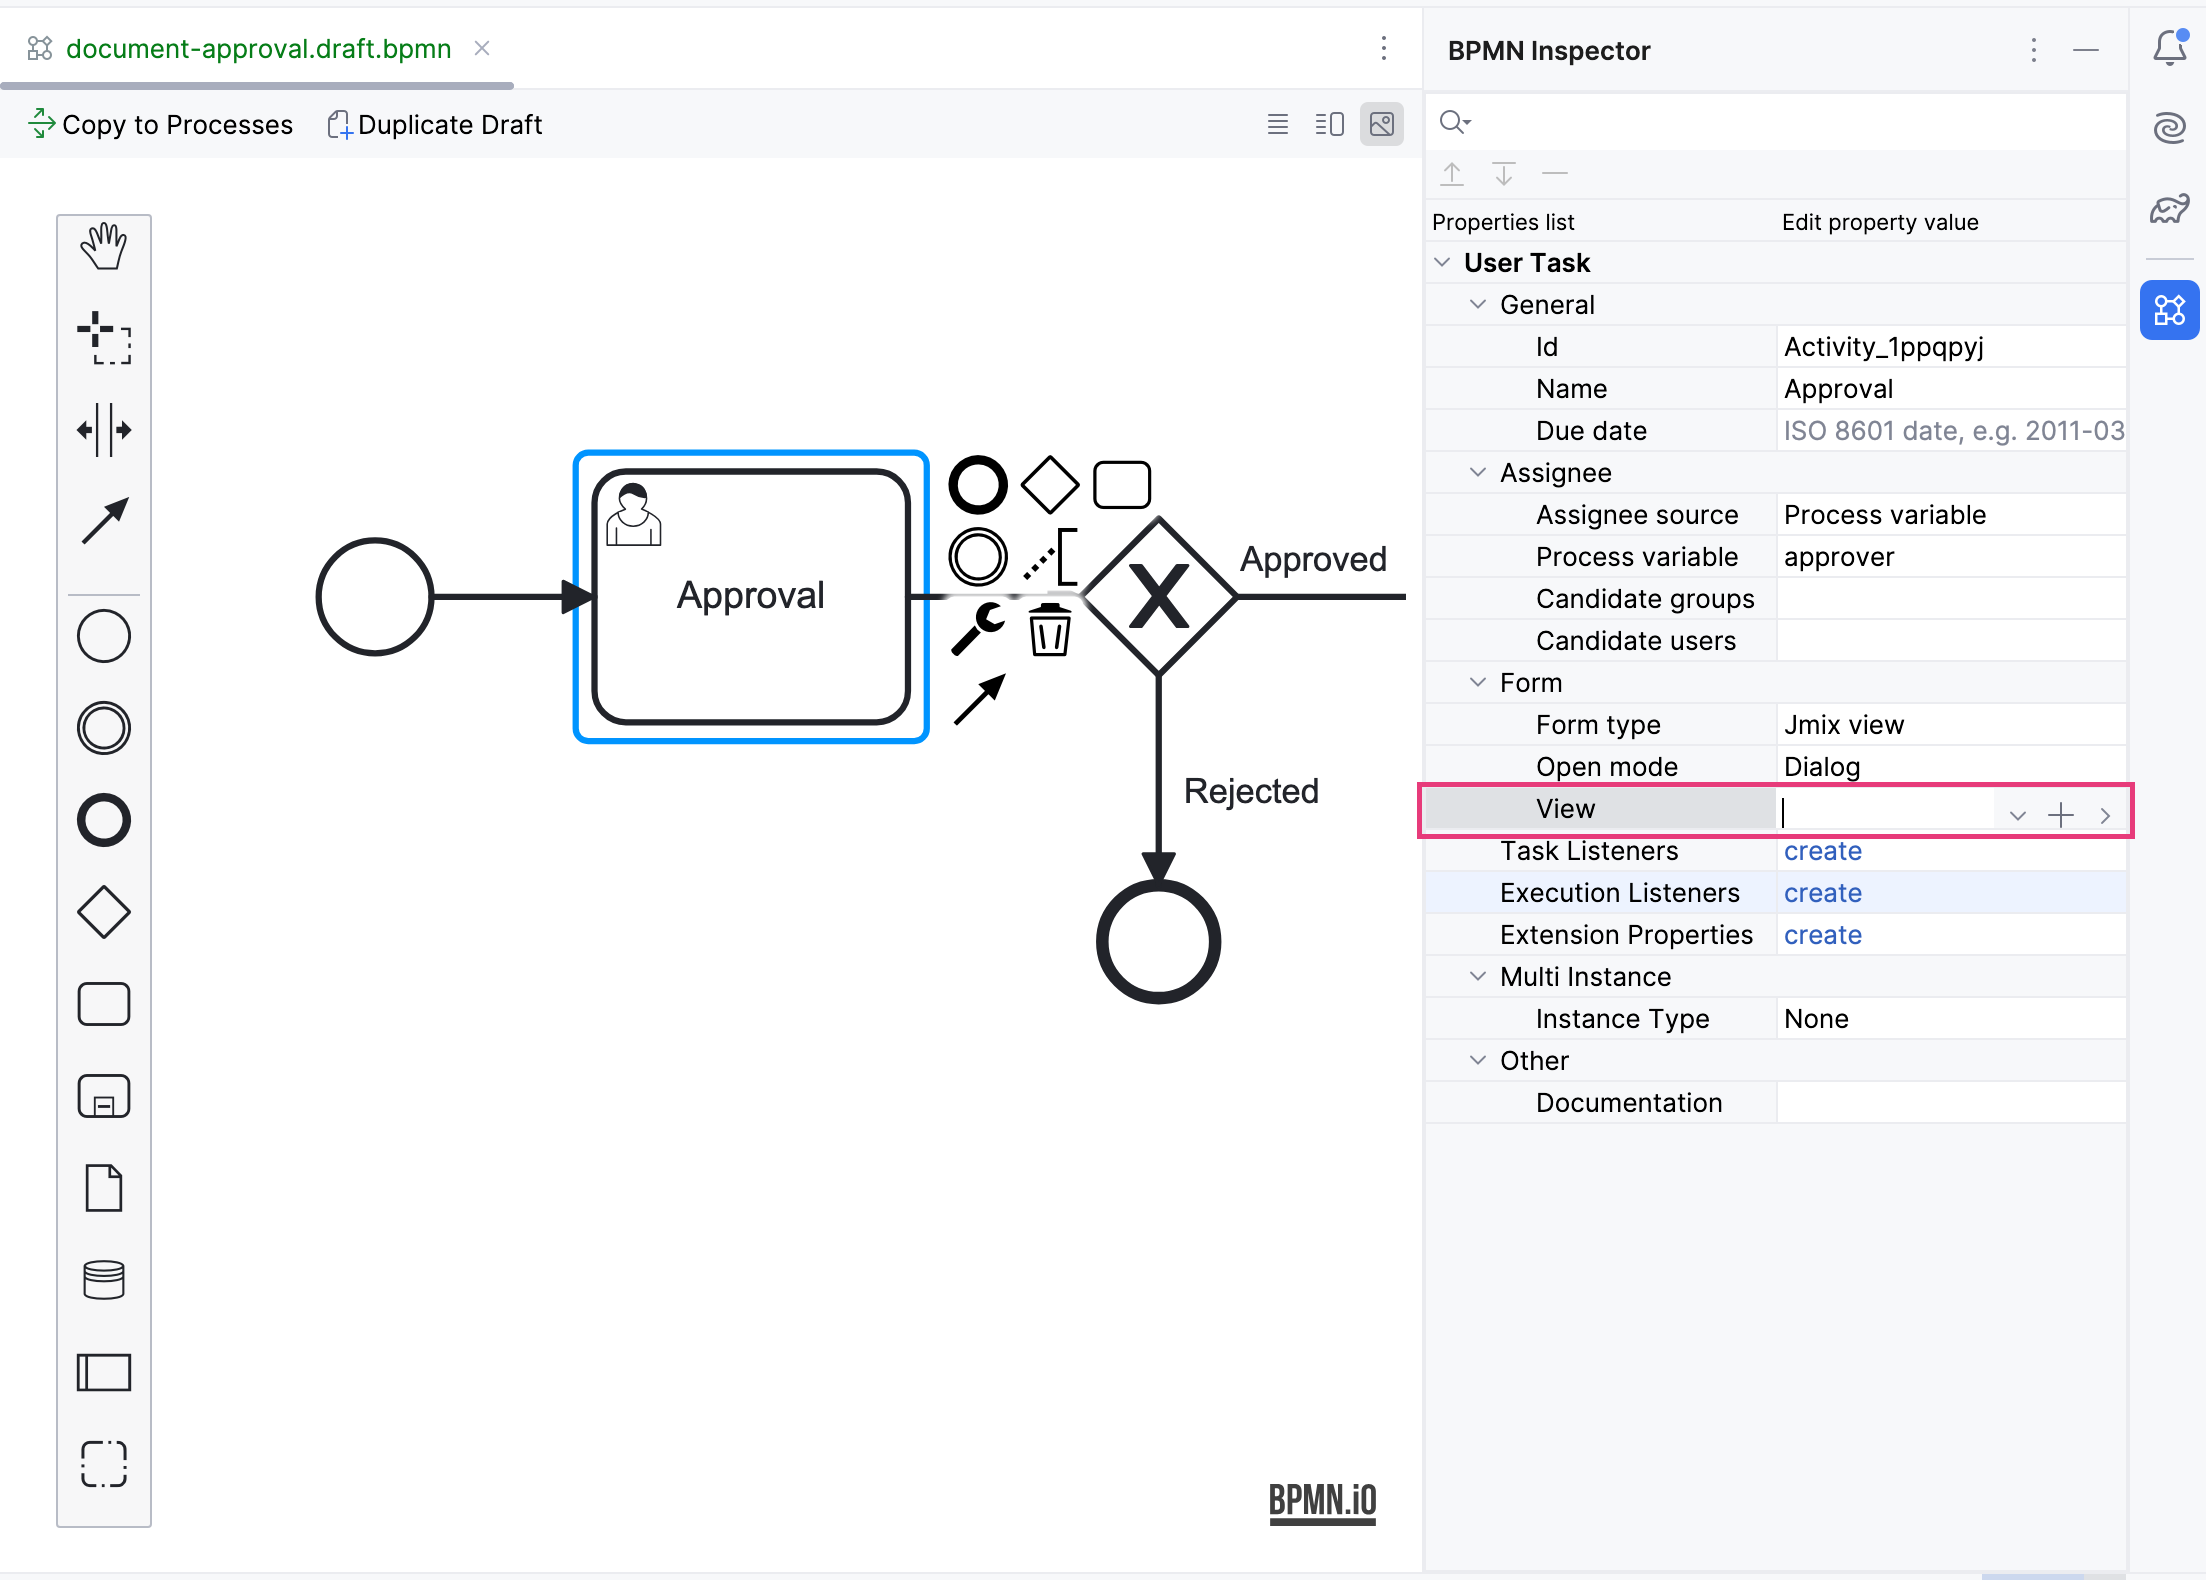
-
 (plus) – кнопка для создания нового Spring bean, Java delegate, процессной формы Jmix или другого компонента.
 -
 (chevron right) – навигация к существующему коду.
 -
 (chevron down) – эта кнопка открывает выпадающий список, в котором вы можете выбрать существующий компонент связанный с атрибутом.
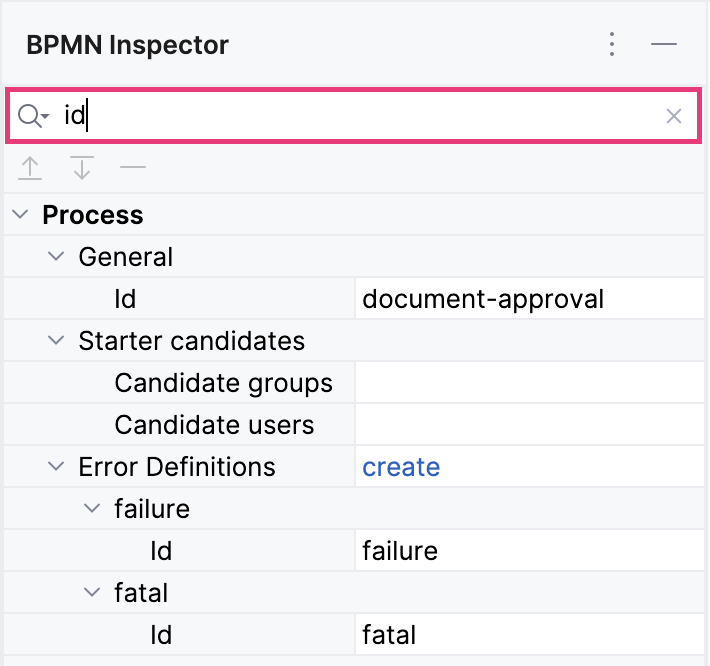
Поиск атрибутов
В верхней части панели BPMN Inspector находится поле Find. Начните вводить название атрибута, чтобы найти нужный.
Упорядочение и удаление параметров
Когда в атрибуте содержится несколько параметров, таких как Input dialog form, BPMN Inspector позволяет перемещать их вверх и вниз в списке.
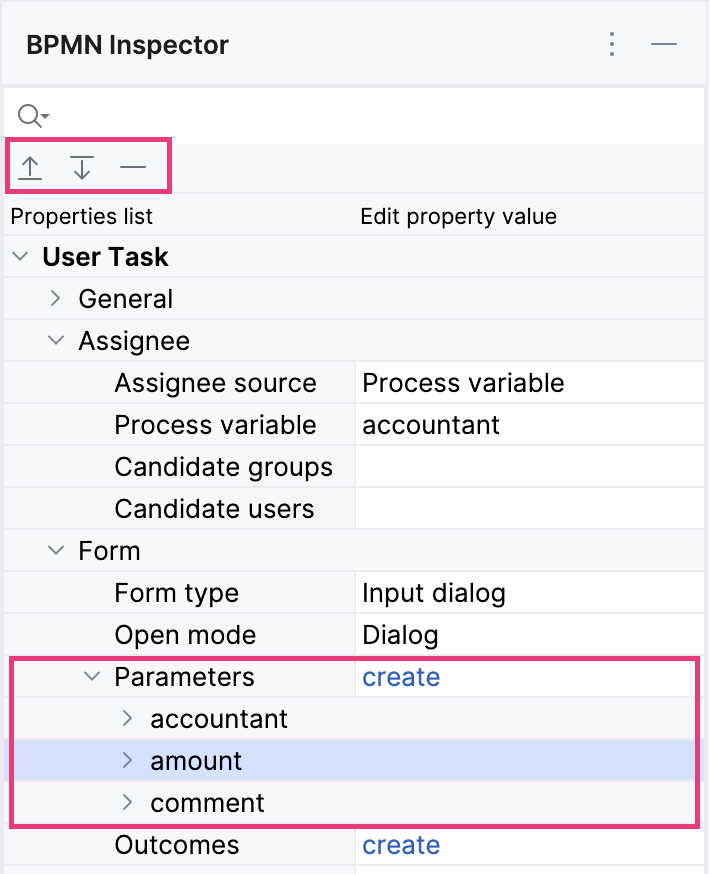
Для этого используйте кнопки вверх (![]() ) и вниз (
) и вниз (![]() ), расположенные в верхней части панели BPMN Navigator.
), расположенные в верхней части панели BPMN Navigator.
Чтобы удалить параметр списка, используйте кнопку удаления (![]() ).
).
Горячие клавиши
В моделере доступны следующие горячие клавиши:
| Command | Windows | Mac OS |
|---|---|---|
Undo |
Ctrl-Z |
Cmd-Z |
Redo |
Ctrl-Y |
Cmd-Y |
Copy |
Ctrl-C |
Cmd-C |
Paste |
Ctrl-V |
Cmd-V |
Select all |
Ctrl-A |
Cmd-A |
Hand tool |
H |
H |
Lasso tool |
L |
L |
Space tool |
S |
S |
Edit label |
E |
E |
Find |
F |
F |
Процессы и черновики процессов
Для доступа к процессам и черновикам используйте секции Processes и Process Drafts в панели инструментов Jmix.
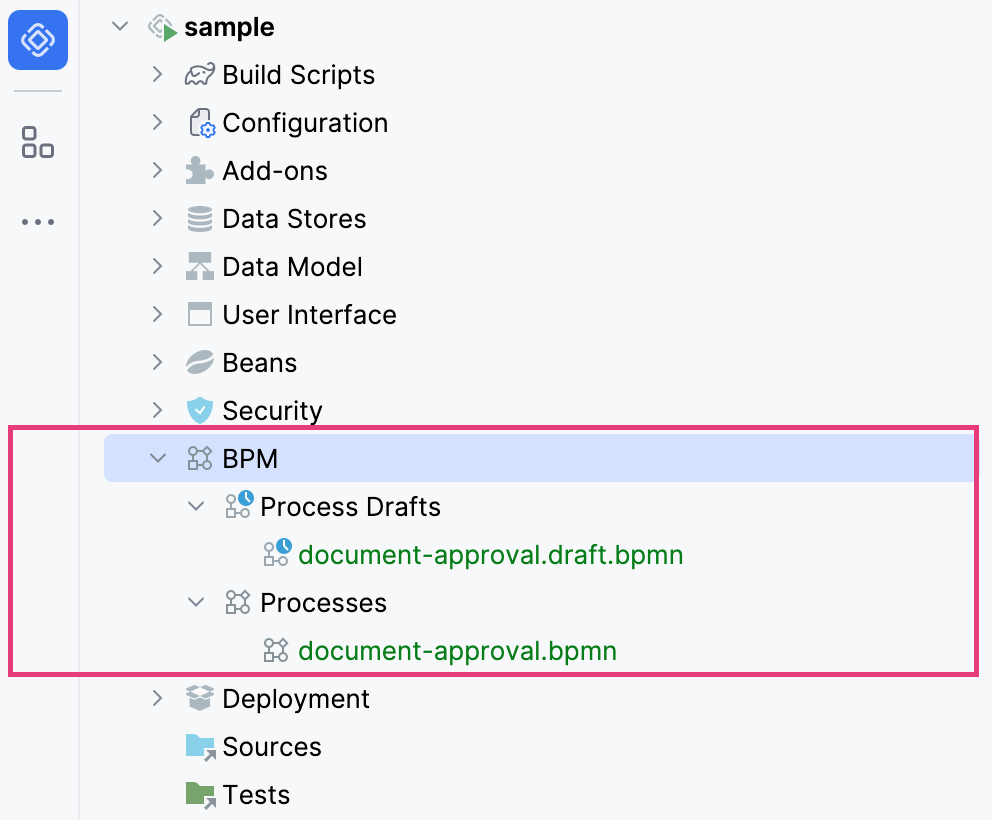
Физически, эти файлы расположены в директориях resources/process и resources/process-drafts соответственно.
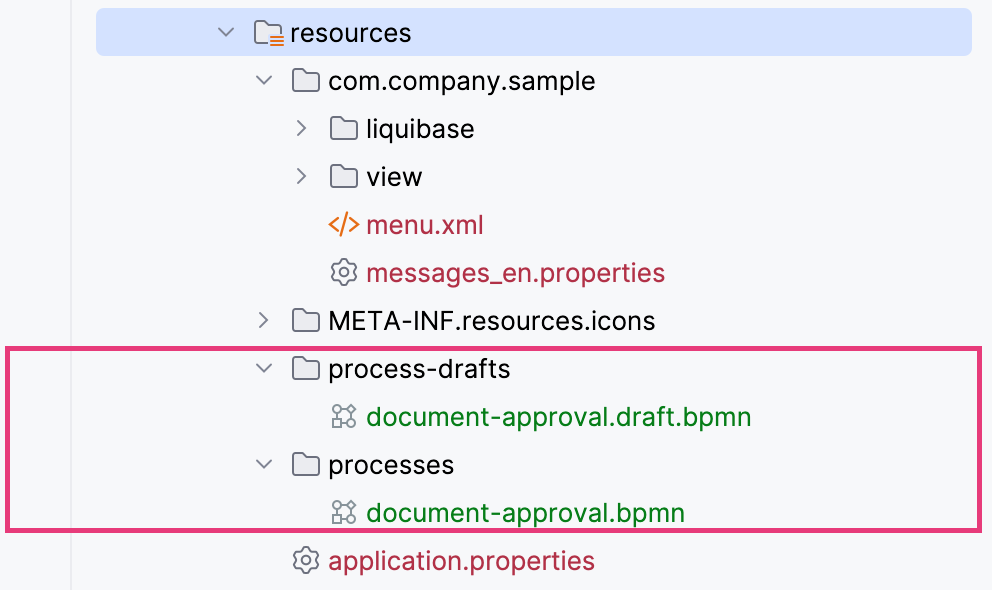
Как процесс, так и черновик процесса являются валидным XML файлами. Однако черновики имеют дополнительное расширение в имени файла по следующему шаблону:
<process-id>.draft.xml. Когда черновик процесса копируется в Processes, система автоматически удалит расширение .draft из его имени.
|
При запуске приложения все модели в Processes будут развернуты на сервере. Кроме того, вы можете использовать функцию Hot Deploy для развертывания без перезапуска приложения.
Создание нового процесса
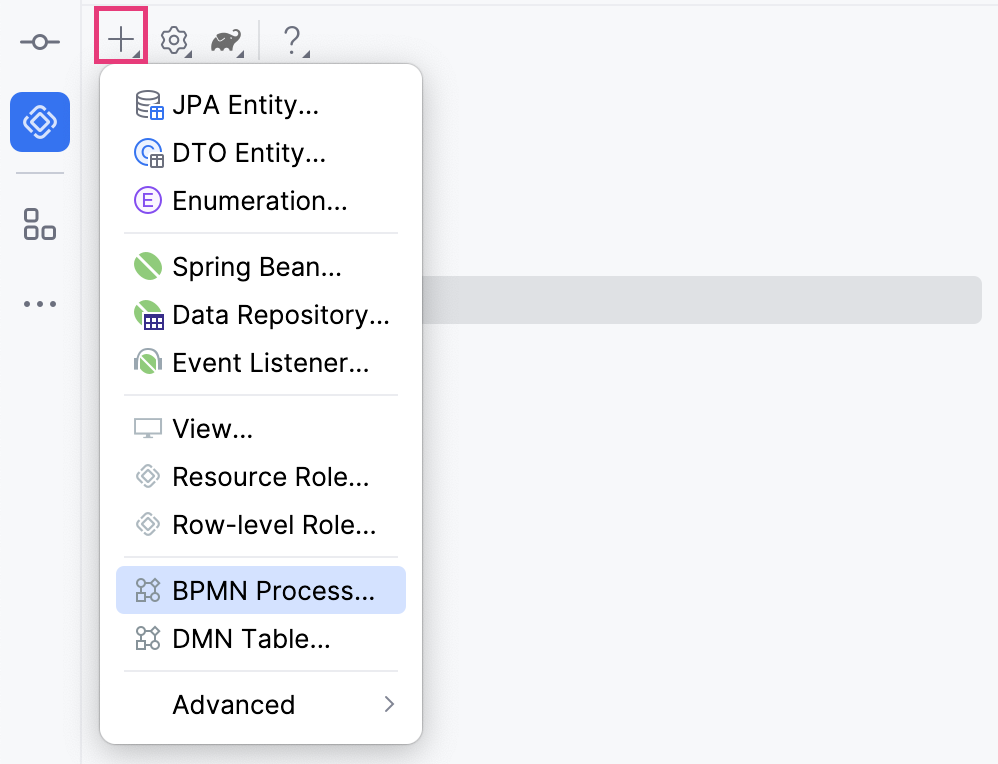
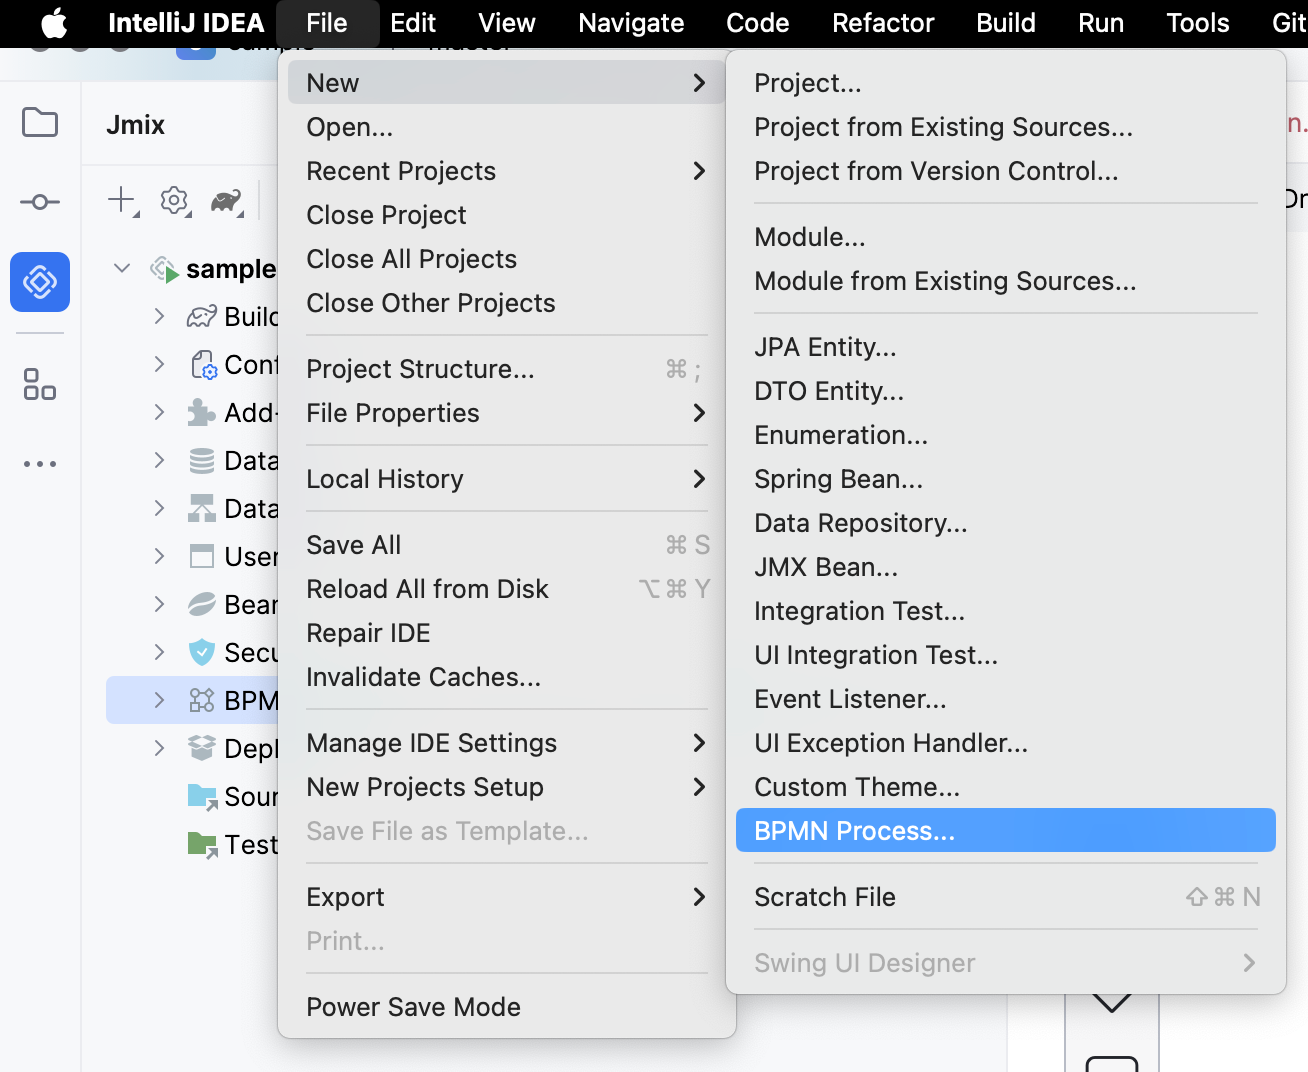
Jmix Studio позволяет создать процесс несколькими способами:
-
Используя Jmix Tool Window:
-
Используя контекстное меню узла BPM:

-
Используя главное меню IntelliJ IDEA File→ New→ BPMN Process:
-
Используя контекстное меню в любой директории вашего проекта:
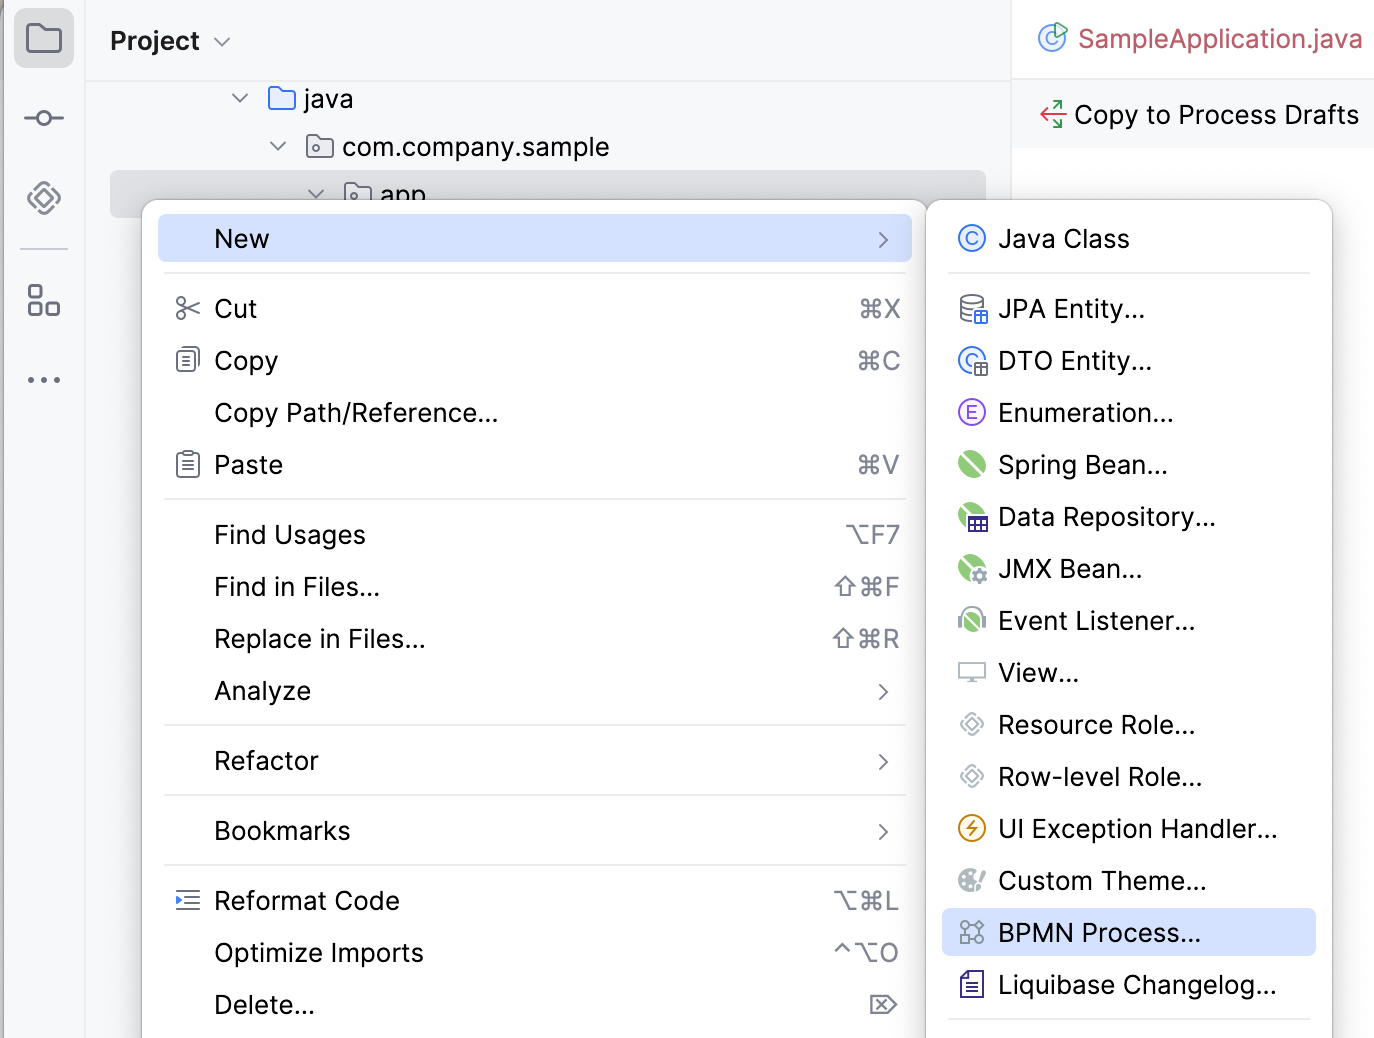
После создания вы увидите диалог New BPMN Process. Введите идентификатор процесса. Имя будет заполнено автоматически.
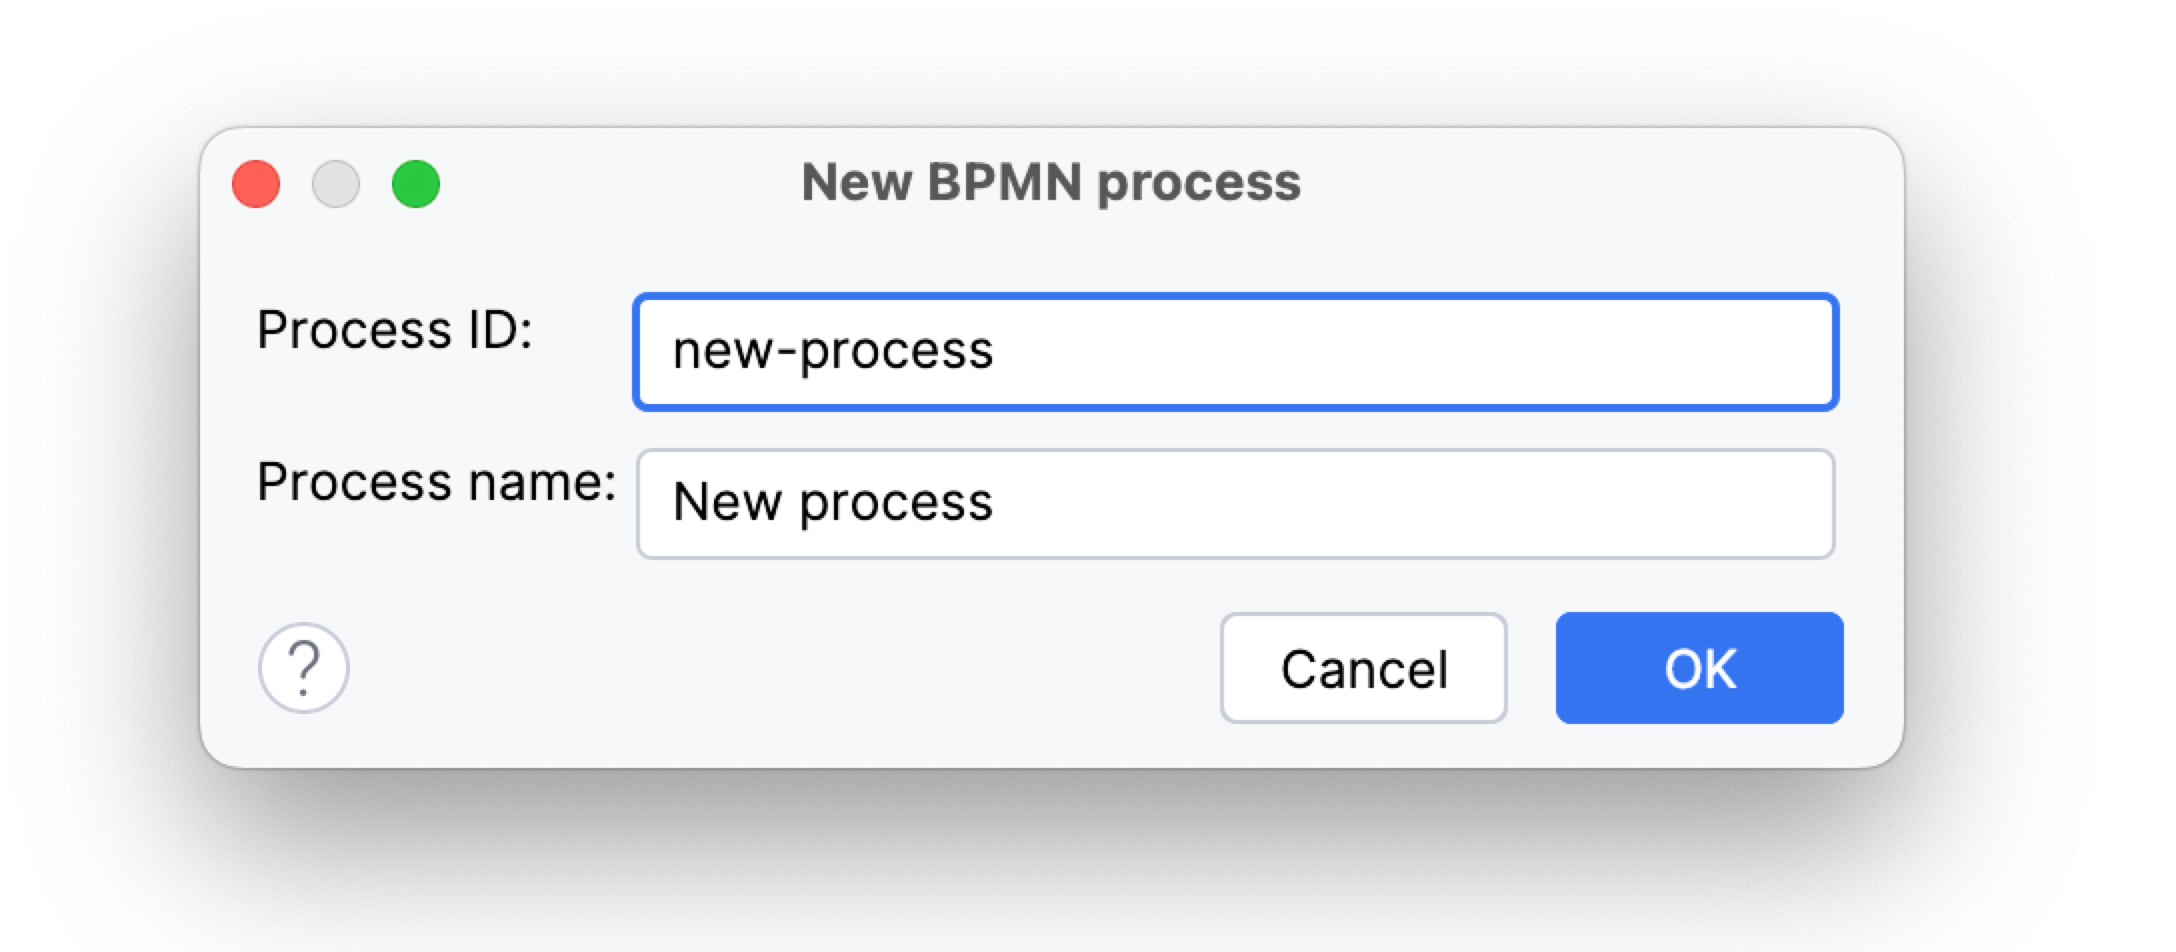
После нажатия кнопки OK вы попадёте в моделер. XML файл нового процесса помечается как черновик и доступен в разделе Process Drafts.
Загрузка модели процесса
Вы можете загрузить модели процессов в ваш проект из внешних источников. Для этого используйте стандартные функции копирования/вставки файловой системы.
Переключитесь на Project view в IntelliJ IDEA и
поместите XML файл в директорию resources/process или resources/process-drafts. Для черновиков используйте следующий шаблон имени: <process-id>.draft.xml.