Компонент карты
UI-компонент GeoMap отображает географические данные, предоставляемые слоями.
Карта строится путем наложения слоев. Изначально карта не имеет слоев.
Вы можете определить общие параметры карты вместе со слоями в XML-дескрипторе экрана.
Карта
Чтобы добавить компонент на экран, используйте Jmix Studio.
Нажмите Add Component на панели действий, найдите элемент GeoMap и дважды щелкните по нему.
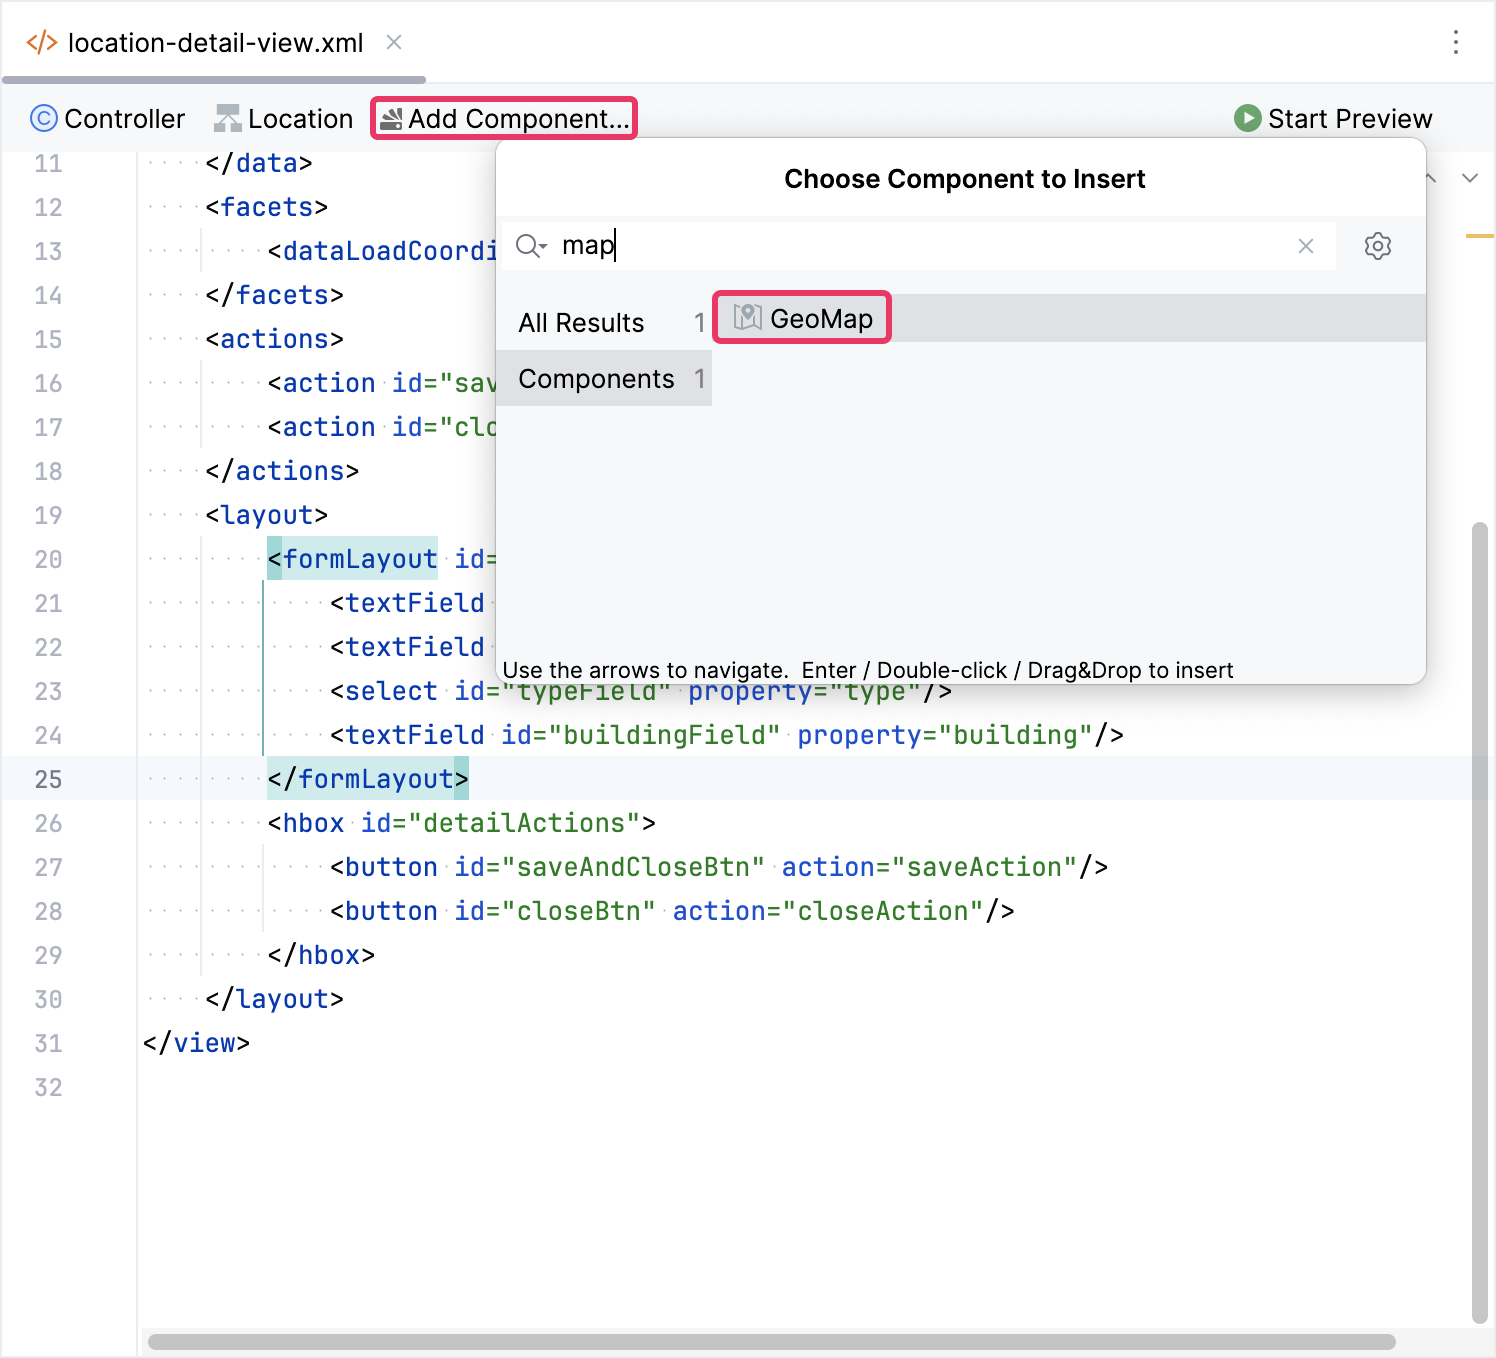
Новый элемент geoMap будет добавлен как на панели структуры Jmix UI, так и в XML. Вы можете настраивать атрибуты, такие как id, height, width и т.д., так же, как это делается для других UI-компонентов.
<maps:geoMap id="map"
             height="100%"
             width="100%"/>
Если вы не используете дизайнер экранов, объявите пространство имен maps в XML-дескрипторе вашего экрана вручную:
<view xmlns="http://jmix.io/schema/flowui/view"
xmlns:maps="http://jmix.io/schema/maps/ui"
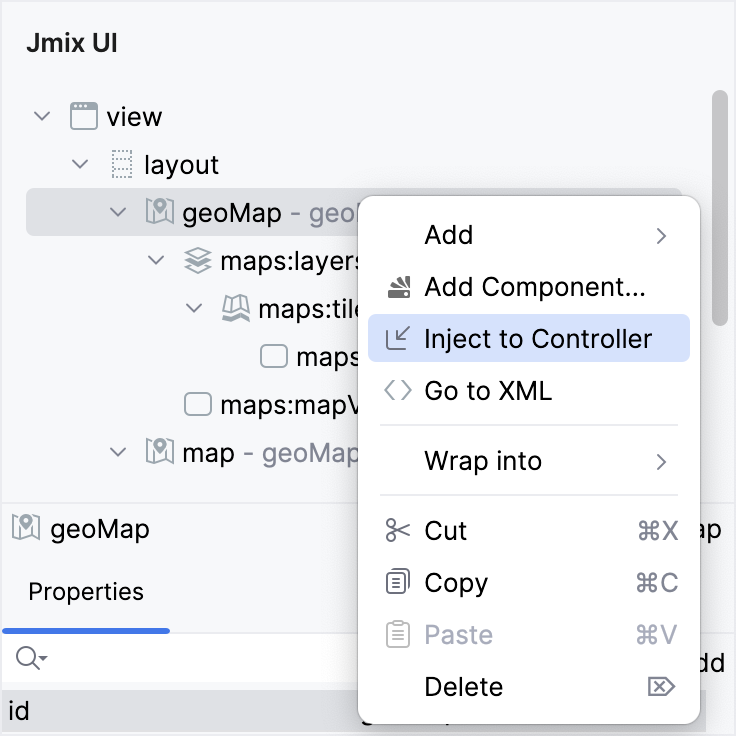
title="msg://mapBasicView.title">Вы можете инжектировать UI-компонент или слой карты в контроллер, используя действие Inject to Controller на панели структуры Jmix UI:
Альтернативно, вы можете использовать кнопку Inject, доступную на панели действий:
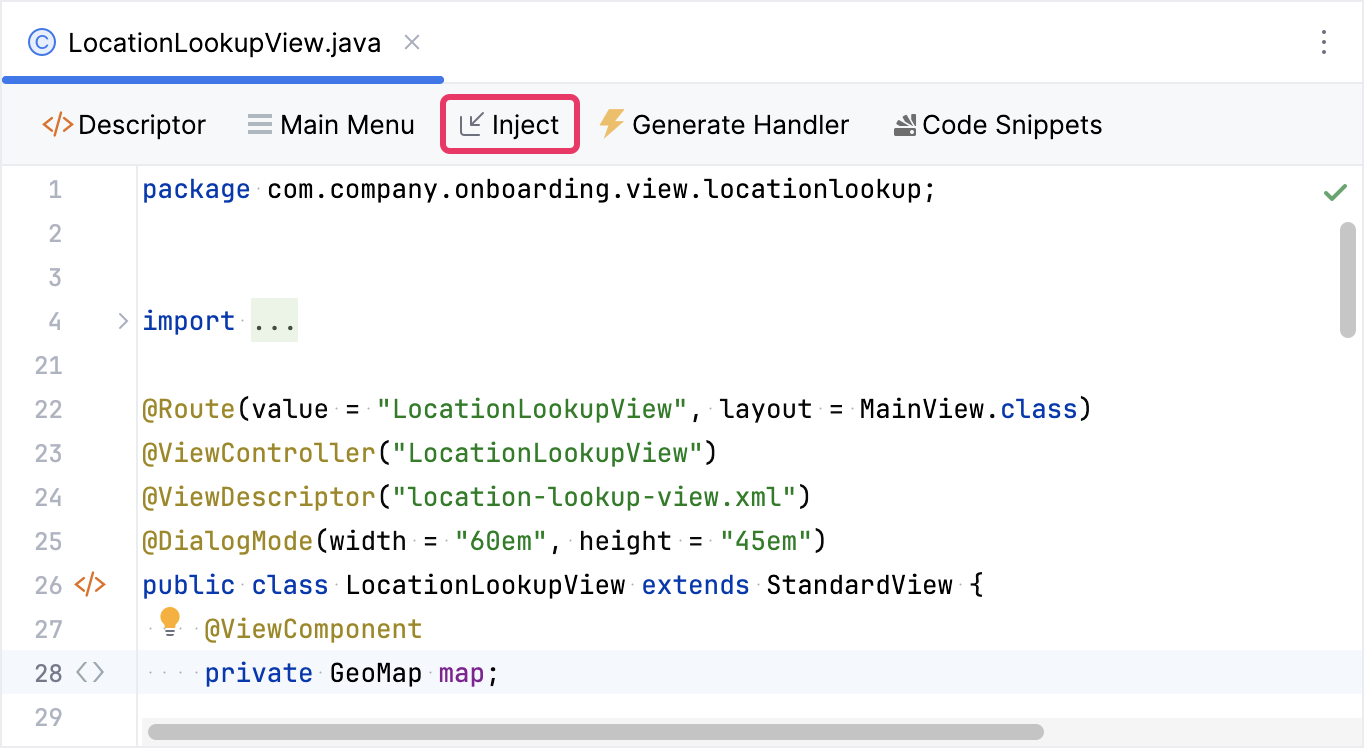
Чтобы компонент можно было инжектировать в контроллер, у него должен быть указан атрибут id.
|
Теперь вы можете взаимодействовать с компонентом GeoMap программно, обращаясь к его методам напрямую:
@ViewComponent
private GeoMap geoMap;

@Subscribe
public void onInit(final InitEvent event) {
    geoMap.addLayer(new TileLayer()
            .withSource(new OsmSource()
                    .withUrl("https://tile.openstreetmap.org/{z}/{x}/{y}.png")
                    .withOpaque(true)
                    .withMaxZoom(10)));
}
Слой
Компонент GeoMap может включать несколько слоев, которые отображают различные типы географической информации, такие как растровые слои и векторные слои.
Изначально карта не имеет слоев.
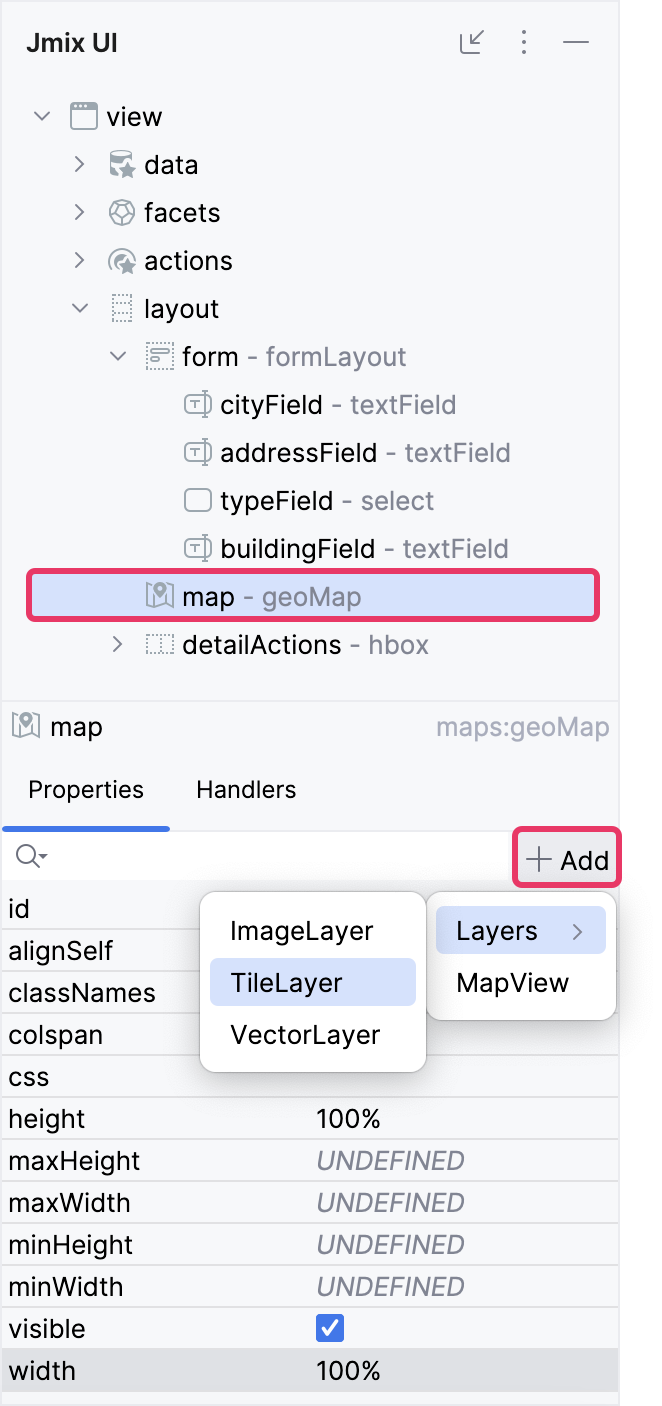
Например, давайте добавим TileLayer на карту.
Выберите элемент geoMap на панели структуры Jmix UI или в XML-дескрипторе экрана, затем нажмите кнопку Add на панели инспектора. В выпадающем списке выберите Layers → TileLayer.
Вы можете инжектировать слой в контроллер и взаимодействовать с ним программно, обращаясь к его методам напрямую:
@ViewComponent("map.tile")
private TileLayer mapTile;

@Subscribe
public void onInit(final InitEvent event) {
    mapTile.setSource(new XyzSource()
            .withUrl("https://server.arcgisonline.com/ArcGIS/rest/services/World_Topo_Map/MapServer/tile/{z}/{y}/{x}"));
}
Источник
Источник представляет данные, которые используются для отрисовки слоев карты на компоненте карты. Источники предоставляют пространственную информацию, которая определяет содержимое и внешний вид слоев карты.
Например, давайте добавим OsmSource для тайлового слоя.
Выберите maps:tile на панели структуры Jmix UI или в XML-дескрипторе экрана, а затем нажмите кнопку Add на панели инспектора. В выпадающем списке выберите OsmSource.
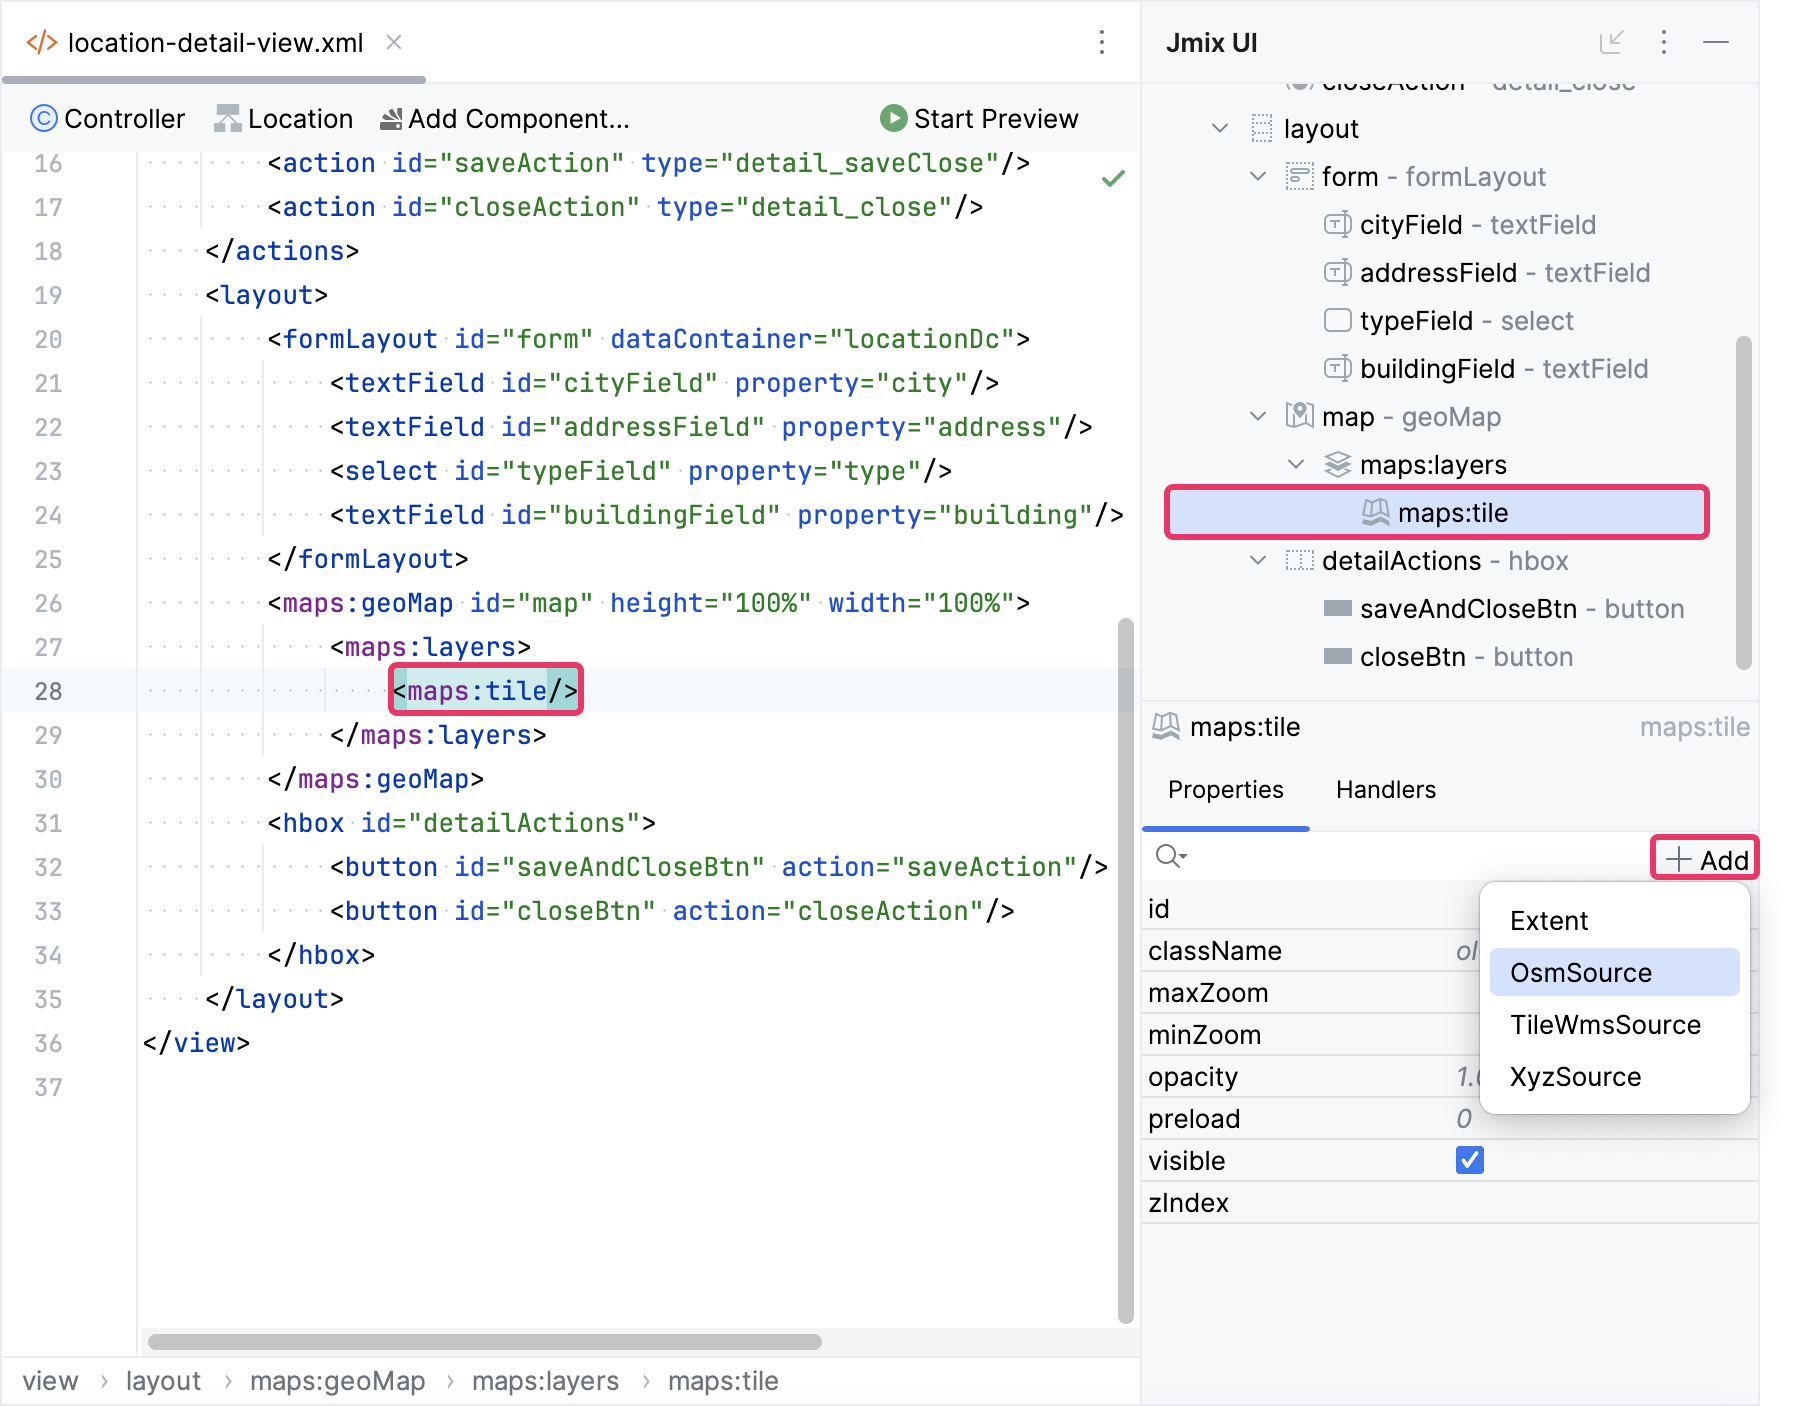
<maps:layers>
    <maps:tile>
        <maps:osmSource attributions="© Your Attribution Info"
                        maxZoom="34"/>
    </maps:tile>
</maps:layers>
Вы можете инжектировать источник в контроллер и взаимодействовать с ним программно, обращаясь к его методам напрямую:
@ViewComponent("map.tile.osmSource")
private OsmSource osmSource;

@Subscribe
public void onInit(final InitEvent event) {
    osmSource.withUrl("https://tile.openstreetmap.org/{z}/{x}/{y}.png")
            .withMaxZoom(12)
            .withWrapX(false);
}
Отображение
Отображение (View) определяет, как карта отображается с точки зрения ее центра, уровня масштабирования, поворота и проекции. По сути, отображение задает начальное состояние карты при ее загрузке в пользовательском интерфейсе.
По умолчанию компонент geoMap отображает карту мира с начальным географическим центром в (0,0).
Выберите geoMap на панели структуры Jmix UI или в XML-дескрипторе экрана, а затем нажмите кнопку Add на панели инспектора. В выпадающем списке выберите MapView.
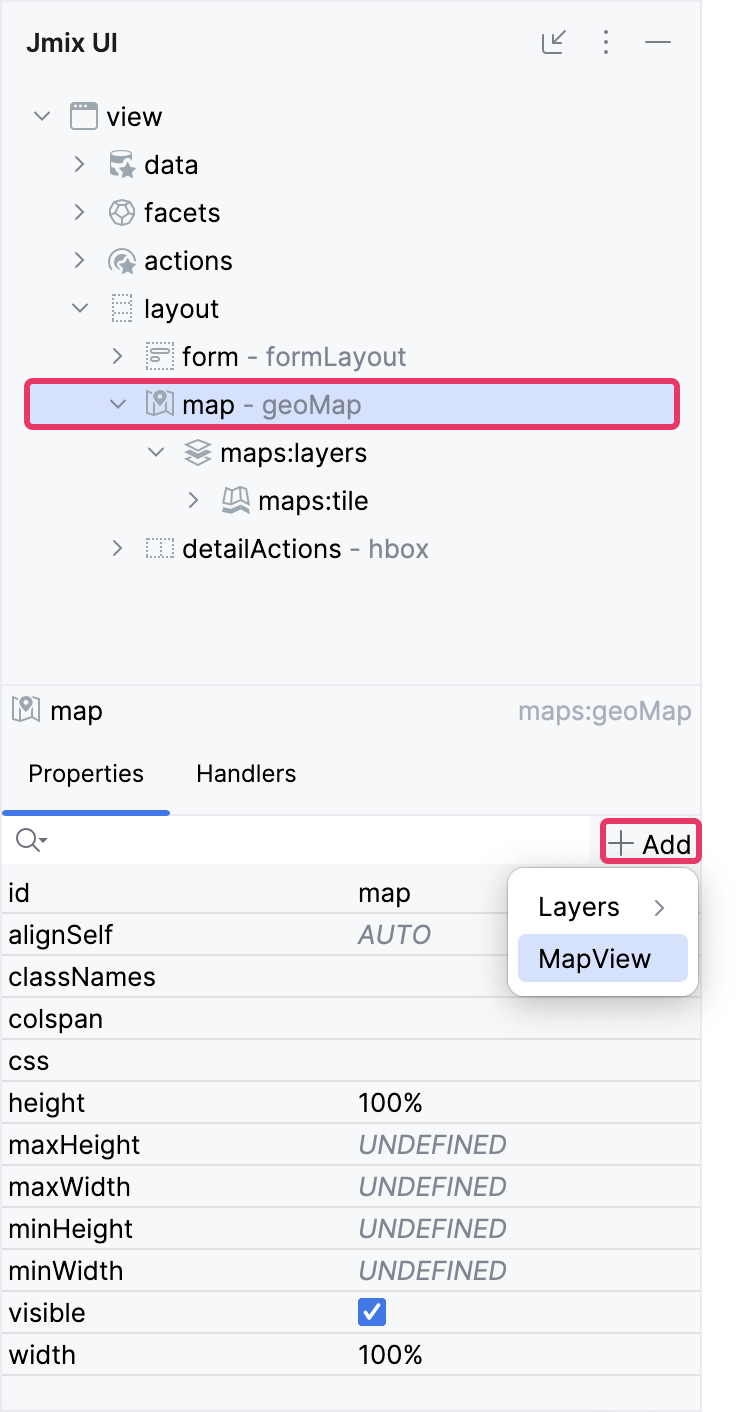
<maps:mapView centerX="10.872461786203276"
              centerY="48.36928140366503"
              zoom="4.0"/>
Вы можете указать дополнительные параметры:
-
centerXопределяет широту начального географического центра карты. Передается в объектorg.locationtech.jts.geom.Coordinate. -
centerYопределяет долготу начального географического центра карты. Передается в объектorg.locationtech.jts.geom.Coordinate. -
maxZoom- устанавливает максимальный уровень масштабирования для отображения. -
minZoom- устанавливает минимальный уровень масштабирования для отображения. -
projectionопределяет систему координат (CRS), используемую для отображения географических данных на карте. Она преобразует трехмерные координаты Земли в двухмерную плоскость. Распространенные проекции включаютEPSG:3857(Web Mercator) иEPSG:4326(WGS 84). Проекция по умолчанию - EPSG:3857. Вы можете задать пользовательскую проекцию:Настройка пользовательской проекции
Выполните следующие шаги для настройки пользовательской проекции:
-
Определите бин проекции. Зарегистрируйте проекцию в вашей Spring-конфигурации, используя формат PROJ.4:
@Bean public ProjectionRegistration projectionRegistration21781() { return new GeoMapProjectionRegistration("EPSG:21781", "+proj=somerc +lat_0=46.9524055555556 " + "+lon_0=7.43958333333333 " + "+k_0=1 +x_0=600000 +y_0=200000 +ellps=bessel " + "+towgs84=674.374,15.056,405.346,0,0,0,0 +units=m " + "+no_defs +type=crs"); } -
Настройте компонент карты. Укажите атрибут
projectionдляmapViewв вашем XML-дескрипторе:<maps:geoMap id="geoMap" width="100%" height="100%"> <maps:mapView projection="EPSG:21781" centerX="10.872461786203276" centerY="48.36928140366503" zoom="4.0"> </maps:mapView> <maps:layers> <maps:tile> <maps:osmSource/> </maps:tile> </maps:layers> </maps:geoMap> -
Инициализируйте в контроллере. Примените проекцию программно ко всем компонентам карты на странице:
@ViewComponent
private GeoMap geoMap;

@Subscribe
public void onInit(final InitEvent event) {
    geoMap.setProjection(() -> "EPSG:21781");
}
Проекция применяется ко всем компонентам карты на странице. После установки все операции с координатами используют единицы измерения проекции (метры, градусы и т.д.).
-
-
rotation- устанавливает поворот для отображения в радианах (положительный поворот по часовой стрелке, 0 означает Север). Подробнее смотрите setRotation. -
zoomопределяет конкретный уровень масштабирования. Уровень масштабирования начинается с 0, представляя вид с максимальным отдалением, и постепенно увеличивается по мере приближения.
Экстент
Экстент (extent) задает географические границы отображения карты или конкретного слоя в терминах координат, определяя видимую область на карте.
Экстент обычно определяется минимальными (левый верхний угол) и максимальными (правый нижний угол) значениями координат в форме [minX, minY, maxX, maxY], представляя ограничивающую рамку области.
Выберите слой или элемент mapView на панели структуры Jmix UI или в XML-дескрипторе экрана, а затем нажмите кнопку Add на панели инспектора. В выпадающем списке выберите Extent и настройте атрибуты minX, minY, maxX и maxY, как указано ниже.
<maps:mapView centerY="51.0"
              centerX="40.0"
              zoom="4.0">
    <maps:extent minX="-15.0"
                 minY="30.0"
                 maxX="40.0"
                 maxY="60.0"/>
</maps:mapView>