Настройка OAuth для Google и Microsoft
Приложение Jmix может использовать авторизацию на основе токена OAuth 2.0 для работы с провайдерами почтовых сервисов. Этот метод предлагает повышенную безопасность по сравнению с базовой аутентификацией с помощью логина и пароля. Многие провайдеры постепенно отказываются от поддержки базовой аутентификации, оставляя OAuth единственным жизнеспособным типом аутентификации.
В этом разделе описывается процесс получения учетных данных OAuth для Google и Microsoft, а также шаги настройки для приложения Jmix.
Чтобы включить OAuth для Google, зарегистрируйте свое OAuth-приложение и сгенерируйте учетные данные. Затем настройте свое приложение Jmix, используя полученные учетные данные.
| Следующие инструкции основаны на документации Google Developer для настройки OAuth для веб-приложений. Пожалуйста, проверьте эту ссылку для получения самой актуальной информации о процедурах и особенностях конкретных случаев использования. |
Создание проекта
-
Войдите в консоль Google Cloud.
-
В верхней панели нажмите Select a project.
-
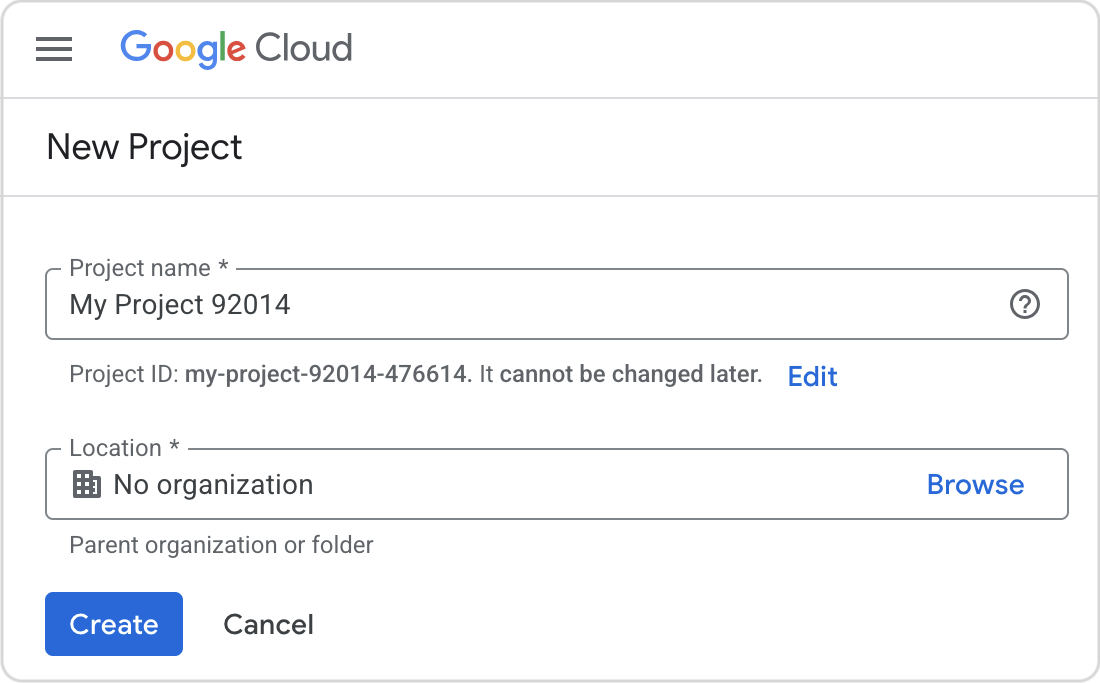
Нажмите New project и введите информацию о вашем проекте.
-
Нажмите Create.
Создание OAuth 2.0 приложения
-
Выберите проект, созданный ранее.
-
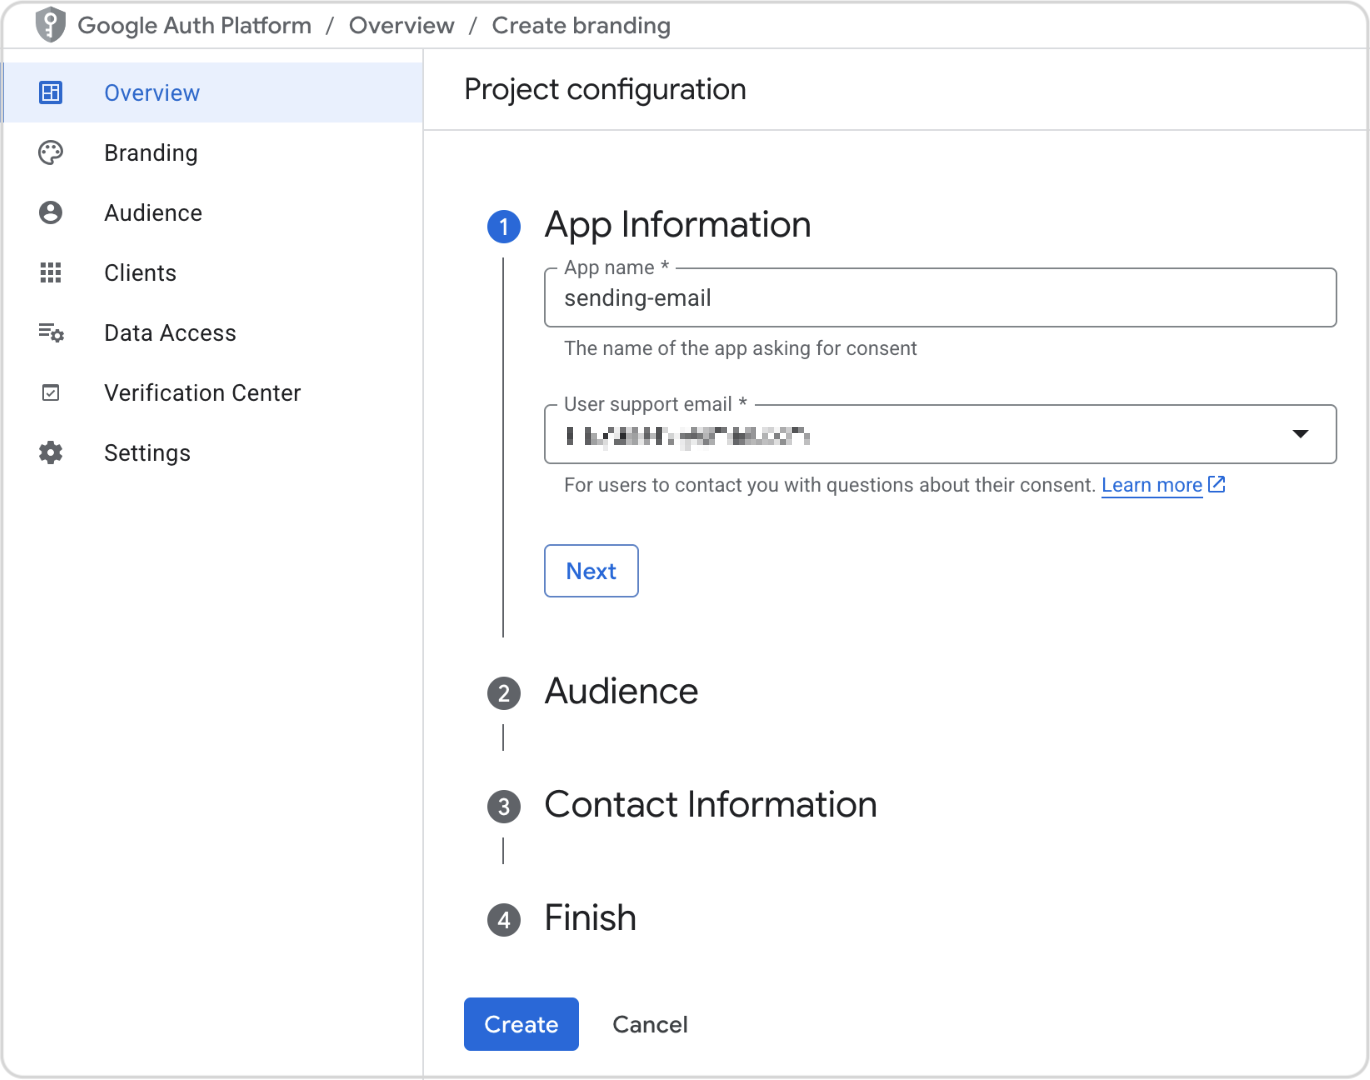
Нажмите кнопку меню в верхнем левом углу и выберите APIs & Services → OAuth consent screen.
-
Нажмите Get Started.
-
Заполните форму:
-
Нажмите Create
Включение API для вашего проекта
Для отправки писем вашему приложению необходим Gmail API:
-
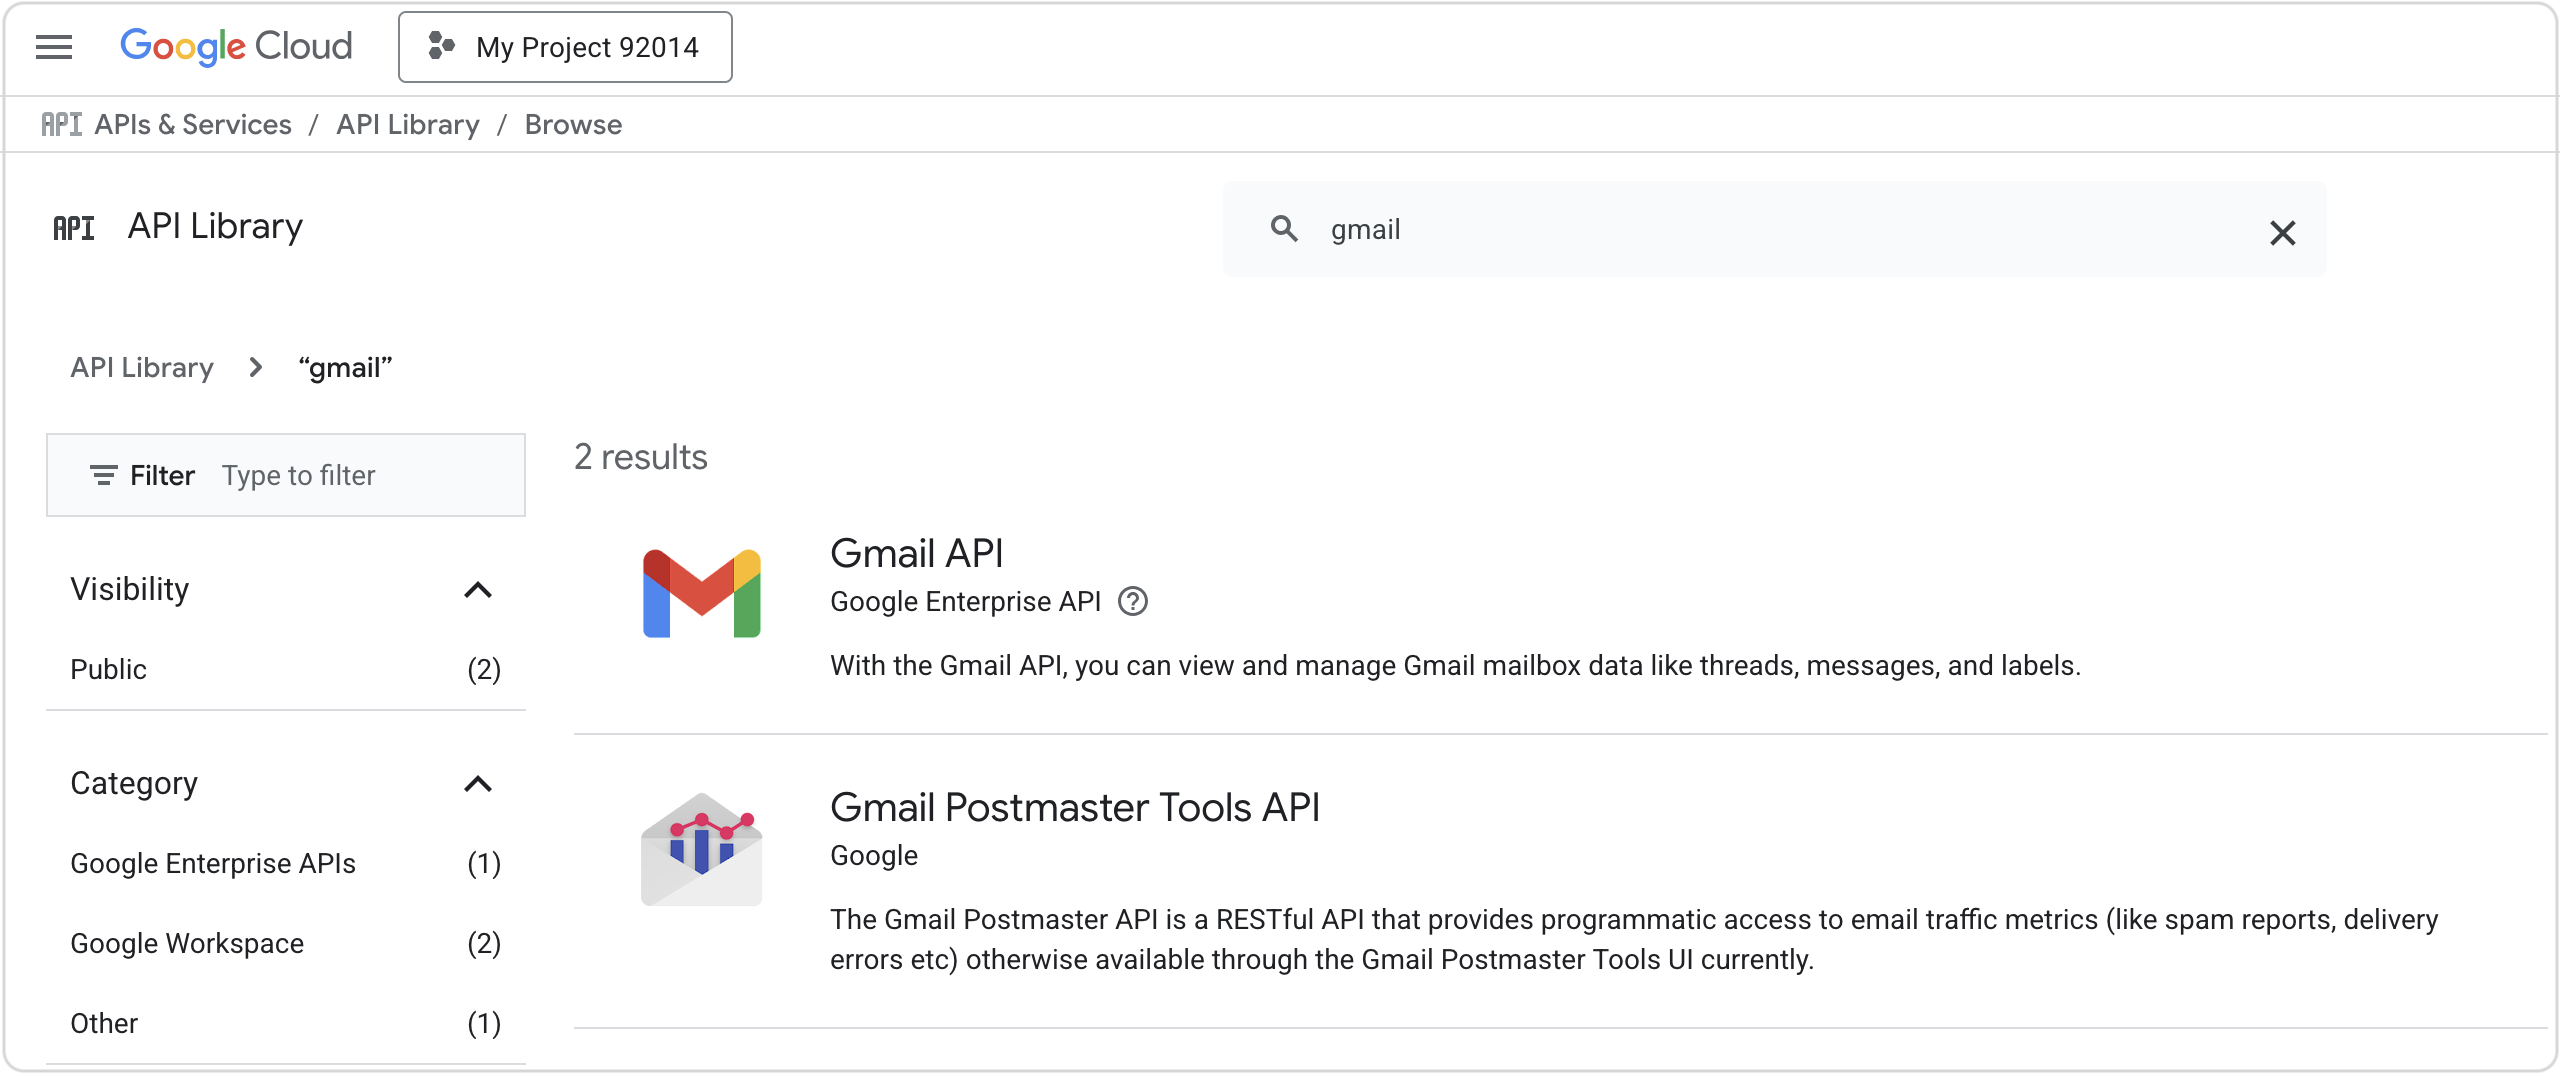
Откройте Библиотеку API. При появлении запроса выберите свой проект.
-
Найдите Gmail API и включите его.
Создание учетных данных для авторизации
Для доступа к API ваше приложение должно иметь учетные данные авторизации:
-
Перейдите на страницу клиентов.
-
При появлении запроса выберите свой проект.
-
Нажмите Create client.
-
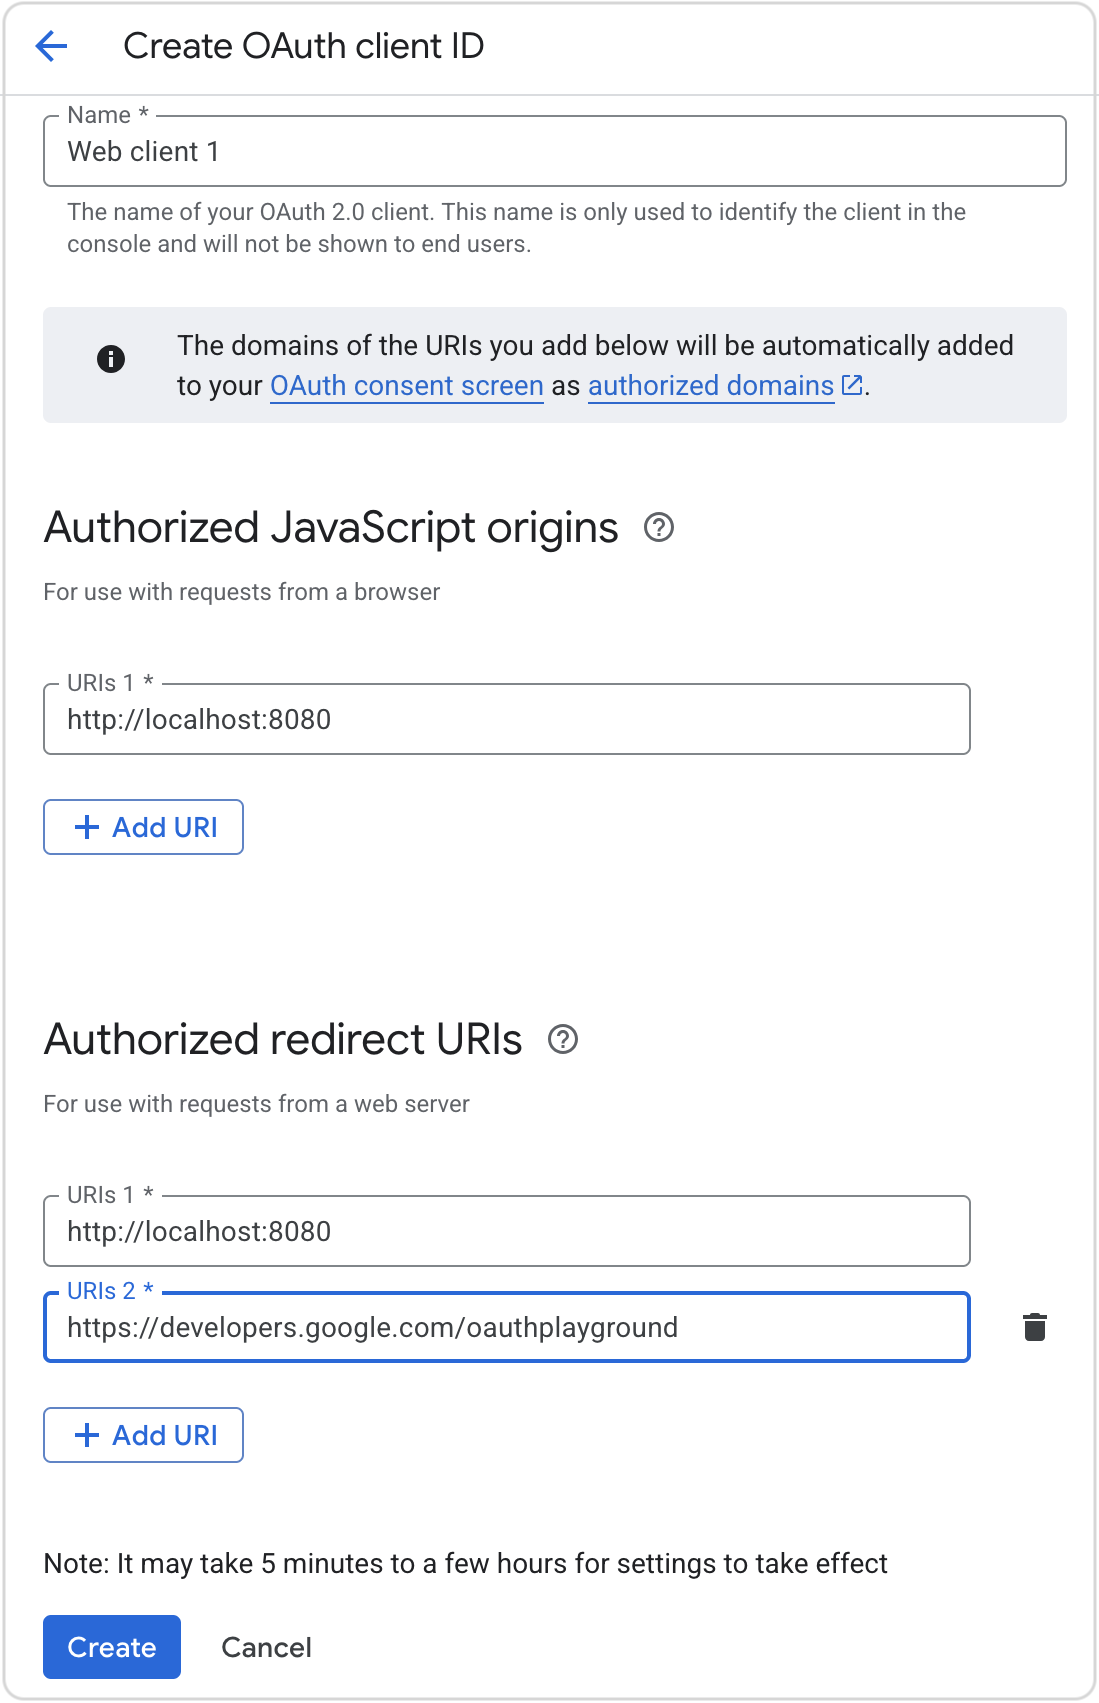
Выберите тип приложения Web application.
-
Заполните форму:
-
Name: (Укажите любое описательное имя)
-
Authorized JavaScript origins: http://localhost:8080 (Используйте адрес вашего приложения Jmix. Источники (origins) определяют домены, с которых ваше приложение может отправлять запросы на сервер OAuth 2.0)
-
Authorized redirect URIs:
-
http://localhost:8080 (Используйте адрес вашего приложения Jmix)
-
https://developers.google.com/oauthplayground (Добавьте этот URI для доступа к Google Developers OAuth2 playground, чтобы получить токен на следующем шаге)
-
-
-
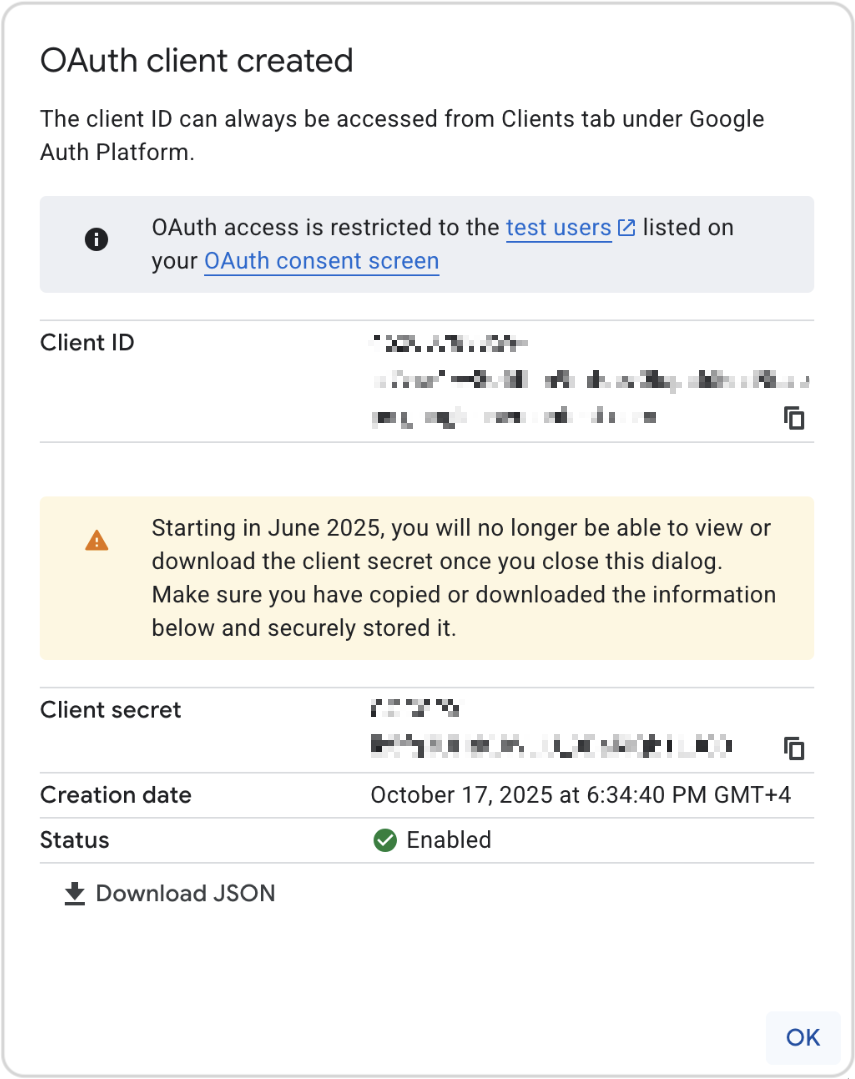
Нажмите Create.
-
Скопируйте или скачайте Client ID и Client secret и сохраните их в безопасном месте. Эта информация понадобится вам позже.
Получение токена обновления (Refresh Token)
Токен будет получен через Authorization Code flow с использованием Google Developers OAuth2 playground.
| Вы можете использовать другие подходы для прохождения Authorization Code flow, такие как Postman, oauthdebugger или ручные запросы. |
-
Перейдите на Google Developers OAuth2 Playground.
-
Откройте конфигурацию OAuth 2.0 (значок шестеренки).
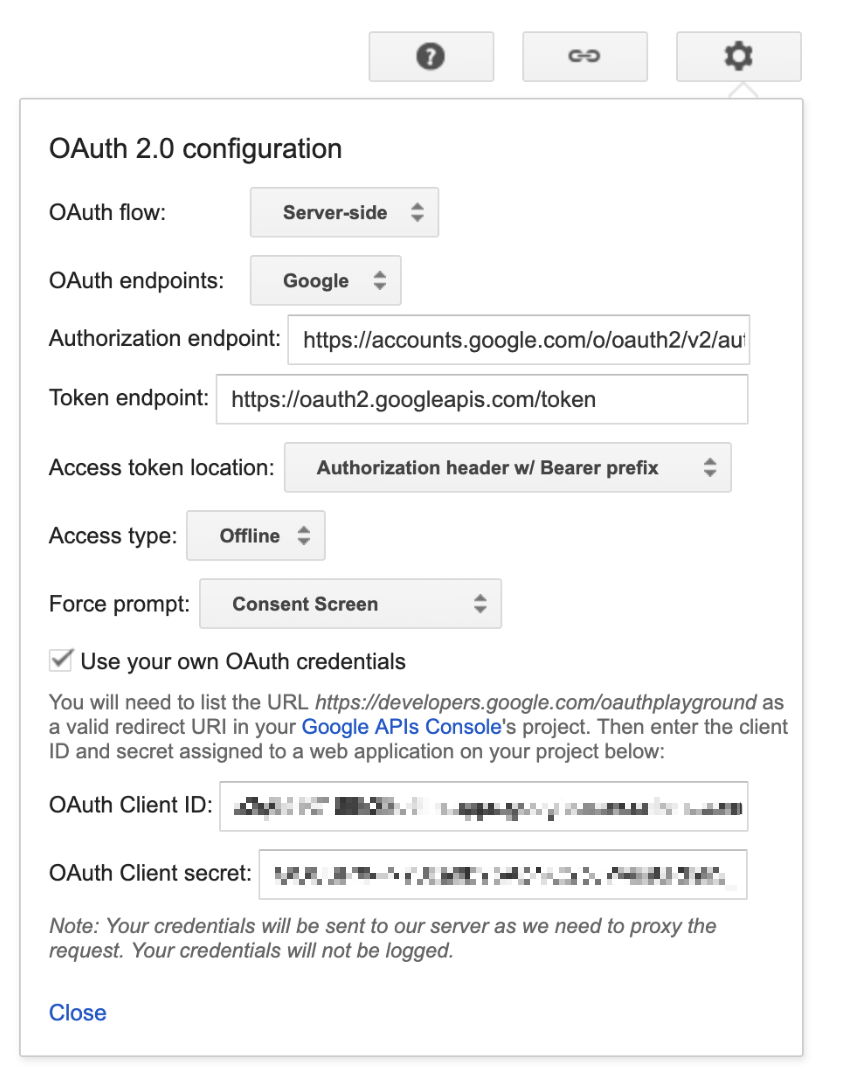
-
Установите флажок Use your own OAuth credentials.
-
Введите ваш Client ID и Client Secret.
-
-
В списке scopes слева выберите Gmail API → https://mail.google.com/
-
Нажмите Authorize APIs и пройдите экраны согласия.
-
Теперь у вас есть Authorization code. Нажмите Exchange authorization code for tokens.

-
Скопируйте Refresh token.
Настройка свойств приложения
Используйте учетные данные для настройки файла application.properties вашего приложения Jmix:
spring.mail.host=smtp.gmail.com
spring.mail.port=587
spring.mail.protocol=smtp
spring.mail.username=<account_name>
spring.mail.properties.mail.smtp.auth=true
spring.mail.properties.mail.smtp.starttls.enable=true
spring.mail.properties.mail.smtp.ssl.trust=smtp.gmail.com
spring.mail.properties.mail.smtp.auth.mechanisms=XOAUTH2
spring.mail.properties.mail.smtp.sasl.enable=true
spring.mail.properties.mail.smtp.sasl.mechanisms=XOAUTH2
spring.mail.properties.mail.smtp.auth.login.disable=true
spring.mail.properties.mail.smtp.auth.xoauth2.disable=false

jmix.email.oauth2.enabled=true
jmix.email.oauth2.provider=google
jmix.email.oauth2.client-id=<client_id>
jmix.email.oauth2.secret=<client_secret>
jmix.email.oauth2.refresh-token=<refresh_token>
Где <account_name> - это адрес электронной почты, используемый для конфигурации. А <client_id>, <client_secret>, <refresh_token> - значения, полученные в процессе настройки.
| Альтернативно, вы можете предоставить или изменить значение токена обновления во время выполнения через экран Email → OAuth2 token. |
Microsoft
Чтобы включить OAuth для Microsoft, зарегистрируйте свое OAuth-приложение и сгенерируйте учетные данные. Затем настройте приложение Jmix, используя полученные учетные данные.
| Следующие инструкции основаны на документации Microsoft Entra. Пожалуйста, проверьте эту ссылку для получения самой актуальной информации о процедурах и особенностях конкретных случаев использования. |
Регистрация приложения
-
Войдите на портал Microsoft Azure.
-
Если у вас несколько арендаторов Azure Active Directory, переключитесь на нужный.
-
Перейдите в App registrations.
-
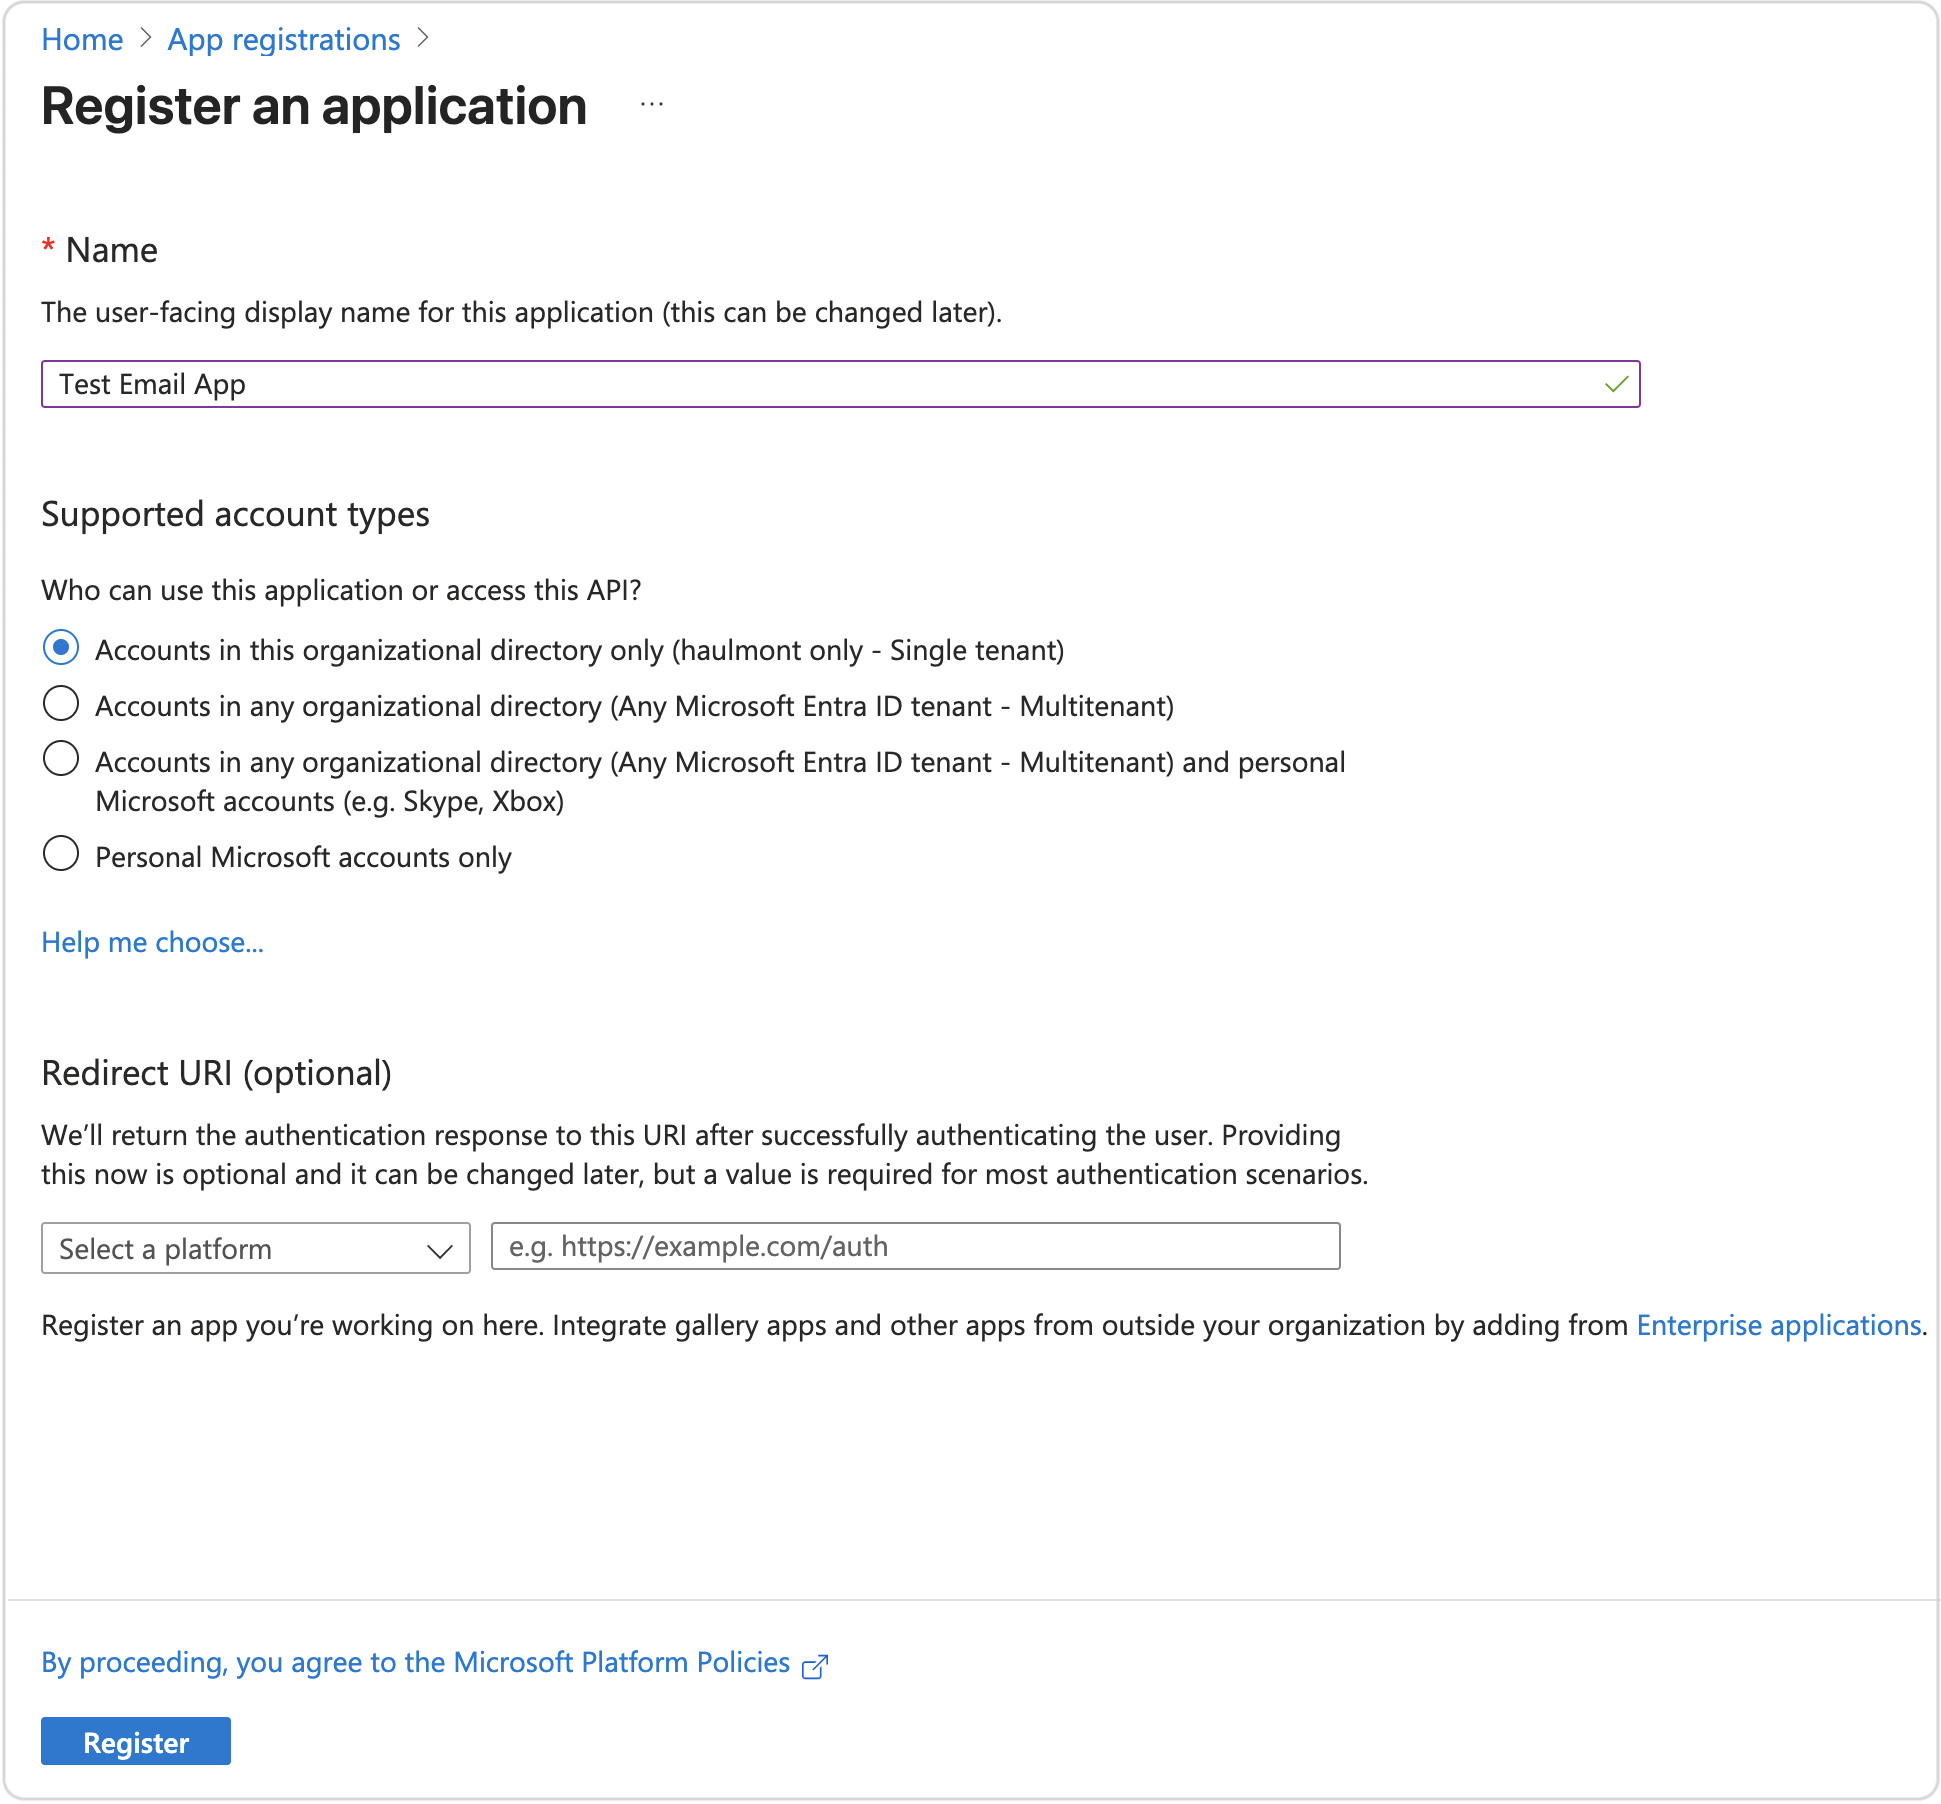
Нажмите New Registration и предоставьте следующую информацию:
-
Введите имя для вашего приложения.
-
В разделе Supported account types выберите вариант, применимый к вашему бизнес-сценарию.
-
В разделе Redirect URI выберите Web в выпадающем списке Select a platform и установите http://localhost:8080 (адрес вашего приложения Jmix) в качестве URI перенаправления.
-
-
Нажмите Register.
Ваше приложение теперь доступно в разделе Home → App Registrations. Внутри приложения вы можете просмотреть значения Application (client) ID и Directory (tenant) ID.
Генерация клиентского секрета (Client Secret)
-
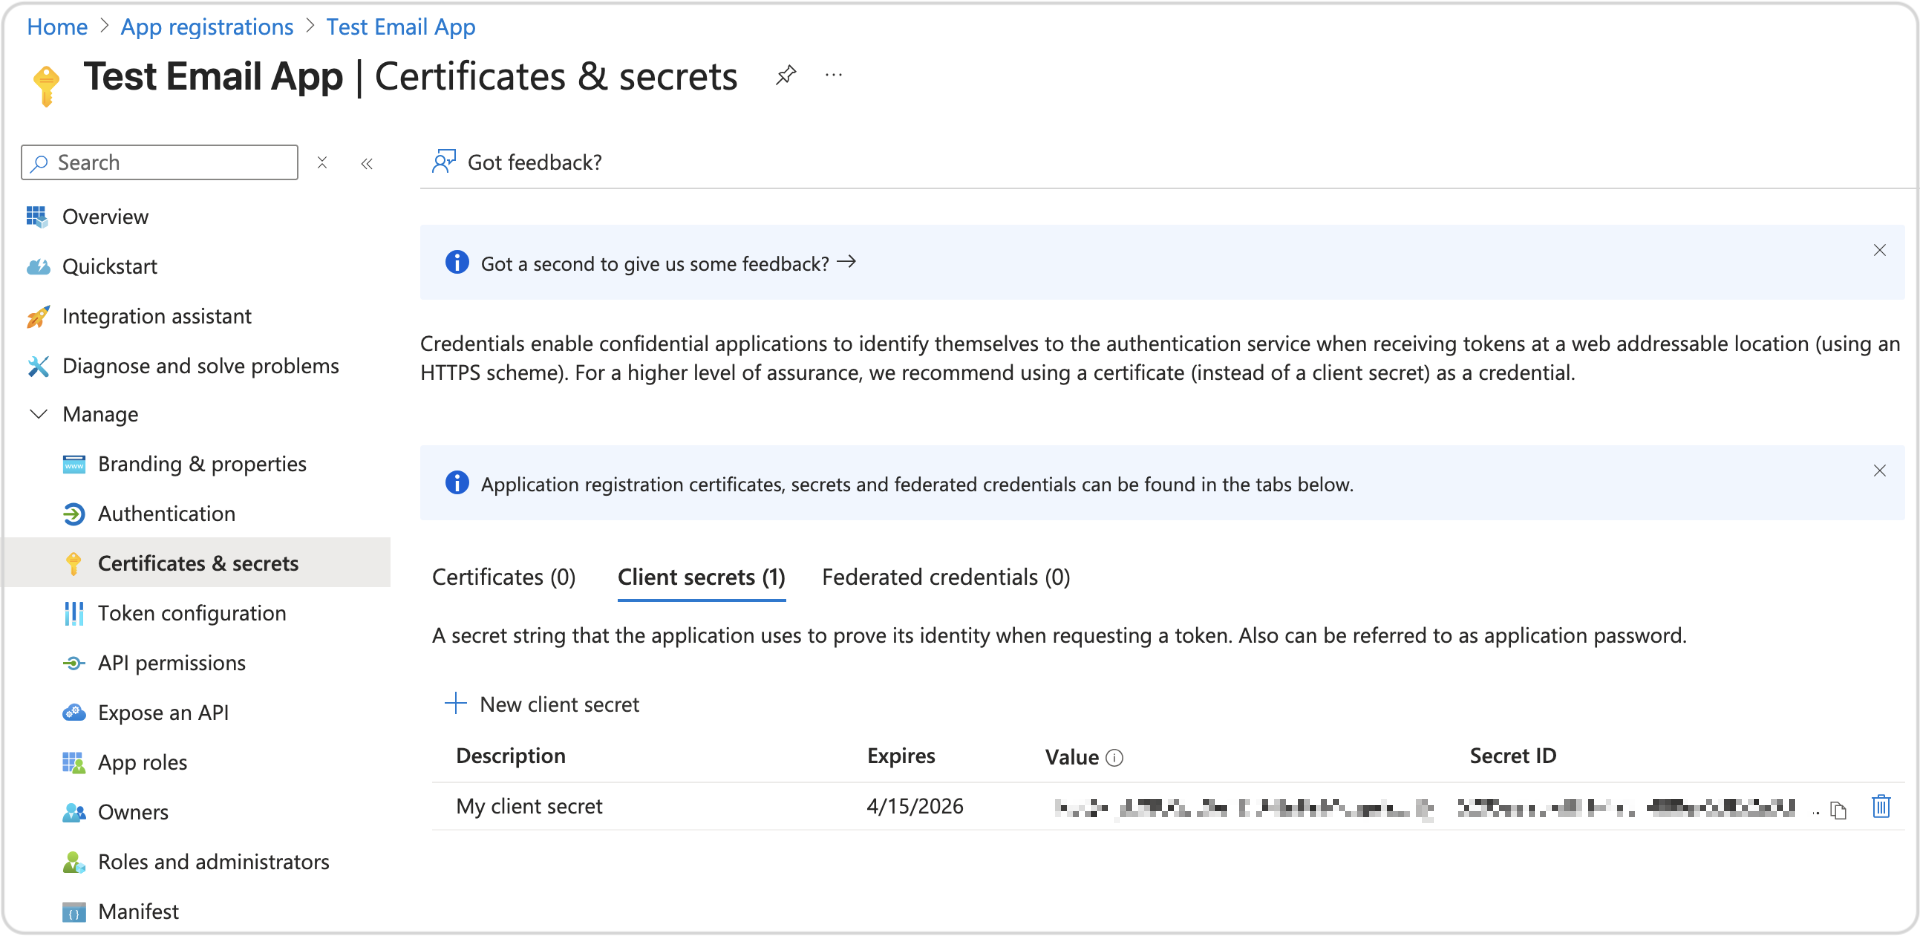
Откройте ваше приложение и перейдите в Certificates & Secrets.
-
Нажмите New Client Secret.
-
Введите описание и срок действия.
-
Нажмите Add , затем скопируйте ключ Value. Это клиентский секрет OAuth 2.0.
Настройка разрешений API
Для отправки писем вашему приложению необходимы определенные разрешения:
-
Откройте ваше приложение и перейдите в API permissions.
-
Добавьте разрешение
SMTP.Send.
Получение токена обновления (Refresh Token)
Токен будет получен через Authorization Code flow с использованием браузера и CLI.
| Вы можете использовать другие подходы для прохождения Authorization Code flow, такие как Postman, oauthdebugger или ручные запросы. Описанный ниже процесс использует браузер и CLI. |
-
Перейдите по следующему URL:
// Разрывы строк добавлены для удобочитаемости

https://login.microsoftonline.com/<tenant_id>/oauth2/v2.0/authorize?
client_id=<client_id>
&response_type=code
&redirect_uri=http://localhost:8080
&response_mode=query
&scope=offline_access%20https://outlook.office.com/SMTP.Send
Это может потребовать согласия администратора для получения доступа к запрошенным разрешениям API. После того как пользователь пройдет аутентификацию и предоставит согласие, платформа Microsoft identity возвращает ответ. Этот пример показывает успешный ответ:
http://localhost:8080/?
code=AwABAAAAvPM1KaPlrEqdFSBzjqfTGBCmLdgfSTLEMPGYuNHSUYBrq...
&session_state=12345
-
Сохраните значение параметра
codeиз ответа. -
Обменяйте код на токен:
 curl -X POST https://login.microsoftonline.com/<tenant_id>/oauth2/v2.0/token \
-H "Content-Type: application/x-www-form-urlencoded" \
-d "grant_type=authorization_code" \
-d "client_id=<client_id>" \
-d "client_secret=<client_secret>" \
-d "code=<code_value>" \
-d "redirect_uri=http://localhost:8080" \
-d "scope=offline_access https://outlook.office.com/SMTP.Send email openid"
-
Успешный ответ содержит значение
refresh_tokenvalue. Скопируйте его значение для будущего использования.
Настройка свойств приложения
Используйте учетные данные для настройки файла application.properties вашего приложения Jmix:
spring.mail.host=smtp.office365.com
spring.mail.port=587
spring.mail.protocol=smtp
spring.mail.username=<account_name>
spring.mail.properties.mail.smtp.auth=true
spring.mail.properties.mail.smtp.starttls.enable=true
spring.mail.properties.mail.smtp.ssl.trust=smtp.office365.com
spring.mail.properties.mail.smtp.auth.mechanisms=XOAUTH2
spring.mail.properties.mail.smtp.sasl.enable=true
spring.mail.properties.mail.smtp.sasl.mechanisms=XOAUTH2
spring.mail.properties.mail.smtp.auth.login.disable=true
spring.mail.properties.mail.smtp.auth.xoauth2.disable=false

jmix.email.oauth2.enabled=true
jmix.email.oauth2.provider=microsoft
jmix.email.oauth2.client-id=<client_id>
jmix.email.oauth2.secret=<client_secret>
jmix.email.oauth2.tenant-id=<tenant_id>
jmix.email.oauth2.refresh-token=<refresh_token>
Где <account_name> - это адрес электронной почты, используемый для конфигурации. А <client_id>, <client_secret>, <refresh_token>, <tenant_id> - значения, полученные в процессе настройки.
| Альтернативно, вы можете предоставить или изменить значение токена обновления во время выполнения через экран Email → OAuth2 token. |