Getting Started with Maps
This guide shows how to start using maps in your application.
Let’s consider that we have Order entity and want to:
-
Add a new order and point its location on the map.
-
Watch all orders on the map.
-
Know the product of creating order by pointing the cursor on the order.
Creating Entity and Screens
-
Create
Orderentity containing the following fields:-
datewithDatetype. -
productwithStringtype. -
amountwithIntegertype.
-
-
Create
OrderBrowseandOrderEditscreens.
Adding Maps on Screens
To display a map on the screen, you need to add geoMap UI component in the XML descriptor.
First, declare the maps namespace in the root element of the order-edit.xml descriptor by adding xmlns:maps="http://jmix.io/schema/maps/ui" schema:
<window xmlns="http://jmix.io/schema/ui/window"
        xmlns:maps="http://jmix.io/schema/maps/ui"
        caption="msg://orderEdit.caption"
        focusComponent="form">
Next, declare the geoMap component:
<maps:geoMap id="map"
             height="400px"
             width="800px"
             centerX="-99.755859"
             centerY="39.164141"
             zoom="4">
</maps:geoMap>-
heightandwidthspecify the size of the map window. Can be set in pixels or per sents. -
centerXdefines longitude of the initial geographical center of the map. -
centerYdefines latitude of the initial geographical center of the map. -
zoomdefines the initial zoom level. The default value is 15.
Do the same in the order-browse.xml file.
Use hbox and vbox elements to set the map position on the screen. Here is an example of Order browser screen:
Adding Raster Layer
We will use a raster layer as a base background layer of a map. Let’s use OpenStreetMap tile provider which comes out of the box, so you can use it like this:
<maps:geoMap id="map" height="400px" width="600px" centerX="-99.755859" centerY="39.164141" zoom="4">
<maps:layers>
<maps:tile id="tiles" tileProvider="map_OpenStreetMap"/>
</maps:layers>
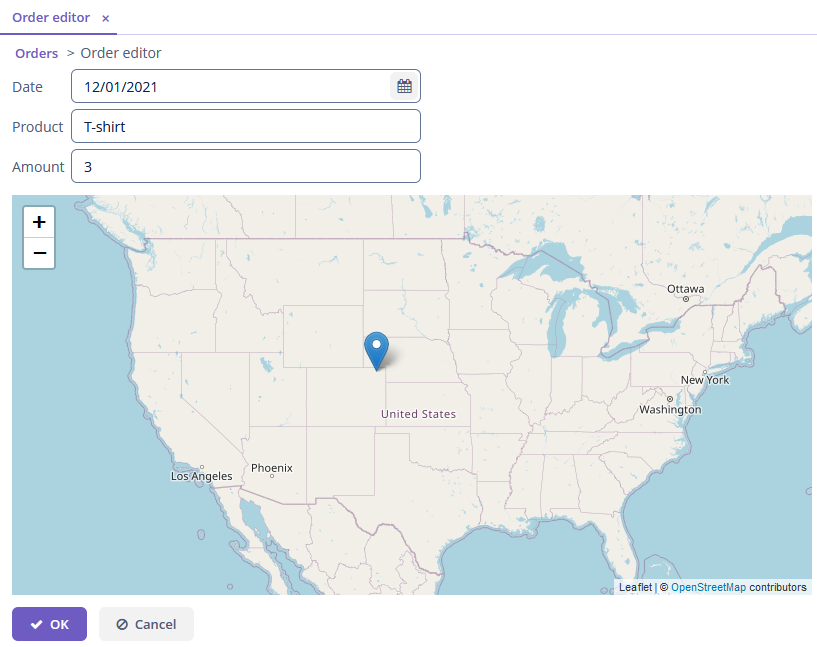
</maps:geoMap>Add the code above in the edit and browse screens. Here is how the Order Edit screen looks:
Creating Geo-Object
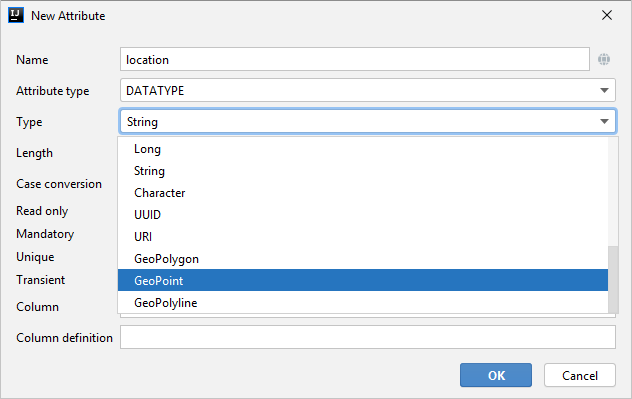
To make a geo-object from the entity, add an attribute to it with one of geo-specific datatypes. We want to place orders on the map, so let’s add the attribute of GeoPoint datatype.
Open entity designer and create a new attribute location. Select GeoPoint datatype from the list.
When you added the attribute, open the code of the entity, and add the @Geometry annotation.
@JmixEntity
public class Order {
    //...
    @Geometry
    @PropertyDatatype("geoPoint")
    @Column(name = "LOCATION")
    @JmixProperty
    private Point location;
    //...
}
Adding Vector Layers
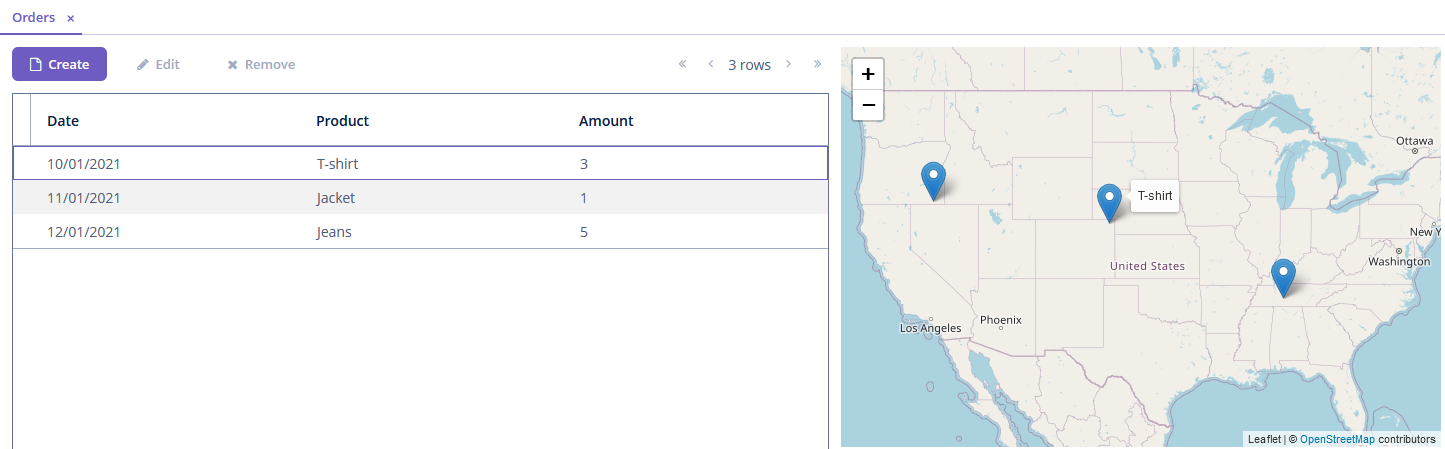
To display geo-objects on the map, you need to add a vector layer.
Lets’s start with Order Browser screen, declare a vector layer in the XML descriptor and pass a dataContainer to the layer:
<maps:geoMap id="map" height="400px" width="600px" centerX="-99.755859" centerY="39.164141" zoom="4">
    <maps:layers>
        <maps:tile id="tiles" tileProvider="map_OpenStreetMap"/>
        <maps:vector id="orderLayer" dataContainer="ordersDc"/>
    </maps:layers>
</maps:geoMap>
Then, add the following code under the layers tag into Order Edit XML descriptor.
<maps:layers selectedLayer="orderLayer"> (1)
    <maps:tile id="tileLayer" tileProvider="map_OpenStreetMap"/>
    <maps:vector id="orderLayer"
                 dataContainer="orderDc"
                 editable="true"/> (2)
</maps:layers>| 1 | The layer should be selected on the map so that it can fires events, reacts on user clicks and can be modified by UI interaction. |
| 2 | The layer is editable, so you can modify the geometry of geo-objects. |
Adding Tooltip
To display a product next to orders on the map on mouseover, we will use the tooltipContentProvider.
Let’s perform it declaratively using the @Install annotation in the screen controller:
@Install(to = "map.orderLayer", subject = "tooltipContentProvider")
private String mapOrderLayerTooltipContentProvider(Order order) {
    return order.getProduct();
}